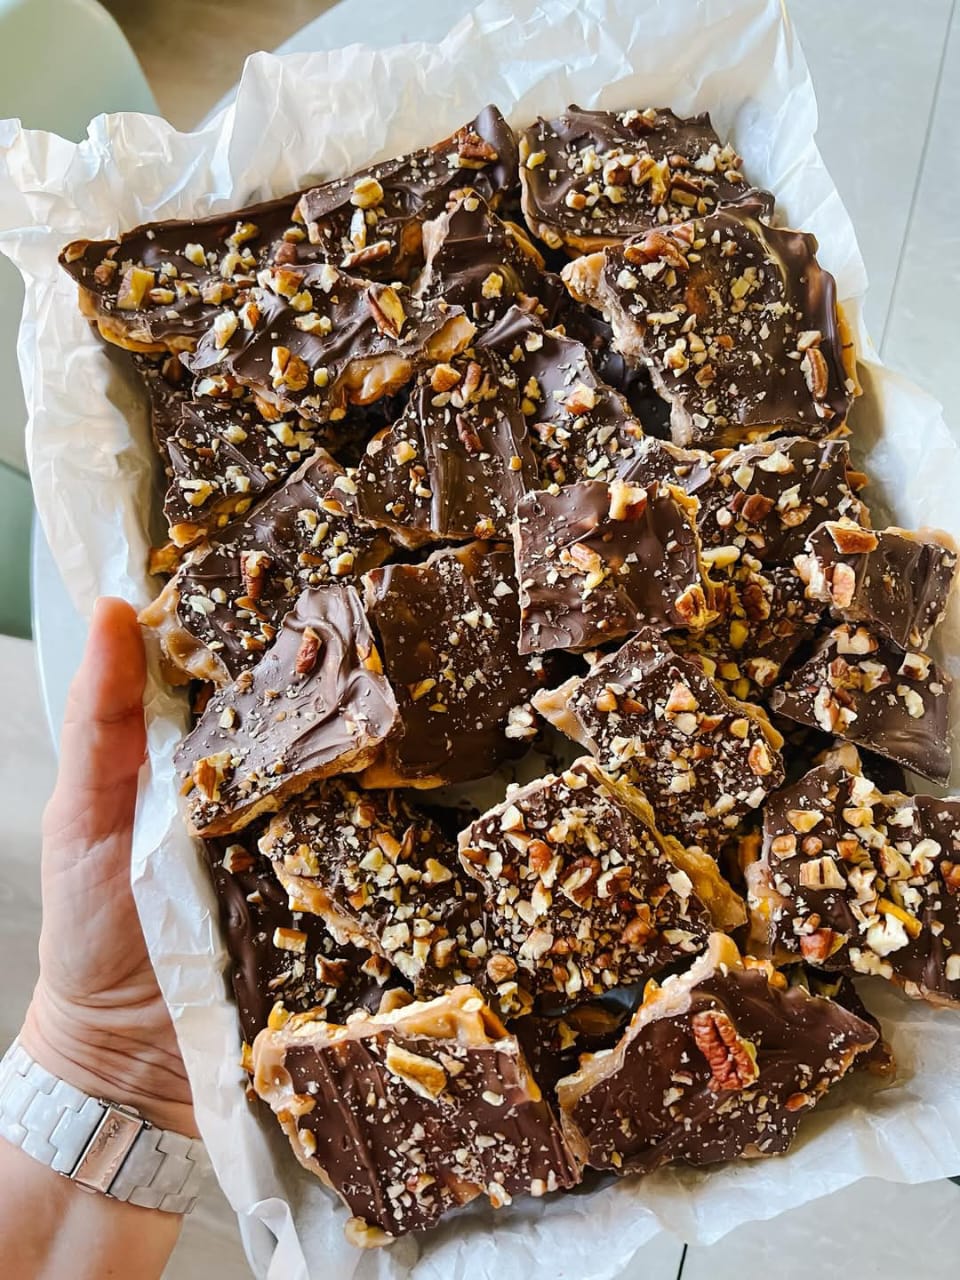
There are holiday treats, and then there is Christmas Crack—the deliriously addictive, sweet-and-salty toffee bark that has earned its cheeky name by being absolutely impossible to stop eating. A single sheet pan of this stuff can reduce a room full of polite cookie-tray nibblers into shameless, crumb-dusted grazers who hover around the kitchen until every last shard is gone. And the magic? It starts with a humble sleeve of saltine crackers. Layered in a neat grid, drowned in a bubbling mixture of butter and brown sugar, baked until the toffee transforms into a glossy, amber sheet, then crowned with melted chocolate and a sprinkle of flaky sea salt—this is the no-fuss, no-thermometer, no-corn-syrup candy that tastes like a million bucks and takes barely 15 minutes of active time. Whether you call it Christmas Crack, Saltine Toffee, or Reindeer Bark, this is the recipe that will become your most-requested holiday contribution, the treat that friends and family start asking about before Thanksgiving is even over. It’s the perfect edible gift, a crowning glory on a cookie platter, and the late-night snack you’ll sneak from the fridge long after the decorations are packed away.
The genius of Christmas Crack lies in its simplicity and its ability to transform the most basic pantry staples into something that tastes like a high-end confection. Saltine crackers provide a crisp, salty base that perfectly balances the intensely sweet, buttery toffee layer that seeps into every nook and cranny as it bakes. The toffee itself is nothing more than butter and brown sugar boiled together until thick and bubbly, then poured over the crackers and baked until it deepens into a rich caramel. Once out of the oven, a generous layer of chocolate chips is scattered over the hot toffee, where it melts into a glossy, spreadable blanket. A final flourish of flaky sea salt, chopped nuts, or festive sprinkles turns it into a masterpiece. The result is a thin, snappy bark with layers of crisp cracker, chewy toffee, and smooth chocolate that shatters with every bite. It’s salty, sweet, crunchy, and utterly, dangerously irresistible. Best of all, it requires no candy thermometer, no tricky sugar work, and no special equipment—just a baking sheet, a saucepan, and a willingness to share (or not).
In this comprehensive guide, we’ll walk through every step of making the perfect batch of Christmas Crack toffee: the secrets to a non-grainy, snappy toffee layer, the best chocolate to use, creative topping ideas that go beyond the classic, and all the tips for gifting, storing, and even freezing this holiday staple. Whether you’re a seasoned candy maker or a first-timer looking for an easy win, this recipe is foolproof, endlessly customizable, and guaranteed to become a cherished part of your holiday tradition. Let’s preheat the oven and get cracking.
Why You’ll Love This Christmas Crack Toffee
Insanely addictive sweet-and-salty flavor. The combination of buttery toffee, rich chocolate, and a crisp, salty cracker base is a sensory trifecta that’s nearly impossible to resist. The saltines add an unexpected savory note that perfectly balances the intense sweetness, creating that “just one more piece” effect that gives this candy its infamous name. The flaky sea salt on top amplifies everything, cutting through the richness and making each bite more complex and crave-worthy than the last.
Shockingly easy with no candy thermometer required. Many toffee recipes are finicky, demanding precise temperatures and constant vigilance. This version is the opposite. You simply boil butter and brown sugar for a few minutes, pour it over crackers, and bake. That’s it. The oven does the tricky work of caramelizing the sugar, so there’s no stress about soft-ball stages or crystallized sugar. It’s the most beginner-friendly candy you’ll ever make, and it tastes like the work of a professional chocolatier.
Ready in under 30 minutes. From lining the pan to pulling the finished bark from the fridge, the entire process takes less than half an hour of active time. The toffee layer bakes in just 5 minutes, the chocolate melts onto the hot surface almost instantly, and after a brief chill to set the chocolate, you’re breaking it into glorious, uneven shards. It’s the ultimate last-minute holiday dessert or hostess gift—you can whip up a batch while dinner is in the oven.
Endlessly customizable and perfect for gifting. The classic version uses semi-sweet chocolate chips and a sprinkle of sea salt, but the variations are endless. Use milk chocolate, dark chocolate, or white chocolate. Top with chopped toasted pecans, almonds, crushed candy canes, holiday sprinkles, or a drizzle of caramel. Package it in festive tins, cellophane bags tied with ribbon, or cute boxes for a homemade gift that everyone will be thrilled to receive. It’s also a wonderful addition to a holiday cookie exchange, where its salty-sweet crunch stands out among the sugar cookies and gingerbread.
Ingredient Deep Dive: The Simple, Addictive Cast
The beauty of this recipe is its minimal ingredient list. Each component plays a critical role in creating that perfect crunchy, chewy, salty, sweet bark. Let’s break them down.
Saltine Crackers – The Salty, Crispy Base
You’ll need about 40 saltine crackers, enough to line a standard 10×15-inch jelly roll pan in a single layer. Saltines are the classic choice for a reason: they’re thin, crisp, and have the perfect amount of salt to contrast the sweet toffee. Their perforations allow the toffee to seep in slightly, marrying the layers. You can also use Ritz crackers for a buttery, richer base, or graham crackers for a sweeter, s’mores-like variation. Matzo crackers are a popular alternative for a Passover-friendly version. Whatever you choose, arrange them in a neat grid, touching slightly but not overlapping heavily, to create a solid foundation. Do not use unsalted crackers—the salt is a crucial part of the flavor balance. If you’re using a different-sized pan, adjust the number of crackers accordingly to fill the pan.
Unsalted Butter – The Rich, Buttery Toffee Base
One cup (2 sticks) of unsalted butter forms the backbone of the toffee. Using unsalted butter allows you to control the salt level, since the crackers and optional flaky salt topping already contribute saltiness. The butter is melted with brown sugar and boiled for a few minutes to create a thick, caramel-like toffee. Real butter is essential—margarine or plant-based butters will not produce the same flavor or texture. The water content in butter is important; as it boils with the sugar, the water evaporates, concentrating the mixture and allowing the toffee to set into a firm, snappy layer. If you use salted butter, simply reduce or omit any additional salt. European-style butter with a higher fat content can make the toffee even richer, but standard American butter works perfectly.
Brown Sugar – The Caramelized Sweetness
One cup of packed light brown sugar provides the deep, molasses-like sweetness that defines toffee. The molasses in brown sugar adds a complex caramel flavor and helps the toffee achieve that gorgeous amber color. You can use dark brown sugar for an even more intense molasses flavor, which is wonderful, especially with dark chocolate. Granulated white sugar will not produce the same depth of flavor or the chewy texture—brown sugar is essential. When measuring, pack the sugar firmly into the measuring cup for an accurate amount. The sugar is combined with the butter and brought to a boil, then simmered until the mixture thickens. This simple cooking process caramelizes the sugar, creating a rich, buttery toffee that sets up firm but not tooth-breakingly hard—it has a slight chew to it that makes it uniquely addictive.
Chocolate Chips – The Smooth, Melty Topping
One and a half to two cups of semi-sweet chocolate chips are the classic choice. They’re scattered over the hot toffee as soon as it comes out of the oven, where the residual heat melts them into a glossy, spreadable layer. Semi-sweet chocolate provides a balanced sweetness that doesn’t overpower the toffee. You can use milk chocolate chips for a sweeter, creamier topping, dark chocolate (60–70% cacao) for a more sophisticated, less sweet bark, or white chocolate chips for a snowy, festive look. You can also use a combination—swirl milk and white chocolate, or use dark chocolate with a white chocolate drizzle. Chocolate baking bars, chopped into small pieces, melt even more smoothly than chips, so feel free to use your favorite high-quality chocolate. The key is to let the chocolate sit on the hot toffee for a few minutes to soften before spreading.
Flaky Sea Salt and Optional Toppings – The Finishing Touch
A generous sprinkle of flaky sea salt (like Maldon or fleur de sel) over the melted chocolate is the final, crucial step. The large, delicate crystals provide bursts of salinity that heighten the sweetness and the chocolate flavor, and they add a subtle crunch. Don’t use fine table salt—it’s too harsh and won’t give the same textural contrast. Beyond salt, the topping possibilities are endless. Chopped toasted pecans, almonds, or walnuts add a nutty crunch. Crushed candy canes or peppermint candies give a festive, minty twist. Holiday sprinkles in red, green, and white make it extra cheerful. A drizzle of caramel or melted white chocolate creates a beautiful pattern. Toasted coconut, dried cranberries, or even a sprinkle of espresso powder can be added for unique flavor profiles. You can divide the pan into sections and top each with something different for a sampler box. The toppings should be added while the chocolate is still soft so they adhere.
Step-by-Step: From Saltines to Sensational Bark
This recipe is wonderfully straightforward. Follow these detailed steps for perfect Christmas Crack every time.
Step 1: Preheat the Oven and Line the Pan
Preheat your oven to 400°F (200°C). Line a 10×15-inch jelly roll pan (or a similar rimmed baking sheet) with aluminum foil, making sure the foil extends up the sides. This is crucial for easy removal and cleanup—the toffee is extremely sticky. Lightly grease the foil with nonstick cooking spray or butter. Arrange the saltine crackers in a single layer over the foil, covering the entire surface. The crackers should be touching slightly but not overlapping significantly. Break a few to fill any gaps around the edges. Set the pan aside.
Step 2: Make the Toffee
In a medium saucepan over medium-high heat, combine the 1 cup of butter and 1 cup of packed brown sugar. Stir with a whisk or wooden spoon until the butter is melted and the mixture is combined. Bring the mixture to a rolling boil, then reduce the heat to medium to maintain a gentle, steady boil. Boil for exactly 3 minutes without stirring. Set a timer—this is important for the toffee to reach the right consistency. The mixture will bubble up, become thick, and turn a slightly lighter, opaque caramel color. Do not stir during this time; stirring can cause the sugar to crystallize and create a grainy toffee. Swirl the pan gently if needed to ensure even cooking. After 3 minutes, remove the pan from the heat and immediately pour the hot toffee mixture evenly over the saltine crackers, covering as many as you can. Use a spatula or the back of a spoon to gently spread the toffee to cover all the crackers. Work quickly, as the toffee will start to set as it cools.
Step 3: Bake the Toffee-Covered Crackers
Place the pan in the preheated oven and bake for 5 to 6 minutes. The toffee will be bubbling vigorously and will turn a deeper golden-amber color. The crackers will have absorbed some of the toffee. Keep an eye on it—if the toffee is browning too quickly or smelling burnt, remove it immediately. The edges may be slightly darker, which is fine. The brief bake allows the toffee to set and deeply penetrate the crackers. Remove the pan from the oven.
Step 4: Add the Chocolate
Immediately sprinkle the chocolate chips evenly over the hot toffee. Let them sit for 2 to 3 minutes to soften and melt from the residual heat. You’ll see the chips begin to lose their shape and turn glossy. Then, using an offset spatula or the back of a spoon, gently spread the melted chocolate into an even layer over the entire surface. The chocolate should cover the toffee completely. If some chips haven’t fully melted, the warmth of the pan will continue to melt them as you spread. Be gentle to avoid disturbing the toffee layer beneath. If you’re using multiple types of chocolate, you can dollop them on and swirl with a knife for a marbled effect.
Step 5: Add Toppings
While the chocolate is still soft and melty, sprinkle your chosen toppings over the surface. A generous dusting of flaky sea salt is the classic finishing touch. If using chopped nuts, candy cane pieces, or sprinkles, scatter them evenly now, pressing very lightly to adhere. If you want to add a drizzle (like caramel or melted white chocolate), wait until the chocolate layer has set slightly, then drizzle and let it set completely. The toppings should be added before the chocolate hardens so they stick.
Step 6: Chill to Set
Place the pan in the refrigerator and chill for at least 1 to 2 hours, until the chocolate is completely firm and the toffee has hardened. You can also leave it at room temperature to set, but the refrigerator speeds up the process and ensures the chocolate sets with a nice snap. The toffee will become firm and brittle as it cools. Once fully set, lift the entire bark out of the pan using the foil overhang. Peel the foil away from the bottom. Place the bark on a cutting board or clean surface and use your hands or a sharp knife to break it into irregular shards, chunks, or bite-sized pieces. The uneven, rustic shapes are part of the charm. Serve immediately, or package for gifting. Store any leftovers in an airtight container.
Pro Tips for the Perfect Toffee Every Time
- Boil the toffee for exactly 3 minutes without stirring. This timing has been tested and yields a toffee that is firm enough to snap but not so hard that it cracks a tooth. Under-boiling will leave you with a soft, grainy layer that doesn’t set properly. Over-boiling can make the toffee bitter and too hard. Set a timer and resist the urge to stir—stirring can introduce sugar crystals that will cause the toffee to become grainy. If you must, you can gently swirl the pan to ensure even cooking, but avoid stirring.
- Use a heavy-bottomed saucepan. A thin pan can cause hot spots that lead to uneven cooking or burning. A sturdy, heavy saucepan distributes heat evenly and gives you better control over the boil. The toffee mixture will be very hot, so handle the pan with care and keep children and pets away during this step. The mixture is essentially molten sugar and can cause serious burns—please be careful!
- Let the chocolate sit before spreading. The residual heat from the toffee is enough to melt the chips, but they need a couple of minutes to soften. If you start spreading immediately, the chips will just slide around. Patience here makes for a smoother, more even chocolate layer. If, for some reason, the chips aren’t melting sufficiently, you can place the pan back in the still-warm oven (turned off) for a minute or two, but usually the 2–3 minute rest is perfect.
- Line the pan with foil and grease it well. The toffee is incredibly sticky, and without a proper foil lining, you’ll be chiseling it out of the pan. Greasing the foil adds an extra layer of insurance. When you lift the foil out, the entire bark should release cleanly. Parchment paper can also work, but foil is sturdier for lifting. If using parchment, ensure it extends up the sides for easy removal. Do not skip this step.
- Customize with your favorite chocolate. Semi-sweet is classic, but you can create completely different flavor profiles by switching the chocolate. Dark chocolate with a sprinkle of sea salt is sophisticated; milk chocolate is great for kids; white chocolate with crushed peppermint is stunning for the holidays. You can even use butterscotch chips or peanut butter chips for a fun twist. If you’re using chocolate from a bar, chop it finely so it melts evenly. High-quality chocolate will have a smoother mouthfeel and richer taste.
Flavor Twists & Topping Ideas
The basic Christmas Crack recipe is a perfect launchpad for a world of delicious variations. Here are some fan-favorite twists.
- Peanut Butter Cup Crack: After spreading the chocolate layer, dollop small spoonfuls of creamy peanut butter over the warm chocolate and swirl with a knife for a marbled effect. Sprinkle with chopped Reese’s cups or salted peanuts. The combination of chocolate, peanut butter, and salty toffee is out of this world.
- Peppermint Bark Crack: Use dark or semi-sweet chocolate as the base, and sprinkle generously with crushed candy canes or starlight mints immediately after spreading. For an extra minty kick, add a few drops of peppermint extract to the toffee mixture just before pouring it over the crackers. This version is a holiday classic and looks incredibly festive.
- Nutty Praline Crack: Stir ½ cup of chopped toasted pecans or almonds into the toffee mixture just before pouring it over the crackers. Top with milk chocolate and another sprinkle of toasted nuts. The nuts add a wonderful crunch and a deep, nutty flavor that makes this taste like a pecan praline candy. A drizzle of caramel over the finished chocolate is a decadent addition.
- S’mores Crack: Use graham crackers instead of saltines for the base. After the toffee and chocolate, sprinkle with mini marshmallows and crushed graham cracker crumbs. You can also use a kitchen torch to lightly toast the marshmallows for that campfire flavor. This variation is a huge hit with kids and tastes like a gourmet s’more.
- Trail Mix Crack: After spreading the chocolate, sprinkle the top with a mixture of chopped dried cranberries, raisins, toasted coconut flakes, sunflower seeds, and chopped nuts. The combination of sweet, chewy, and crunchy textures makes each piece a little adventure. It’s also beautiful and colorful on a cookie tray.
- Dark Chocolate Espresso Crack: Use dark chocolate (70% cacao or higher) and sprinkle the top with a light dusting of instant espresso powder or finely ground coffee beans before it sets. The coffee enhances the chocolate flavor dramatically and adds a sophisticated, adult twist that’s perfect for an after-dinner treat with coffee.
Gifting, Packaging & Serving
Christmas Crack toffee is one of the best edible gifts you can make. Its long shelf life, sturdy texture, and incredible flavor make it ideal for shipping or handing out to friends, neighbors, teachers, and coworkers. Break the cooled bark into generous shards and arrange them in clear cellophane bags tied with a festive ribbon and a sprig of rosemary or a cinnamon stick. Layer the pieces in a decorative tin with parchment paper between layers to prevent sticking. For a cookie exchange, pile the shards on a platter with other holiday treats—it will be the first thing to disappear. Serve it on a dessert board with cheeses, nuts, and dried fruits for a sweet-savory grazing experience. A small piece goes a long way, so even a modest bag feels like a luxurious gift. Don’t forget to include a little note with the name of the treat and a warning about its addictive nature!
Storage, Freezing & Shelf Life
Storing: Once completely cooled and set, store the Christmas Crack in an airtight container at cool room temperature for up to 2 weeks. If your kitchen is warm, you may want to store it in the refrigerator to prevent the chocolate from becoming soft or the toffee from getting sticky. It will keep in the refrigerator for up to 3 weeks. Layer the pieces between sheets of parchment or wax paper to prevent them from sticking together. The bark does not need to be refrigerated if your home is cool, but refrigeration extends its shelf life and keeps the chocolate snappy.
Freezing: Christmas Crack freezes beautifully! Place the completely set bark pieces in a single layer inside a freezer-safe container, with parchment paper between the layers. Freeze for up to 3 months. The bark can be enjoyed directly from the freezer—it’s wonderfully crisp and the toffee has an extra snap—or you can let it sit at room temperature for about 10 minutes to soften slightly. Freezing is a fantastic way to get ahead of the holiday rush: make a few batches in November, freeze them, and you’ll have gifts and party treats ready to go all December long. The texture remains perfect upon thawing, with no sogginess or separation.
Want the full recipe and simple step-by-step instructions?
Page 2 continues with the full ingredients, cooking tips, and easy directions so you can make this recipe perfectly at home.