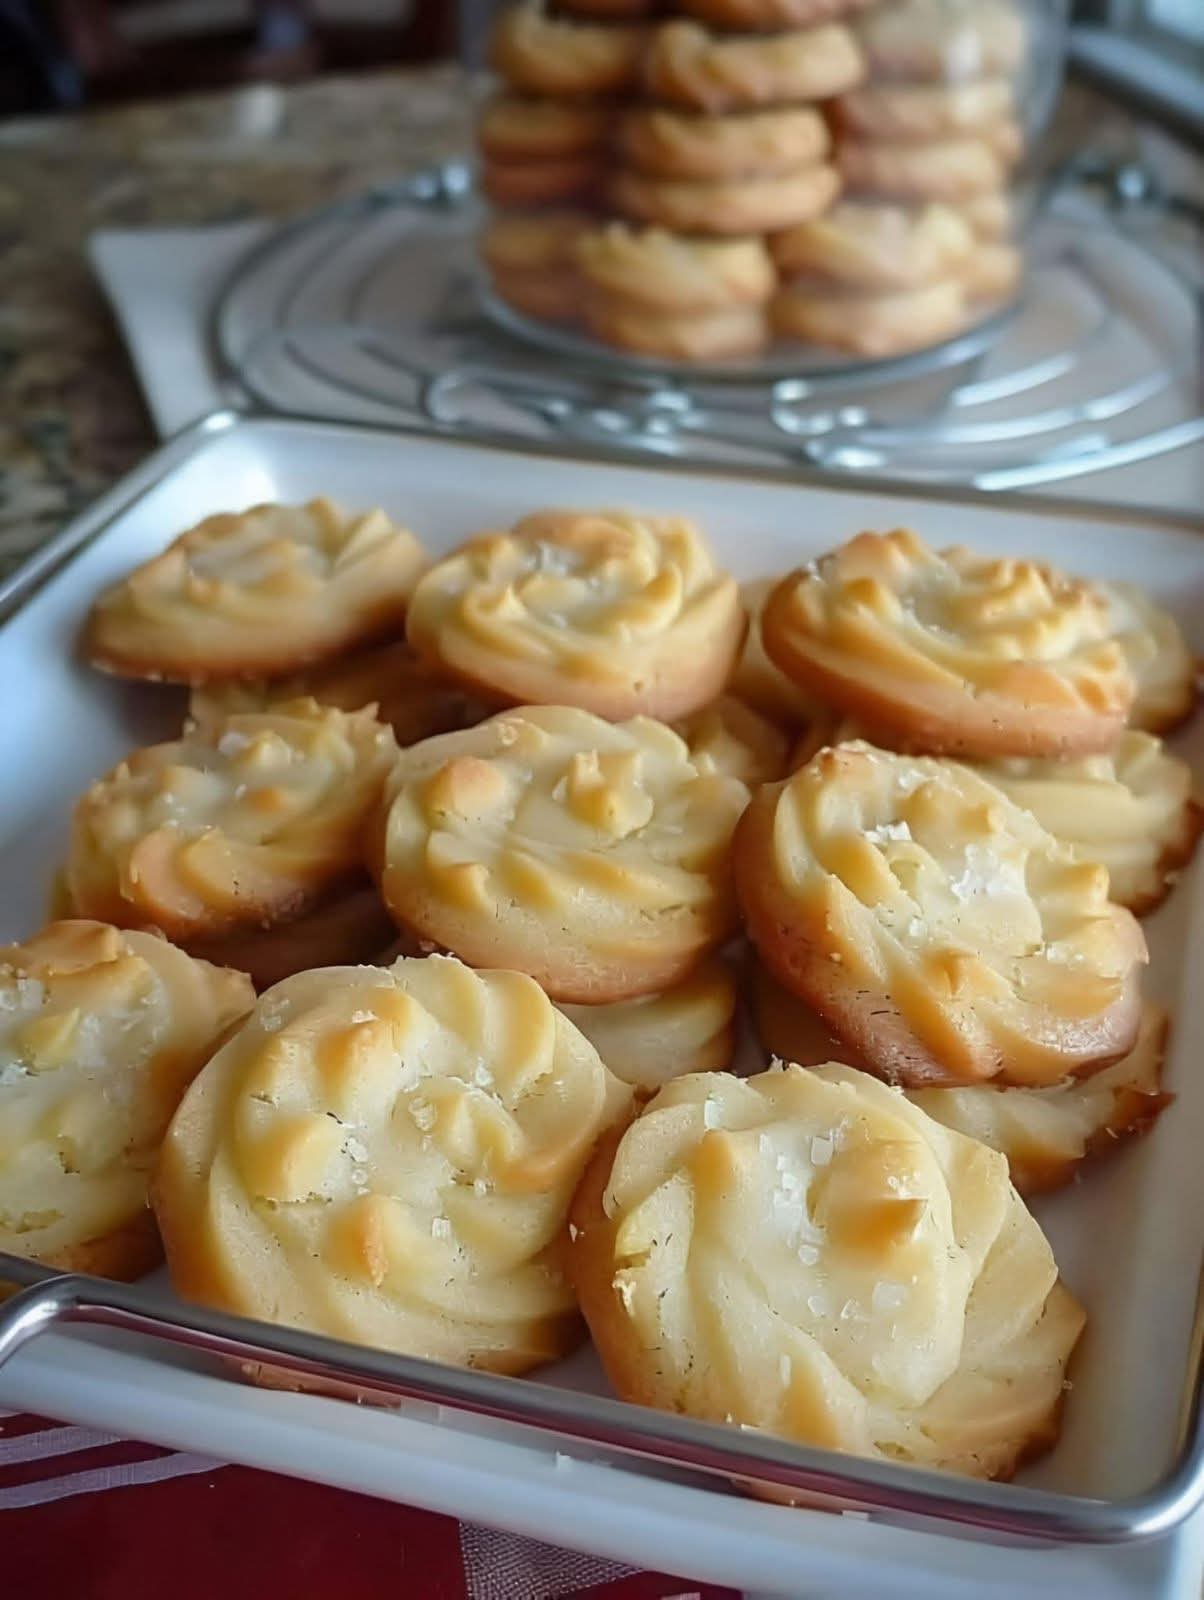
There are cookies that impress with elaborate fillings and towering stacks, and then there are the timeless classics—the ones that don’t need anything more than good butter, a little sugar, and a touch of vanilla to be utterly unforgettable. These World’s Best Butter Cookies belong to the latter, in the most magnificent way. With a crisp, delicate edge and a tender, sandy center that seems to dissolve on your tongue, they are the very definition of simple perfection. Each bite carries the deep, rich flavor of real butter, balanced by just enough sweetness and a whisper of vanilla. They’re the cookies your grandmother made, the ones you reach for with a cup of tea, the ones that are somehow always the first to disappear from the holiday cookie tray. This isn’t just a recipe; it’s a love letter to the one ingredient that makes baking magical—pure, golden butter.
The beauty of a classic butter cookie lies in its simplicity. With just six ingredients—unsalted butter, granulated sugar, a pinch of salt, pure vanilla extract, an egg yolk, and all-purpose flour—you can create a cookie that’s infinitely better than the sum of its parts. There’s no baking powder to make them puff, no brown sugar to add chewiness, just the pure, unadulterated flavor of butter, lightly sweetened and baked to a pale golden hue. The technique is just as straightforward: cream the butter and sugar until light and fluffy, beat in the yolk and vanilla, then gently fold in the flour. The dough is soft and pipeable, perfect for pressing through a star tip to create beautiful, bakery-style swirls, or simply rolled and cut into shapes. After a brief chill and a quick bake, you’re rewarded with delicate, buttery rounds that fill your entire kitchen with the most comforting aroma. They’re wonderful plain, dipped in chocolate, sandwiched with jam, or decorated with a sprinkle of sparkling sugar. And because the dough freezes so well, you can always have a batch ready to slice and bake at a moment’s notice. These cookies are the ultimate secret weapon for holiday baking, last-minute entertaining, or a quiet afternoon treat.
In this comprehensive guide, we’ll walk through every detail of creating the world’s best butter cookies: why each ingredient matters, the crucial steps that ensure a tender, non-greasy texture, how to pipe and shape them like a pro, and endless ways to customize them with flavors, dips, and decorations. You’ll also find make-ahead and storage tips, troubleshooting advice, and a full recipe card to keep close at hand. Let’s preheat the oven and fill the house with the irresistible scent of butter and vanilla.
Why You’ll Love These World’s Best Butter Cookies
Pure, rich butter flavor in every bite. These cookies don’t rely on mix-ins or heavy spices to make an impression. The star is the butter itself—eight ounces of it, to be exact—which gives the cookies a deeply rich, creamy taste that no other fat can replicate. The absence of leavening agents like baking powder or baking soda means the cookie remains dense and tender, almost shortbread-like, allowing the butter flavor to shine through completely. When you bite into one, the first thing you taste is that unmistakable, luxurious real butter richness.
A perfectly tender, melt-in-your-mouth texture. The texture is a magical balance between a delicate shortbread and a crisp sugar cookie. The high ratio of butter to flour, combined with the use of only an egg yolk (which adds tenderness without the water content of the white), creates a cookie that’s crumbly yet firm enough to hold its shape. It shatters delicately when you bite, then dissolves into buttery crumbs on your tongue. It’s the kind of cookie you can’t stop eating because the texture is so incredibly pleasing.
Incredibly simple and quick to make. With just six basic ingredients and a straightforward method, these cookies come together in minutes. There’s no complicated folding, no resting time required (though chilling the shaped dough improves the final look), and no special equipment beyond a hand mixer and a piping bag if you choose to pipe. It’s a perfect recipe for beginner bakers or for baking with children, and the results are always beautiful and impressive.
Elegant, versatile, and perfect for any occasion. These cookies are a blank canvas. Pipe them into rosettes, stars, or wreaths for an elegant presentation that looks straight out of a European bakery. Cut them into festive shapes with cookie cutters and decorate with sprinkles. Dip half of each cookie in dark chocolate and a sprinkle of sea salt for a sophisticated treat. Sandwich two cookies with raspberry jam or Nutella. They’re equally at home on a holiday cookie platter, packed in a tin as a gift, or served simply alongside a cup of tea on a quiet afternoon. You can flavor the dough with almond, lemon, or orange zest, or add a hint of cinnamon or cardamom. The possibilities are endless, and the base is foolproof.
Ingredient Deep Dive: The Simple, Essential Six
Each ingredient in this recipe has been carefully chosen to produce the perfect butter cookie. Here’s what you need and why.
Unsalted Butter – The Flavor Foundation
You’ll need 8 ounces (2 sticks, or 1 cup) of high-quality unsalted butter. Butter is the absolute star of this cookie, so using the best you can find—preferably a European-style butter with a higher butterfat content (like Plugrá or Kerrygold)—will make a noticeable difference in both flavor and texture. Higher fat content means less water, which yields a more tender, richer cookie that spreads less. The butter should be at cool room temperature: soft enough to beat into a creamy, fluffy consistency, but not so warm that it becomes greasy or oily. Ideal temperature is around 65–67°F (18–19°C). If you press your fingertip into the butter, it should leave a slight indent but still hold its shape. Using unsalted butter allows you to control the salt level precisely; if you only have salted butter, reduce the added salt to a tiny pinch.
Granulated Sugar – The Sweetness and Structure
Three-quarters of a cup of granulated white sugar provides the perfect amount of sweetness without overwhelming the butter flavor. Granulated sugar, when creamed with butter, helps create tiny air pockets that give the cookie a light, crisp texture. It also contributes to the slight spread and golden edge during baking. Do not use powdered sugar in this recipe; it contains cornstarch and will produce a completely different, more crumbly, melt-away texture that’s better suited to shortbread. If you prefer a slightly chewier cookie with a deeper, caramel-like flavor, you can substitute light brown sugar for up to half of the granulated sugar, but for the classic pure butter cookie, stick with white granulated sugar. Superfine sugar (caster sugar) works wonderfully and creams even more smoothly.
Salt – The Flavor Enhancer
A quarter teaspoon of fine sea salt or table salt may seem small, but it’s essential. Salt doesn’t make the cookies taste salty; it suppresses bitterness and amplifies the sweetness and the rich, buttery flavor. Without it, the cookies would taste flat and one-dimensional. If you’re finishing the cookies with a sprinkle of flaky sea salt (which is highly recommended!), you can reduce the salt in the dough slightly, but I like to keep both for layers of saltiness that hit at different moments. The salt should be finely ground so it dissolves evenly into the dough.
Pure Vanilla Extract – The Aromatic Warmth
One and a half teaspoons of pure vanilla extract add a warm, floral sweetness that rounds out the butter flavor and makes the cookies taste more complex. Always use pure vanilla extract, not imitation vanilla, for the best flavor. You can also use an equal amount of vanilla bean paste, which will add those beautiful little black flecks and an even more intense vanilla aroma. Vanilla extract is added with the egg yolk so it emulsifies properly. If you’d like to experiment, you can replace half a teaspoon of the vanilla with almond extract for a nutty note, or with lemon extract for a citrusy brightness. But the classic version relies on pure vanilla, and it’s wonderful.
Large Egg Yolk – The Tenderness and Richness
One large egg yolk is the only egg product in this dough. The yolk adds richness, a slight golden color, and a tender, velvety texture. It also acts as an emulsifier, helping the butter and sugar combine smoothly and preventing the dough from becoming greasy. The egg white is omitted because it contains a lot of water, which can make the cookies tough and cause them to spread too much during baking. Save the egg white for another use (like brushing onto pie crusts, or making meringues). Make sure the yolk is at room temperature so it blends seamlessly into the creamed butter mixture. If you forget to take the egg out of the fridge, place the whole egg in a bowl of warm water for 5–10 minutes before separating.
All-Purpose Flour – The Structure
Two cups of all-purpose flour give the cookies enough structure to hold their shape while remaining tender. Measure the flour carefully: spoon it into the measuring cup and level it off with a straight edge. Too much flour will make the cookies dry and crumbly; too little will cause them to spread into flat, greasy puddles. You can substitute an equal amount of pastry flour for an even more delicate, tender crumb, or use a 1:1 gluten-free flour blend if you need to avoid gluten. The gluten in the all-purpose flour is what allows the dough to be rolled and cut without crumbling, so handle the dough gently to avoid developing too much toughness. A light hand at mixing and rolling is key.
Step-by-Step: Creaming, Piping, and Baking Perfection
This recipe is a masterclass in the creaming method. Follow these detailed steps for butter cookies that are crisp, tender, and beautifully shaped.
Step 1: Preheat the Oven and Prepare Baking Sheets
Preheat your oven to 350°F (175°C). Line two large baking sheets with parchment paper or silicone baking mats. The parchment helps the cookies bake evenly and prevents sticking. Do not grease the baking sheets, as the butter in the dough is sufficient to prevent sticking, and added grease can cause the cookies to spread too much.
Step 2: Cream the Butter and Sugar
In a large mixing bowl, place the softened butter and the granulated sugar. Using a hand mixer or a stand mixer fitted with the paddle attachment, beat on medium speed for 2 to 3 minutes, until the mixture is pale, light, and fluffy. Scrape down the sides of the bowl with a spatula as needed. Properly creamed butter and sugar should have increased in volume and taken on a creamy, almost frosting-like consistency. This step is crucial for the final texture; don’t rush it. The sugar crystals cut into the butter, creating tiny air pockets that will expand slightly in the oven and give the cookies a delicate, crisp structure. If the butter is too cold, it won’t cream properly; if it’s too warm, the mixture will look greasy and won’t hold air. Aim for that perfect soft, cool room-temperature state.
Step 3: Add the Egg Yolk, Vanilla, and Salt
Add the egg yolk, vanilla extract, and salt to the creamed butter mixture. Beat on low speed (or mix by hand with a spatula) until just combined and the yolk is fully incorporated. The mixture will become even creamier and slightly more yellow. Be careful not to overbeat at this stage, as you don’t want to incorporate too much air into the dough, which could cause the cookies to rise and then fall, creating cracks. The dough should be smooth, homogenous, and fragrant.
Step 4: Incorporate the Flour
Gradually add the all-purpose flour to the butter mixture, mixing on the lowest speed (or folding in by hand with a spatula) just until the flour is absorbed and a soft dough forms. The dough will be thick and slightly sticky, but it should hold together when pressed. Do not overmix once the flour is added; overworking the dough will develop the gluten and make the cookies tough. Stop mixing as soon as you no longer see any streaks of flour. The finished dough should be smooth, pliable, and uniform in color.
Step 5: Shape the Cookies (Piping, Rolling, or Scooping)
For classic piped butter cookies, fit a large piping bag with a large open star tip (like Wilton 1M or Ateco 827). Fill the bag with the dough, twisting the top to seal. Pipe the dough onto the prepared baking sheets into desired shapes—rosettes, stars, simple swirls, or wreaths—leaving about 1½ inches of space between each cookie, as they will spread slightly. The dough should be soft enough to pipe with steady pressure but firm enough to hold its shape. If the dough is too stiff to pipe, let it sit at room temperature for a few minutes; if it’s too soft, refrigerate it for 10–15 minutes. Alternatively, you can divide the dough in half, shape each half into a disk, wrap in plastic, and chill for about 30 minutes until firm. Then roll the dough out on a lightly floured surface to about ¼-inch thickness and cut into shapes with cookie cutters. This method yields cookies that are a bit sturdier and perfect for decorating. For simple drop cookies, you can chill the dough for 15 minutes and then scoop rounded teaspoons onto the baking sheet, flattening them slightly with the bottom of a glass.
Step 6: Chill the Shaped Dough (Optional but Recommended)
For the cleanest, most defined piped shapes, place the baking sheet with the piped cookies in the refrigerator for 15–20 minutes before baking. Chilling solidifies the butter, which helps the cookies hold their intricate piped design and prevents excessive spreading in the oven. This step is optional but makes a noticeable difference in the final look. If you’re short on time, you can skip it, but the cookies may spread a bit more and lose some definition.
Step 7: Bake to Pale Golden Perfection
Bake the cookies in the preheated oven for 10 to 13 minutes, rotating the baking sheets halfway through, until the edges are just beginning to turn a very pale golden brown. The centers should remain pale. These cookies are meant to be light in color, not deeply browned. Overbaking will diminish the delicate butter flavor and make the cookies overly crisp. They will appear slightly soft when they come out of the oven but will firm up as they cool. If you’re baking multiple sheets, bake one at a time in the center of the oven for the most even results. Watch them closely during the last minute or two; the line between perfectly baked and overbaked is thin.
Step 8: Cool and Decorate
Let the cookies cool on the baking sheets for 5 minutes, then carefully transfer them to a wire rack to cool completely. They are very delicate when warm, so handle them gently. Once completely cool, you can decorate them. Dust with powdered sugar, dip half of each cookie in melted chocolate, sandwich them with jam or ganache, or drizzle with a simple glaze. The possibilities are endless. Store the completely cooled cookies in an airtight container.
Pro Tips for the Most Tender, Flavorful Butter Cookies
- Use the best butter you can find. The flavor of these cookies depends almost entirely on the quality of the butter. European-style butter with 82% butterfat or higher will give you a richer, more tender cookie with a superior taste. If you can, splurge on a high-quality brand. The difference is unmistakable. Regular American butter will still make a delicious cookie, but the European-style butter truly elevates it to “world’s best.”
- Don’t overcream the butter and sugar, and don’t overmix the flour. Cream until just light and fluffy—about 2–3 minutes is perfect. Overcreaming can incorporate too much air, causing the cookies to rise and then collapse, creating a cracked surface. Overmixing the flour will develop gluten, making the cookies tough rather than tender. Mix just until the flour disappears.
- Chill the dough if it becomes too soft. If your kitchen is warm or your hands are hot, the dough can become sticky and difficult to pipe or roll. Pop the dough (or the shaped cookies on the baking sheet) in the refrigerator for 15–20 minutes to firm up the butter. This makes handling much easier and ensures the cookies maintain their shape in the oven.
- Bake until just pale golden at the edges. The cookies should look slightly underdone in the center when you pull them out. They will continue to bake on the hot baking sheet and firm up as they cool. Overbaking will give you a crumbly, dry cookie that lacks that melt-in-your-mouth quality. Err on the side of slightly underbaked.
- Experiment with finishing touches. These cookies are a perfect base for so many decorations. While they’re still warm, you can sprinkle them with sparkling sugar, colored sanding sugar, or crushed nuts. Once cool, dip them in melted dark, milk, or white chocolate and add a pinch of flaky sea salt. Sandwich them with Nutella, lemon curd, or raspberry jam. The simple cookie is a canvas for your creativity.
Flavor Twists, Shapes & Decorative Ideas
While the pure butter-vanilla version is timeless, you can easily adapt this recipe to create a variety of cookies that suit any season or occasion.
- Chocolate-Dipped Butter Cookies: Melt 4 ounces of high-quality semi-sweet or dark chocolate with 1 teaspoon of coconut oil (for shine). Dip half of each cooled cookie into the chocolate, let the excess drip off, and place on parchment to set. Sprinkle with a few flakes of sea salt or chopped nuts before the chocolate hardens. This simple addition turns a classic cookie into a stunning, gift-worthy treat.
- Lemon or Orange Zest Butter Cookies: Add the finely grated zest of one large lemon or one large orange to the butter and sugar during the creaming stage. The citrus oils will infuse the dough with a bright, fragrant note that’s incredibly refreshing. Orange zest pairs beautifully with a dark chocolate dip, while lemon zest is lovely with a simple powdered sugar glaze. A few drops of lemon or orange extract can further intensify the flavor.
- Almond Butter Cookies: Replace ½ teaspoon of the vanilla extract with ½ teaspoon of pure almond extract. The sweet, nutty flavor of almond pairs perfectly with the butter. Press a whole blanched almond into the center of each cookie before baking, or sprinkle sliced almonds on top. Drizzle with a simple almond glaze or dip in white chocolate for an elegant finish.
- Spiced Brown Butter Cookies: Take the butter to the next level by browning it first. Melt the butter in a saucepan over medium heat, swirling occasionally, until the milk solids turn a deep amber brown and the butter smells nutty. Pour it into a heatproof bowl, including all the browned bits, and let it cool until it’s solidified to a soft, spreadable consistency (about the texture of room-temperature butter). Proceed with the recipe as written. The brown butter adds an incredible nutty, caramel-like depth that’s absolutely irresistible.
- Festive Holiday Shapes and Decorations: Roll out the chilled dough and use cookie cutters to create stars, trees, hearts, or any shape you like. Before baking, brush the tops lightly with a little egg wash (egg white beaten with water) and sprinkle with colored sanding sugar, nonpareils, or crushed candy canes. After baking and cooling, flood the cookies with a simple royal icing or pipe details with a thicker icing. These are perfect for Christmas, Valentine’s Day, or any celebration.
Serving Suggestions & Occasions
These butter cookies are a versatile addition to any dessert table. They’re the perfect accompaniment to a hot cup of coffee, tea, or hot chocolate—their buttery richness is the ideal complement to the slight bitterness of coffee or the floral notes of Earl Grey tea. Arrange them on a platter with other classic cookies like chocolate chip, gingersnaps, and shortbread for a beautiful cookie tray. They make a stunning addition to a bridal shower, baby shower, or afternoon tea spread, especially when piped into rosettes and decorated with edible flowers or a dusting of powdered sugar. During the holidays, they are a must-have on a Christmas cookie platter, and they package beautifully in tins or cellophane bags tied with ribbon for edible gifts. For an elegant dessert, serve them alongside a bowl of vanilla ice cream or lemon sorbet, or crumble them over a fruit crisp or trifle. They’re also wonderful as a simple after-school snack or a lunchbox treat. No matter how you serve them, these cookies bring a touch of simple elegance to any moment.
Storage, Freezing & Make-Ahead
Make-Ahead: The dough can be made up to 3 days in advance. Wrap it tightly in plastic wrap and refrigerate. When you’re ready to bake, let the dough sit at room temperature for about 15–20 minutes to soften slightly before piping or rolling. If the dough is too firm, you can knead it gently a few times with your hands to make it pliable. This is a fantastic time-saver for the holidays—make the dough on a free evening, then bake fresh cookies whenever you need them.
Storing Baked Cookies: Store the completely cooled cookies in an airtight container at room temperature. They will stay fresh and crisp for up to 1 week. If you’ve decorated them with chocolate or icing, make sure those are fully set before stacking the cookies. Place a sheet of parchment paper between layers to prevent sticking. If the cookies soften from humidity, you can crisp them up by placing them in a 300°F oven for 3–5 minutes, then cooling completely.
Freezing the Dough: This dough freezes beautifully. Shape it into a disk, wrap it tightly in plastic wrap, then place it in a freezer-safe bag. Freeze for up to 3 months. Thaw overnight in the refrigerator, then bring to cool room temperature before shaping and baking. You can also freeze the shaped, unbaked cookies: place the piped or cut-out dough pieces on a parchment-lined baking sheet and freeze until solid. Transfer to a freezer bag. Bake directly from frozen, adding 1–2 minutes to the baking time. This is perfect for having fresh, warm cookies on demand.
Freezing Baked Cookies: Baked cookies also freeze well. Place them in a single layer in a freezer-safe container, with parchment between layers. Freeze for up to 2 months. Thaw at room temperature, still covered, to prevent condensation from making them soggy. The texture remains excellent, especially if you re-crisp them in a warm oven for a few minutes before serving.
Want the full recipe and simple step-by-step instructions?
Page 2 continues with the full ingredients, cooking tips, and easy directions so you can make this recipe perfectly at home.