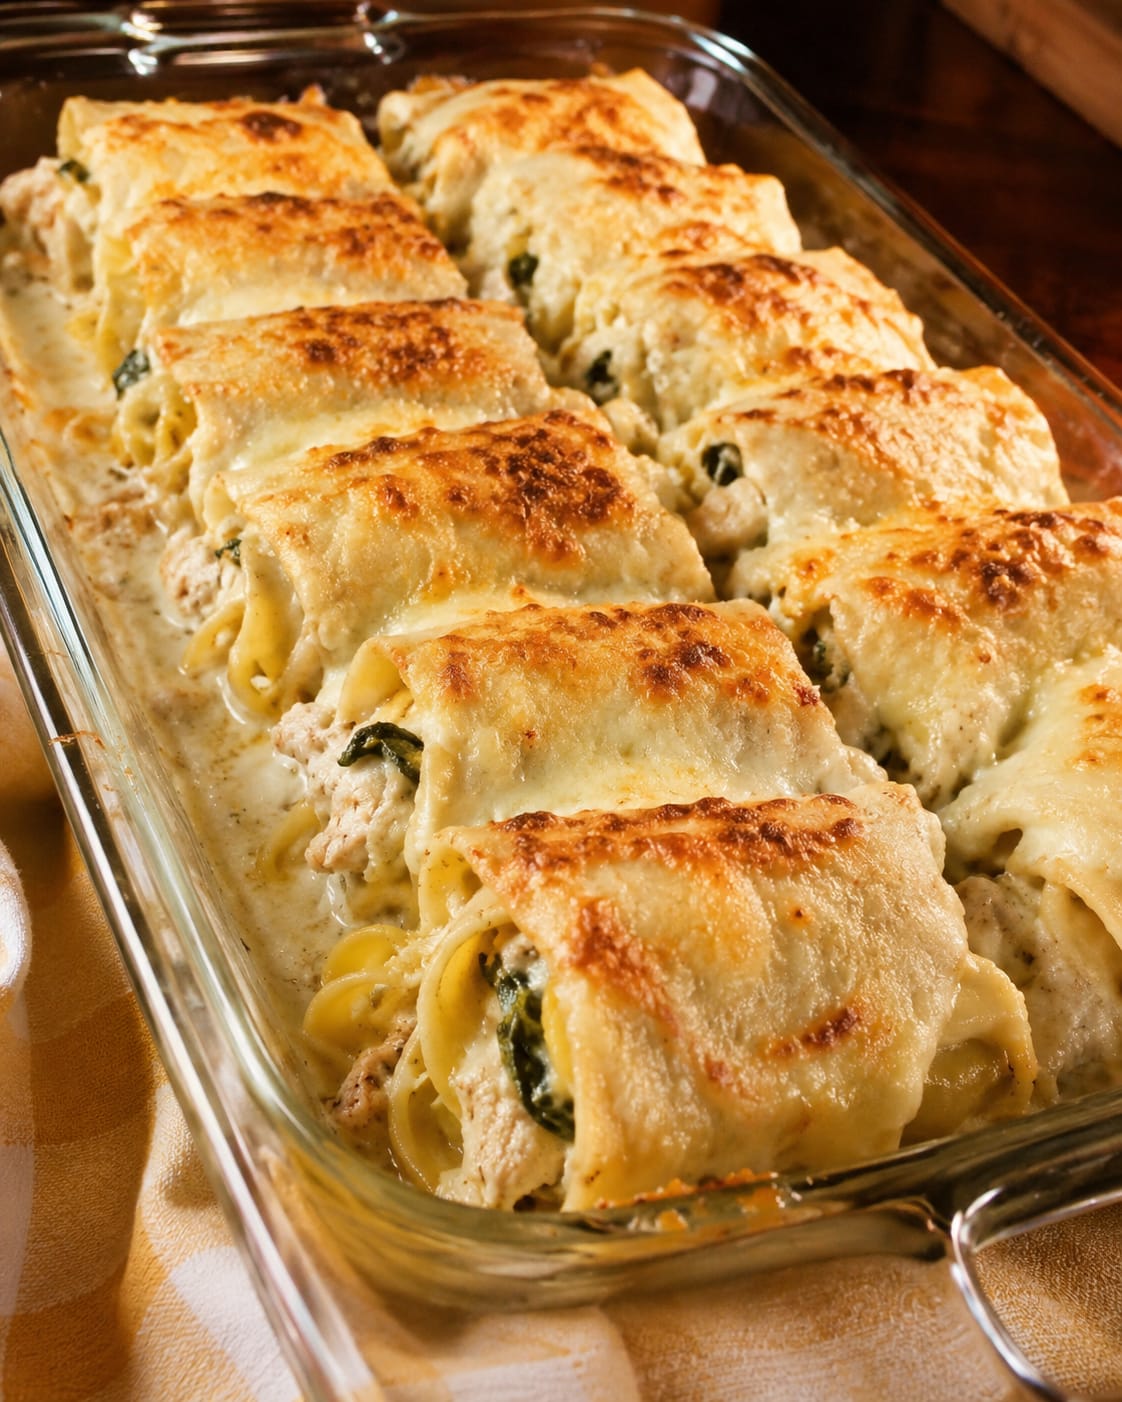
When you want all the cheesy, garlicky comfort of lasagna but in a fun, individual portion that feels a little bit special, these Creamy Chicken Alfredo Lasagna Roll-Ups are the answer. Tender lasagna noodles are spread with a rich, creamy filling of shredded chicken, velvety ricotta (or cream cheese), garlic, Italian herbs, and a generous handful of mozzarella and Parmesan, then rolled up into spirals and nestled in a pool of luscious Alfredo sauce. A final blanket of cheese on top bakes until golden, bubbly, and irresistibly inviting. Every forkful is a perfect bite of creamy, cheesy, and savory goodness that makes dinner feel like an occasion without any of the fuss. Whether you’re feeding a hungry family on a busy weeknight or serving guests something elegant yet effortless, these roll-ups deliver. They’re destined to become a beloved staple at your table.
Lasagna roll-ups are one of those brilliant recipes that combine the familiar comfort of baked pasta with a beautiful presentation. Instead of layering sheets of noodles in a casserole dish, you spread the filling onto individual noodles, roll them up, and place them seam-side down in the sauce. The result is not only visually stunning—each spiral revealing swirls of creamy filling—but also much easier to serve, with perfect portions built right in. This version swaps the traditional tomato-based meat sauce for a decadent Alfredo sauce, creating a white lasagna that’s luxuriously creamy and rich. The filling uses cooked shredded chicken, which makes it hearty and protein-packed. You can use rotisserie chicken for the ultimate time-saver, or leftover roasted chicken from last night’s dinner. Adding a handful of chopped spinach brings a pop of color, a bit of freshness, and a serving of greens that meld seamlessly into the cheesy mixture. It’s a complete meal in one dish, and it’s endlessly adaptable to your family’s tastes.
In this comprehensive guide, we’ll walk through every detail of creating the ultimate Chicken Alfredo Lasagna Roll-Ups: from cooking the pasta perfectly to assembling the rolls without tearing, to building the creamiest filling and the best store-bought or homemade Alfredo sauce. You’ll find pro tips, creative variations, make-ahead instructions, and all the little secrets to a golden, bubbling top. Let’s roll up some comfort.
Why You’ll Love These Chicken Alfredo Lasagna Roll-Ups
All the comfort of baked lasagna, but in a fun, individual package. Each roll-up is its own perfect serving, making portion control effortless and plating beautiful. The spirals hold the filling neatly inside, so when you cut into them, you get that gorgeous cross-section of creamy cheese, tender chicken, and pasta. They’re a dish that feels special enough for company, yet simple enough for a Tuesday night. Kids love the rolled shape, and adults appreciate the sophisticated white sauce.
Incredibly creamy and satisfying. Alfredo sauce, with its buttery, garlicky, Parmesan-rich flavor, is the perfect backdrop for the chicken and cheese filling. Combined with ricotta (or cream cheese), mozzarella, and more Parmesan inside, each bite is a luscious explosion of creamy, savory goodness. The optional spinach adds a subtle earthy note and a pop of green, making the dish feel balanced.
Easy to make, especially with rotisserie chicken. Using pre-cooked shredded chicken cuts the prep time down dramatically. You can have the filling mixed and the noodles cooked in about the time it takes to preheat the oven. The assembly is a fun, meditative task—spread, roll, place—and the baking time is hands-off. It’s an ideal recipe for busy weeknights when you want a homemade dinner without spending hours in the kitchen.
Endlessly customizable. The basic recipe is a canvas. You can add cooked bacon, sautéed mushrooms, broccoli florets, or sun-dried tomatoes to the filling. Swap the Alfredo for a creamy pesto sauce, or use a blend of Italian cheeses. Make it spicy with red pepper flakes, or lighten it up with a cauliflower Alfredo. These roll-ups are forgiving and encourage you to experiment with what you have on hand.
Ingredient Deep Dive: The Creamy, Cheesy Cast
Each ingredient is chosen to create the perfect texture and flavor. Here’s what you need and why.
Lasagna Noodles – The Wrapper
You’ll need 9 to 12 lasagna noodles, cooked until just tender (al dente). It’s a good idea to cook a few extra in case some tear. Drain them and lay them flat on a lightly greased baking sheet or a piece of parchment paper, not touching, so they don’t stick together while you prepare the filling. You can use regular, whole wheat, or even gluten-free lasagna noodles. No-boil noodles should be boiled for a minute or two to make them pliable enough to roll; do not skip this step, as they will be too stiff and may crack.
Cooked Shredded Chicken – The Hearty Protein
Two cups of cooked shredded chicken provide a substantial, lean protein base for the filling. Rotisserie chicken is a fantastic shortcut—it’s already seasoned and tender. You can also use poached or grilled chicken breasts, leftover roast chicken, or even drained canned chicken in a pinch. The chicken should be finely shredded or chopped so it integrates smoothly into the cheese mixture and rolls up easily without creating lumps that tear the noodles.
Ricotta or Cream Cheese – The Creamy Binder
One and a half cups of ricotta cheese provide the classic, slightly grainy texture and mild flavor that’s synonymous with lasagna. Ricotta is light, creamy, and blends beautifully with the chicken and seasonings. You can substitute an equal amount of softened cream cheese for an even richer, tangier filling that’s almost like a cheesecake-like decadence. Full-fat versions of either are recommended for the best flavor and mouthfeel. If using cream cheese, make sure it’s softened to room temperature so it mixes smoothly without lumps.
Mozzarella and Parmesan – The Melty, Salty Duo
One and a half cups of shredded mozzarella (1 cup for the filling, plus extra for topping) and ½ cup of grated Parmesan cheese provide the gooey, stretchy, salty elements that make every bite irresistible. Mozzarella gives you those iconic cheese pulls; Parmesan adds a nutty, savory depth. Shred your own mozzarella from a block for the smoothest melt, and use freshly grated Parmesan (not the powdered shelf-stable kind) for the best flavor. The extra mozzarella on top creates that golden, bubbly crust.
Alfredo Sauce – The Luxurious Base
Two cups of Alfredo sauce are used—one thin layer on the bottom of the baking dish to prevent sticking, and the rest poured over the roll-ups. You can use a good-quality jarred Alfredo sauce (look for one with real cream and Parmesan in the ingredients) or make your own from scratch with butter, garlic, heavy cream, and Parmesan. A homemade sauce elevates the dish, but a jarred version is perfectly acceptable for a quick weeknight dinner. If you’re feeling adventurous, try a roasted garlic Alfredo or a four-cheese Alfredo for extra flavor.
Garlic, Italian Seasoning, and Spinach – The Flavor Boosters
Two minced garlic cloves give the filling a fresh, aromatic punch. One teaspoon of Italian seasoning (a dried herb blend) adds a classic Italian-herb backbone. Salt and black pepper season the mixture. One cup of chopped fresh spinach (optional but recommended) adds color, a bit of earthy flavor, and extra nutrients. It wilts slightly during baking and blends into the cheesy filling beautifully. You can also use thawed and squeezed frozen spinach; just make sure it’s very dry to avoid adding moisture.
Step-by-Step: Noodles, Filling, and Rolling
This recipe is straightforward and fun. Follow these detailed steps for perfect, golden-topped roll-ups every time.
Step 1: Preheat the Oven and Cook the Noodles
Preheat your oven to 375°F (190°C). Bring a large pot of salted water to a boil and cook the lasagna noodles according to the package directions until just tender (al dente). Drain the noodles carefully and lay them flat on a lightly greased baking sheet or a piece of parchment paper, separate them so they don’t stick. Set aside to cool slightly.
Step 2: Prepare the Chicken Cheese Filling
In a large mixing bowl, combine the shredded chicken, ricotta (or softened cream cheese), 1 cup of the shredded mozzarella, the grated Parmesan, minced garlic, Italian seasoning, salt, black pepper, and chopped spinach if using. Stir everything together until well blended. The mixture should be thick and cohesive. Taste and adjust seasoning—it should be well-seasoned, as the pasta and sauce will balance it.
Step 3: Assemble the Roll-Ups
Spread a thin layer of Alfredo sauce (about ½ cup) over the bottom of a 9×13-inch baking dish. This prevents the roll-ups from sticking and adds moisture. Take one cooked lasagna noodle and spoon a generous amount of the chicken filling along its length, leaving a small border at the ends. Don’t overfill—about ¼ to ⅓ cup of filling per noodle is sufficient. Gently roll the noodle up from one short end to the other, creating a spiral. Place the roll-up seam-side down in the prepared baking dish. Repeat with the remaining noodles and filling. You should be able to fit 9–12 roll-ups snugly in the dish.
Step 4: Top with Sauce and Cheese
Pour the remaining Alfredo sauce (about 1½ cups) evenly over the top of the roll-ups, making sure all the noodles are covered. Sprinkle the reserved ½ cup (or more) of shredded mozzarella cheese generously over everything. If you like a golden, crunchy top, add an extra sprinkle of Parmesan as well.
Step 5: Bake Covered, Then Uncovered
Cover the baking dish with aluminum foil, tenting it slightly so the foil doesn’t touch the cheese. Bake in the preheated oven for 20 minutes. The foil traps steam and ensures the roll-ups heat through and the cheese melts without browning too quickly. After 20 minutes, remove the foil and continue baking for another 10 to 15 minutes, until the sauce is bubbly and the cheese on top is golden brown and slightly crisp at the edges. If you want an even browner top, switch the oven to broil for the last 1–2 minutes, watching carefully.
Step 6: Rest and Serve
Remove the dish from the oven and let the roll-ups rest for 5 minutes before serving. This brief rest allows the sauce to settle and makes it easier to lift the roll-ups out of the dish without them falling apart. Garnish with fresh chopped parsley if desired. Use a spatula to carefully transfer each roll-up to a plate, spooning some of the extra Alfredo sauce from the dish over the top. Serve hot, with your favorite sides.
Pro Tips for Perfect Roll-Ups Every Time
- Cook the noodles al dente and don’t overcook. They will continue to cook in the oven, and if they’re too soft to begin with, they can tear during rolling or become mushy in the final dish. Boil them until they’re just pliable but still have a slight bite. Rinsing them briefly with cool water can stop the cooking process and make them easier to handle.
- Don’t overfill the noodles. It’s tempting to pile on the filling, but too much will squeeze out the ends and make a mess. A generous but controlled strip down the center is perfect. Leave a small border at the edges so the filling doesn’t spill out during rolling and baking.
- Place seam-side down. This ensures the roll-ups don’t unroll during baking. The pressure from the surrounding roll-ups also helps keep them closed. Nestle them close together in the dish; they’ll hold each other in place.
- Use room-temperature ricotta or cream cheese. Cold cheese is harder to mix and can leave lumps in the filling. Let it sit out for about 30 minutes before using. If you’re in a hurry, microwave it in short bursts until it’s soft to the touch, but not melted.
- Make extra sauce. The roll-ups soak up the sauce as they bake, and a generous amount of Alfredo ensures the dish stays creamy and moist. If the dish looks dry before baking, don’t hesitate to add a little more sauce or a splash of milk. The extra sauce in the bottom of the dish is perfect for spooning over the roll-ups when serving.
Flavor Twists & Customizations
Once you’ve mastered the basic recipe, try these creative variations to keep things fresh.
- Chicken Bacon Ranch Roll-Ups: Add ¼ cup of crumbled cooked bacon to the filling, and stir 2 tablespoons of dry ranch seasoning mix into the ricotta. Use a garlic Alfredo sauce. Drizzle with extra ranch before serving. This version is a huge hit with kids and adults alike.
- Chicken Mushroom Florentine: Sauté 8 ounces of sliced mushrooms and 2 cups of fresh spinach until wilted and any liquid has evaporated. Fold them into the chicken filling along with a little extra garlic. Use a creamy mushroom Alfredo sauce. The earthy mushrooms add a wonderful depth.
- Buffalo Chicken Roll-Ups: Swap the Alfredo sauce for a mixture of 1 cup ranch dressing and ½ cup buffalo wing sauce. Use crumbled blue cheese in place of the mozzarella, and stir some into the filling as well. The spicy, tangy buffalo flavor is incredible, and it’s perfect for game day.
- Pesto Chicken Roll-Ups: Replace the Alfredo sauce with a good-quality basil pesto, thinned with a little heavy cream if needed. Use a blend of mozzarella and fontina cheese. Add sun-dried tomatoes (drained and chopped) to the filling. The bright pesto flavor pairs beautifully with the chicken.
- Seafood Alfredo Roll-Ups: Replace the chicken with a mix of cooked shrimp, crab, or flaked salmon. The delicate seafood pairs beautifully with the creamy Alfredo. Add a teaspoon of Old Bay seasoning to the filling for a coastal twist.
What to Serve with Chicken Alfredo Roll-Ups
These rich, creamy roll-ups are a meal on their own, but a few simple sides round out the plate. Garlic bread or cheesy breadsticks are perfect for mopping up the extra Alfredo sauce. A Caesar salad with crunchy croutons and a tangy dressing provides a refreshing, crisp contrast to the rich pasta. Steamed or roasted broccoli, asparagus, or green beans add a pop of color and a healthy element. For a lighter option, a tomato cucumber salad with a lemon vinaigrette is wonderfully refreshing. You can also keep it simple with a side of sautéed spinach or a mixed greens salad. A glass of Chardonnay or a crisp Pinot Grigio complements the creamy sauce beautifully.
Storage, Make-Ahead & Reheating
Make-Ahead: You can assemble the roll-ups completely (without baking) up to 24 hours in advance. Cover the dish tightly with plastic wrap or foil and refrigerate. When ready to bake, let it sit at room temperature for about 20 minutes while the oven preheats, then bake as directed, adding 10–15 minutes to the covered baking time to ensure the center is hot. You can also bake them fully, cool, and reheat—the flavors deepen overnight.
Storing Leftovers: Transfer cooled roll-ups to an airtight container and refrigerate for up to 4 days. The sauce will thicken in the fridge. Reheat gently, adding a splash of milk or cream to loosen the sauce. The roll-ups hold their shape well, so they’re great for meal-prepped lunches.
Reheating: The oven is best for reheating larger portions: cover the dish with foil and warm at 350°F for 15–20 minutes until heated through. Individual portions can be microwaved for 1–2 minutes. The microwave is faster but may soften the topping; the oven preserves the slightly crispy cheese. Add a little extra Alfredo sauce or a pat of butter on top before reheating to keep things moist.
Freezing: Assemble the roll-ups (without baking) in a freezer-safe dish, cover tightly with plastic wrap and foil, and freeze for up to 3 months. Thaw overnight in the refrigerator, then bake as directed, adding 15–20 minutes to the baking time. You can also bake directly from frozen: cover with foil and bake at 375°F for 60–70 minutes, then uncover and bake 15–20 minutes more until bubbly. The texture may be slightly softer, but the flavor remains excellent.
Want the full recipe and simple step-by-step instructions?
Page 2 continues with the full ingredients, cooking tips, and easy directions so you can make this recipe perfectly at home.