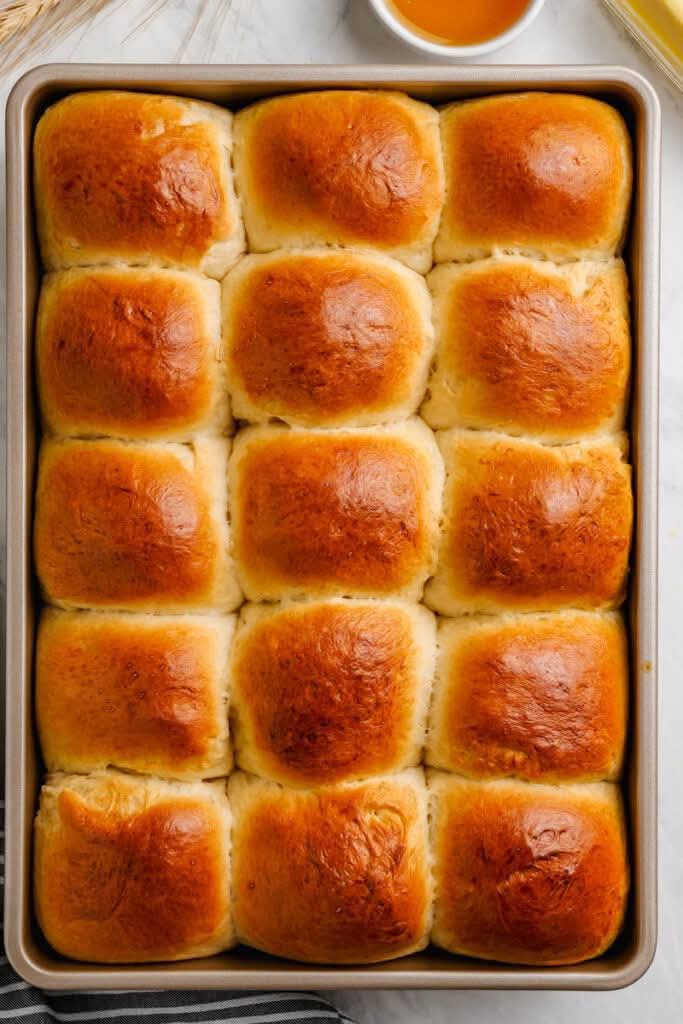
There are breads that are merely a vehicle for butter, and then there are breads that are so good they don’t need anything at all – but they’re even better with a generous slather of butter. Soft and Buttery Homemade Dinner Rolls fall gloriously into the second category. Imagine a golden, pillowy roll that’s impossibly light and tender, with a slight sheen of melted butter on top and a warm, yeasty aroma that fills your kitchen. Pull one apart, and you’ll find a soft, feathery interior that practically melts in your mouth. These are the rolls that make every meal feel like a special occasion.
If you’ve ever been intimidated by yeast breads, this recipe is your gateway to bread‑making confidence. These rolls are forgiving, straightforward, and absolutely foolproof – the kind of recipe that yields perfect results every single time. Whether you’re serving them for Thanksgiving, a holiday feast, a Sunday dinner, or just because you want to fill your home with the most comforting aroma imaginable, these rolls are guaranteed to be the star of the table.
What Are Soft and Buttery Dinner Rolls?
At their heart, these rolls are a classic enriched yeast bread – a dough that’s made with butter, milk, and eggs to create a tender, flavorful crumb. They’re softer and richer than standard bread rolls, thanks to the fat from the butter and eggs. The result is a roll that’s light, airy, and incredibly satisfying – the kind that everyone reaches for first at the dinner table.
This recipe falls into the category of “essential baking” – the recipes that every home baker should have in their repertoire. Dinner rolls are a staple at holiday meals, Sunday dinners, and family gatherings. They’re versatile enough to accompany everything from roasted turkey and mashed potatoes to a simple bowl of soup.
What makes this version especially brilliant is the soft, feathery texture. The combination of scalded milk (which tenderizes the gluten), plenty of butter, and a gentle kneading technique creates rolls that are almost cloud‑like. And the best part? They’re surprisingly easy to make – the active work is minimal, and the rewards are enormous.
Why You’ll Love This Recipe
There are countless reasons to fall in love with these Soft and Buttery Dinner Rolls. Here are just a few that will have you making them on repeat:
Incredibly soft and fluffy – they melt in your mouth, every single time.
Rich, buttery flavor – the butter in the dough and the brushed topping make them irresistible.
Foolproof recipe – perfect for beginner bakers and seasoned pros alike.
Simple ingredients – you probably already have everything you need in your pantry.
Make‑ahead friendly – the dough can be refrigerated overnight or frozen.
Perfect for holidays – these rolls are a must‑have for Thanksgiving, Christmas, and Easter.
Freezes beautifully – make a double batch and save some for later.
Always a crowd‑pleaser – everyone loves a warm, freshly baked roll.
Versatile – serve them with butter, jam, honey, or alongside any meal.
Beautiful presentation – golden, glossy, and perfect for any table.
This is the recipe that will earn you a reputation as a bread‑baking pro. It’s proof that homemade bread is one of life’s simplest and greatest pleasures.
Ingredients for Soft and Buttery Dinner Rolls
This recipe uses simple, wholesome ingredients that come together beautifully. Here’s what you’ll need:
For the Dough
1 cup whole milk (or 2% milk)
½ cup unsalted butter, cut into pieces (plus extra for brushing)
¼ cup granulated sugar
1 teaspoon salt
1 packet (2¼ teaspoons) active dry yeast or instant yeast
¼ cup warm water (110°F / 43°C – for active dry yeast)
2 large eggs, at room temperature
4 to 4½ cups all‑purpose flour (or bread flour)
For the Egg Wash and Topping
- 1 large egg
- 1 tablespoon water
- 2 tablespoons unsalted butter, melted (for brushing after baking)
- Flaky sea salt (optional, for finishing)
Ingredient Notes and Substitutions
Milk: Whole milk gives the richest flavor and softest texture. You can use 2% or even skim milk, but the rolls will be slightly less tender. For a dairy‑free version, use unsweetened oat milk or almond milk and substitute vegan butter.
Butter: Unsalted butter is preferred so you can control the salt level. If you only have salted butter, reduce the added salt to ½ teaspoon.
Yeast: Active dry yeast and instant yeast are both excellent. For active dry yeast, dissolve it in the warm water first and let it foam for 5–10 minutes. For instant yeast, you can add it directly to the dry ingredients – it’s that easy!
Eggs: Eggs add richness and help create a tender crumb. Make sure they’re at room temperature – cold eggs can shock the dough and slow down rising.
Flour: All‑purpose flour works beautifully for light, tender rolls. Bread flour has a higher protein content and will produce slightly chewier, more structured rolls – both are great options.
Step‑by‑Step Instructions
Follow these detailed steps to create a flawless batch of Soft and Buttery Dinner Rolls every single time. The process is straightforward, and the results are spectacular.
1. Scald the Milk
In a small saucepan over medium heat, warm the milk and butter together until the butter is melted and the mixture is steaming (about 180°F / 82°C). Do not boil. Remove from heat and stir in the sugar and salt. Let the mixture cool to lukewarm (about 110°F / 43°C) before proceeding.
Pro tip: Scalding the milk denatures the proteins, which helps create a softer crumb. This is a classic baker’s technique that makes a real difference.
2. Activate the Yeast
If using active dry yeast: In a small bowl, combine the warm water (110°F / 43°C) and the yeast. Let it sit for 5–10 minutes until it becomes frothy and bubbly. If using instant yeast, skip this step and add it directly to the flour later.
3. Mix the Dough
In the bowl of a stand mixer fitted with the dough hook attachment (or a large bowl if mixing by hand), combine the cooled milk mixture, eggs, and the yeast mixture (or instant yeast). Add 2 cups of the flour and mix on low speed until the dough starts to come together. Gradually add the remaining flour, ½ cup at a time, until the dough is soft, slightly sticky, and pulls away from the sides of the bowl. You may not need all the flour – stop when the dough is soft and tacky but not overly sticky.
4. Knead
Knead the dough on medium speed for 5–7 minutes (or by hand for 8–10 minutes) until the dough is smooth, elastic, and slightly tacky. It should pass the “windowpane test” – when you stretch a small piece of dough, it should stretch thin without tearing. If the dough is too sticky, add more flour a tablespoon at a time. If it’s too dry, add a teaspoon of water.
5. First Rise
Place the dough in a lightly greased bowl, turning it once to coat the top. Cover with a clean kitchen towel or plastic wrap. Let it rise in a warm, draft‑free place for 1 to 1½ hours, or until doubled in size.
6. Shape the Rolls
Gently punch down the dough and turn it out onto a lightly floured surface. Divide the dough into 12–15 equal pieces (about 2–2½ ounces each). Shape each piece into a smooth ball by tucking the edges under and rolling it between your palms. Place the rolls in a greased 9×13‑inch baking dish or on a parchment‑lined baking sheet, about ½ inch apart for a pull‑apart style, or 1–2 inches apart for individual rolls.
7. Second Rise
Cover the shaped rolls loosely with a kitchen towel and let them rise for 30–45 minutes, or until they’ve puffed up and are touching (if using a dish) or nearly doubled in size.
8. Preheat and Brush
Preheat your oven to 375°F (190°C). In a small bowl, whisk together the egg and water to make an egg wash. Gently brush the tops of the risen rolls with the egg wash – this will give them a beautiful golden, glossy finish.
9. Bake
Bake for 15–18 minutes, or until the rolls are golden brown and sound hollow when tapped on the bottom. The internal temperature should be about 190°F (88°C). If the rolls are browning too quickly, cover them loosely with foil for the last 5 minutes.
10. Brush with Butter and Serve
Remove from the oven and immediately brush the tops with the melted butter. This adds a glossy sheen and an extra layer of buttery flavor. Sprinkle with flaky sea salt if desired. Let the rolls cool slightly in the pan for about 5–10 minutes before serving. Serve warm with extra butter on the side.
Expert Tips for the Perfect Dinner Rolls
This recipe is simple, but a few expert tricks will elevate it to perfection. Here’s what I’ve learned from making these rolls countless times:
Temperature matters – make sure the milk mixture is lukewarm, not hot, before adding the yeast. Hot liquid will kill the yeast; cold liquid will slow down the rise.
Use a thermometer – if you want to be precise, use an instant‑read thermometer. The milk mixture should be about 110°F for yeast activation.
Don’t add too much flour – the dough should be soft and slightly tacky. Adding too much flour will make the rolls dense instead of light and fluffy.
Use a warm spot for rising – a warm, draft‑free spot is essential for good yeast activity. If your kitchen is cool, place the bowl on top of a preheated oven or in a microwave with a cup of hot water.
Shape gently – when shaping the rolls, handle the dough gently to preserve the air bubbles that make the texture light and airy.
Don’t overbake – the rolls are done when they’re golden brown and sound hollow. Overbaking dries them out.
Brush with butter immediately – brushing the rolls with butter as soon as they come out of the oven adds shine, flavor, and that irresistible softness.
Make ahead – the shaped rolls can be refrigerated overnight for a slow rise. In the morning, let them come to room temperature and rise for 30–60 minutes before baking.
Delicious Variations
One of the best things about this recipe is how easily it adapts to different tastes and occasions. Here are some of my favorite ways to switch it up:
Garlic Herb Dinner Rolls
Add 2 teaspoons of dried Italian seasoning and 2 cloves of minced garlic to the dough. Brush the baked rolls with a mixture of melted butter, minced garlic, and fresh parsley. These are perfect alongside pasta or as garlic bread substitute.
Parker House Rolls
After shaping the dough into balls, roll each ball into an oval, then fold it in half and tuck the edges under. Place in a dish with the folded side down. These classic rolls have a signature “hump” on top and a pillowy, pull‑apart texture.
Cinnamon Sugar Dinner Rolls
After brushing with butter, sprinkle the rolls with a mixture of ¼ cup sugar and 1 tablespoon cinnamon. This turns them into a sweet treat that’s perfect for brunch or breakfast.
Cheese Stuffed Dinner Rolls
Flatten each dough ball and place a small cube of cheese (cheddar, mozzarella, or Swiss) in the center, then seal and shape into a ball. The cheese melts inside, creating a gooey, savory surprise.
Herb and Parmesan Crusted Rolls
After brushing with butter, sprinkle with a mixture of ¼ cup grated Parmesan and 1 tablespoon of fresh herbs (thyme, rosemary, or parsley). This creates a flavorful, cheesy crust.
Honey Butter Dinner Rolls
Mix 2 tablespoons of honey with the melted butter before brushing the baked rolls. The honey adds a subtle, floral sweetness that pairs beautifully with the buttery rolls.
Whole Wheat Dinner Rolls
Replace half the all‑purpose flour with whole wheat flour. You may need to add a few extra tablespoons of milk or water, as whole wheat flour absorbs more liquid. The rolls will be slightly denser but still delicious.
Serving Suggestions
These versatile rolls pair beautifully with a wide variety of meals:
With butter and jam – the classic, simple way to enjoy freshly baked rolls.
Alongside soup or stew – perfect for dipping into a warm bowl of soup.
With roasted chicken or turkey – a must‑have for Sunday dinners and holidays.
As a sandwich – split the rolls open and fill them with ham, turkey, or leftover roast beef.
For brunch – serve with eggs, bacon, and fresh fruit.
With honey or flavored butter – a compound butter (like garlic herb or honey cinnamon) takes them to the next level.
As a side for pasta – use them as a simple, delicious bread side for any Italian meal.
Storage and Reheating Guidelines
These rolls store beautifully, making them a fantastic make‑ahead option for any gathering.
Room Temperature: Store leftover rolls in an airtight container at room temperature for up to 2 days. They’ll stay soft and delicious.
Refrigeration: If you need to keep them longer, store them in the refrigerator for up to 4 days. Reheat gently before serving.
Freezing: These rolls freeze beautifully. Wrap cooled rolls tightly in plastic wrap, then in aluminum foil, or place them in a freezer‑safe bag. Freeze for up to 2 months. Thaw at room temperature or overnight in the refrigerator.
Reheating: For the best texture, reheat rolls in a 350°F oven for 5–10 minutes until warmed through. You can also microwave individual rolls for 15–20 seconds, though the oven gives a fresher texture.
Pro tip: To refresh day‑old rolls, sprinkle them lightly with water and warm them in the oven. The steam will revive their softness.
Want the full recipe and simple step-by-step instructions?
Page 2 continues with the full ingredients, cooking tips, and easy directions so you can make this recipe perfectly at home.