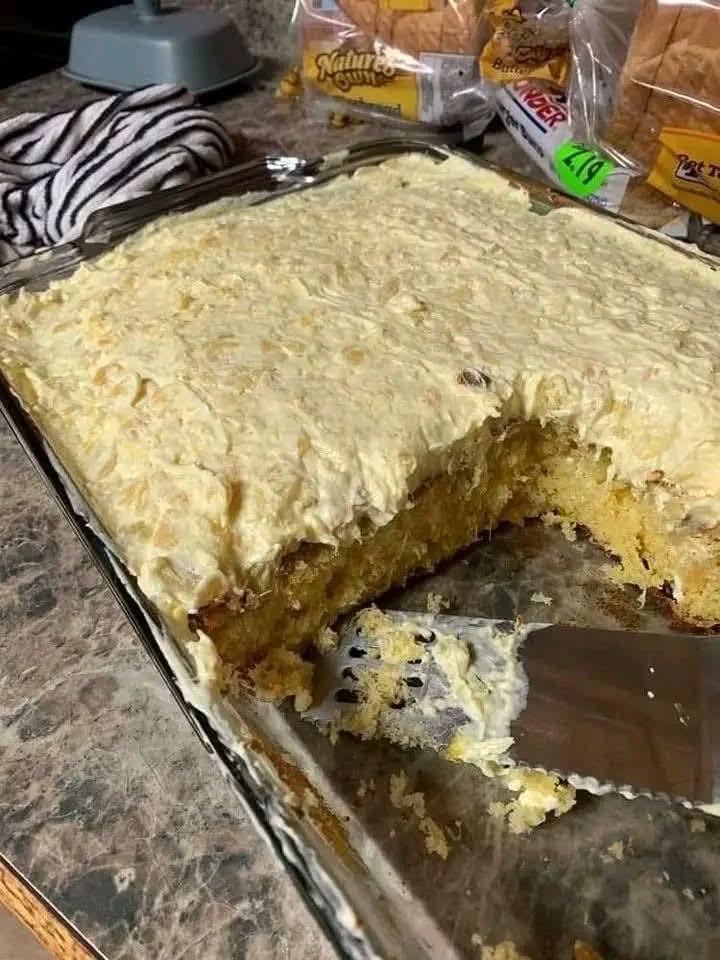
There are desserts that feel like a guilty pleasure, and then there are desserts that prove you don’t have to sacrifice flavor to make healthy choices. Diabetic‑Friendly Pineapple Cream Cake is emphatically the latter. Imagine a light, moist, tender cake infused with the sweet, tropical flavor of pineapple, layered with a creamy, luscious filling, and finished with a cloud of whipped topping – all without the sugar spike that typically comes with traditional desserts. It’s the kind of cake that makes you feel like you’re indulging, even as you’re taking care of your health.
If you or a loved one are managing diabetes, or simply looking to reduce sugar without compromising on taste, this cake is about to become your new favorite dessert. It’s naturally sweetened with pineapple and a sugar‑free pudding mix, uses wholesome ingredients, and delivers all the satisfaction of a classic cream cake – with a fraction of the carbs. Perfect for birthdays, holidays, summer gatherings, or any time you need a little taste of the tropics.
What Is Diabetic‑Friendly Pineapple Cream Cake?
At its heart, this dessert is a light, creamy, no‑bake or lightly baked cake that combines the natural sweetness of pineapple with a silky cream cheese filling, all while keeping the carbohydrate count in check. It’s inspired by classic pineapple cream cakes and pineapple upside‑down cakes, but reimagined with diabetic‑friendly ingredients – sugar‑free pudding mix, sugar‑substitute sweeteners, and portion‑controlled servings.
This recipe falls into the category of “healthier desserts” – treats that are lower in sugar and carbohydrates than traditional versions, making them suitable for people with diabetes, prediabetes, or anyone following a low‑carb lifestyle. The pineapple provides natural sweetness and fiber, while the cream cheese and whipped topping add richness and creaminess without excess sugar.
What makes this version especially brilliant is its versatility. It can be made as a no‑bake dessert (perfect for hot summer days), as a baked cake, or even as individual parfaits. The pineapple flavor pairs beautifully with the creamy filling, and the whole thing comes together with minimal effort. It’s the ultimate dessert for any occasion.
Why You’ll Love This Recipe
There are countless reasons to fall in love with this Diabetic‑Friendly Pineapple Cream Cake. Here are just a few that will have you making it on repeat:
Diabetic‑friendly – low in sugar and carbohydrates, with a balanced glycemic impact.
Naturally sweetened – the pineapple and sugar‑free pudding mix provide sweetness without refined sugar.
Incredibly creamy and satisfying – the cream cheese and whipped topping create a luscious texture.
No‑bake option available – perfect for hot days or when you don’t want to turn on the oven.
Quick and easy – comes together in minutes with minimal prep.
Make‑ahead friendly – needs to chill, making it perfect for party planning.
Budget‑friendly – uses affordable ingredients that go a long way.
Naturally gluten‑free option – use a gluten‑free crust or skip the crust entirely.
Perfect for any occasion – birthdays, holidays, summer barbecues, or a simple treat.
Always a crowd‑pleaser – everyone loves the tropical flavor and creamy texture.
This is the dessert that will make you feel like you’re cheating on your healthy eating plan – when in reality, you’re making a smart, nourishing choice. It’s proof that diabetic‑friendly desserts can be every bit as delicious as their sugar‑laden counterparts.
Ingredients for Diabetic‑Friendly Pineapple Cream Cake
This recipe uses simple, wholesome ingredients that come together beautifully. Here’s what you’ll need:
For the Crust (Optional – Omit for a Crustless Version)
1½ cups almond flour or crushed pecans (or gluten‑free graham cracker crumbs)
¼ cup melted butter or coconut oil
2 tablespoons powdered erythritol or monk fruit sweetener
½ teaspoon cinnamon (optional)
For the Creamy Layer
8 oz cream cheese, softened to room temperature
1 cup heavy whipping cream (cold)
1 small box (about 1 oz) sugar‑free vanilla or cheesecake pudding mix
½ cup powdered erythritol or monk fruit sweetener (adjust to taste)
1 teaspoon vanilla extract
1 can (20 oz) crushed pineapple, packed in juice (not syrup) – well drained
For the Topping
- 1 cup sugar‑free whipped topping (like Cool Whip Sugar‑Free) or freshly whipped cream
- Extra drained pineapple chunks for garnish (optional)
- Fresh mint or toasted coconut for garnish (optional)
Ingredient Notes and Substitutions
Pineapple: Use crushed pineapple packed in its own juice, not heavy syrup. This keeps the sugar content lower. Make sure to drain it very well – excess liquid can make the filling watery. Reserve 2 tablespoons of the juice for flavor if needed.
Cream Cheese: Full‑fat cream cheese gives the richest, creamiest texture. Low‑fat versions work but will be slightly less creamy. Make sure it’s properly softened – cold cream cheese will leave lumps.
Heavy Whipping Cream: Cold heavy cream is crucial for whipping to stiff peaks. Don’t substitute with half‑and‑half or milk – they don’t have enough fat to hold the structure.
Sweetener: Powdered erythritol or monk fruit sweetener works best because it dissolves easily and doesn’t leave a gritty texture. Adjust the amount to your taste – the pineapple adds natural sweetness, so you may need less than you think.
Pudding Mix: Sugar‑free vanilla or cheesecake pudding mix adds flavor and helps thicken the filling. Make sure it’s the instant (cook‑and‑serve) variety. This is what gives the cream layer its structure without needing gelatin.
Step‑by‑Step Instructions
Follow these detailed steps to create a flawless Diabetic‑Friendly Pineapple Cream Cake. The process is straightforward, and the results are spectacular.
1. Prepare the Crust (Optional)
If using a crust, preheat your oven to 350°F (175°C). In a small bowl, combine the almond flour (or crushed nuts), melted butter, sweetener, and cinnamon. Press the mixture firmly into the bottom of a 9‑inch springform pan or pie dish. Bake for 8–10 minutes until lightly golden. Let cool completely before adding the filling. For a no‑bake version, simply press the crust into the pan and refrigerate for 15 minutes to set.
2. Drain the Pineapple
Place the crushed pineapple in a fine‑mesh strainer and press firmly to remove as much liquid as possible. Reserve 2 tablespoons of the juice for the filling if desired. The drier the pineapple, the better the cake will set.
3. Beat the Cream Cheese
In a large mixing bowl or the bowl of a stand mixer fitted with the paddle attachment, beat the softened cream cheese on medium speed until completely smooth and free of lumps – about 2 minutes. Scrape down the sides of the bowl. Add the sweetener, vanilla extract, and sugar‑free pudding mix. Beat until smooth and well combined.
4. Whip the Heavy Cream
In a separate chilled bowl, using a hand mixer or a stand mixer with the whisk attachment, whip the cold heavy cream on medium‑high speed until stiff peaks form. This should take about 3–4 minutes. The cream should hold its shape when the whisk is lifted – don’t overbeat.
5. Fold the Cream Into the Cream Cheese
Gently fold the whipped cream into the cream cheese mixture in two additions. Use a large spatula and fold with a gentle, sweeping motion – don’t stir vigorously, or you’ll deflate the air. The mixture should be light, fluffy, and uniformly colored.
6. Fold in the Pineapple
Gently fold the well‑drained crushed pineapple into the cream mixture. Make sure it’s evenly distributed throughout. Be careful not to overmix – you want the pineapple pieces to remain intact.
7. Assemble the Cake
Spoon the pineapple cream filling over the cooled crust (or directly into a serving dish if going crustless). Smooth the top with a spatula. Cover and refrigerate for at least 4 hours, preferably overnight. This allows the filling to set properly.
8. Add the Topping and Serve
When ready to serve, spread the sugar‑free whipped topping over the top of the cake. Garnish with extra pineapple chunks, fresh mint, or toasted coconut if desired. Slice and serve chilled.
Expert Tips for the Perfect Cream Cake
This recipe is simple, but a few expert tricks will elevate it to perfection. Here’s what I’ve learned from making this dessert countless times:
Drain the pineapple very well – this is the most important step. Excess liquid will make the filling watery and prevent it from setting properly. Press the pineapple firmly in a strainer and even pat it with paper towels.
Use room‑temperature cream cheese – this ensures a smooth, lump‑free filling. Cold cream cheese won’t incorporate properly.
Chill your bowl and beaters – for the whipped cream, a cold bowl and cold beaters help the cream whip faster and hold more volume.
Fold gently – the key to a light, fluffy dessert is preserving the air in the whipped cream. Fold with care, and don’t rush.
Chill for at least 4 hours – overnight is even better. The cake needs time to set properly.
Sweeten to taste – the pineapple provides natural sweetness. Start with ½ cup of sweetener and add more if needed after tasting the filling.
Use a springform pan – if you’re using a crust, a springform pan makes removal effortless and ensures beautiful slices.
Make it crustless – for an even lower‑carb option, skip the crust entirely and serve the creamy pineapple filling as a mousse or parfait.
Delicious Variations
One of the best things about this recipe is how easily it adapts to different tastes and occasions. Here are some of my favorite ways to switch it up:
Pineapple Coconut Cream Cake
Fold in ½ cup of unsweetened shredded coconut along with the pineapple. Garnish with toasted coconut flakes on top. This tropical version is perfect for summer.
Pineapple Lime Cream Cake
Add 1 tablespoon of lime zest and 1 tablespoon of lime juice to the cream mixture. The bright, citrusy flavor pairs beautifully with the sweet pineapple.
Baked Pineapple Cream Cake
For a warm, baked version, add 2 eggs to the cream mixture and pour it into a greased baking dish. Bake at 350°F for 25–30 minutes until set and golden. This creates a firmer, more custard‑like texture.
Pineapple Cream Parfaits
Instead of a single cake, layer the pineapple cream mixture and crushed nuts (or granola) in individual glasses or jars. This is a beautiful, portion‑controlled way to serve the dessert.
Pineapple and Berry Cream Cake
Fold in ½ cup of fresh blueberries or raspberries along with the pineapple. The berries add color, antioxidants, and a lovely tart contrast.
Chocolate Pineapple Cream Cake
Add 2 tablespoons of unsweetened cocoa powder to the cream mixture. The chocolate and pineapple combination is unexpectedly delicious.
Vegan Diabetic‑Friendly Version
Use vegan cream cheese, coconut cream (chilled and whipped), and a vegan butter substitute for the crust. The texture will be slightly different, but many plant‑based versions work beautifully.
Want the full recipe and simple step-by-step instructions?
Page 2 continues with the full ingredients, cooking tips, and easy directions so you can make this recipe perfectly at home.