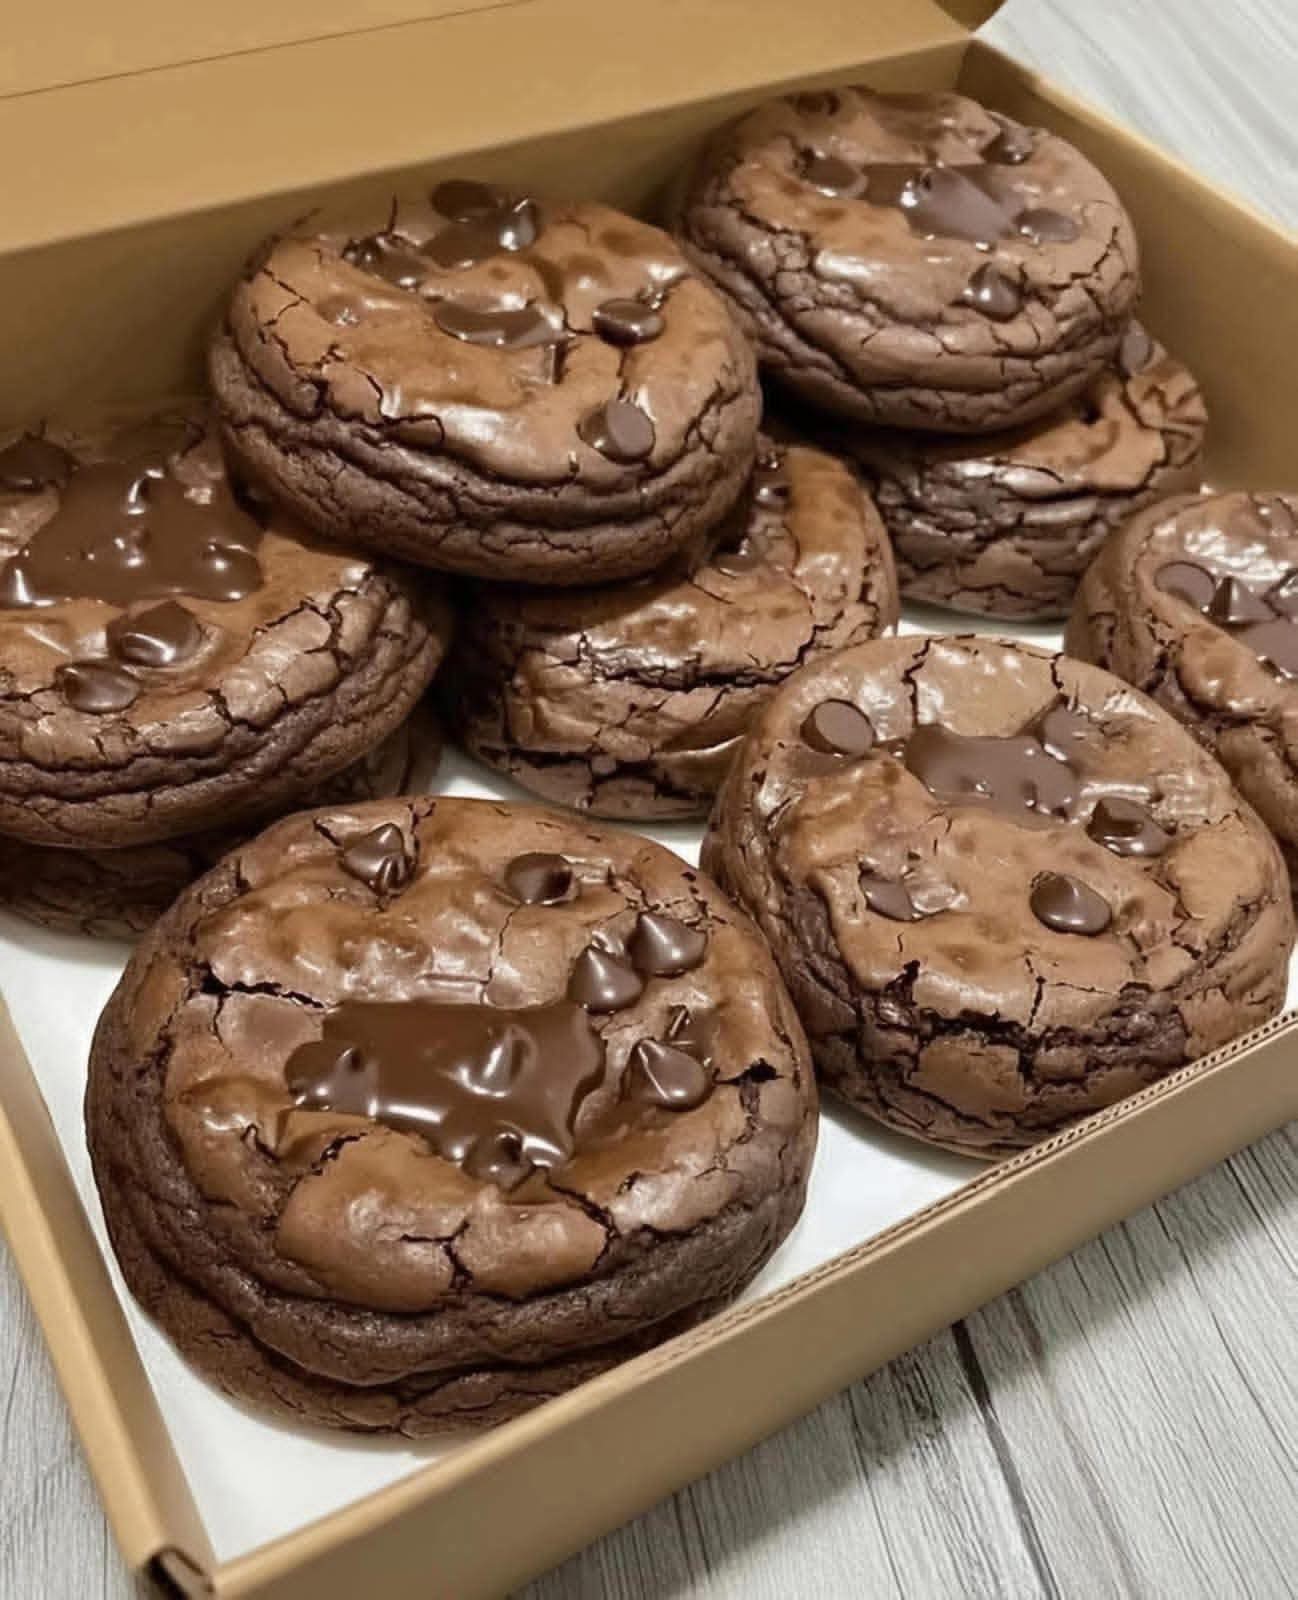
Some recipes are so brilliantly simple, so outrageously delicious, that you want to write them on a piece of paper and tape it to the inside of your kitchen cabinet. These Cookies Made From Brownie Mix are exactly that kind of recipe. With a box of brownie mix, a little flour, two eggs, and some oil, you can create the chewiest, fudgiest, most intensely chocolate cookies in about 15 minutes flat. They have that shiny, crackled top that’s the hallmark of a great brownie, a dense, almost truffle-like center, and edges that are just slightly crisp. Every bite is a double-chocolate dream, and the best part? You don’t even have to measure out cocoa powder or melt chocolate. The box does all the hard work for you. Whether you need a last-minute dessert for a party, a fun baking project with kids, or a way to satisfy a serious chocolate craving, these brownie mix cookies are the answer. Don’t lose this recipe—it’s destined to become your new favorite kitchen hack.
The beauty of this recipe lies in its simplicity and its adaptability. You start with one 18-ounce box of your favorite brownie mix—the kind that already contains the perfect blend of sugar, cocoa, and leavening agents. By adding just a quarter cup of all-purpose flour, you give the cookies a bit more structure so they don’t spread into flat puddles. Two large eggs bind everything together and add richness. A third of a cup of vegetable oil (or melted butter) provides the moisture that turns the dry mix into a thick, scoopable dough. That’s the base: four ingredients, one bowl, and absolutely no fuss. From there, you can customize endlessly. Fold in a cup of chocolate chips for extra gooeyness, add walnuts or pecans for crunch, or stir in a teaspoon of espresso powder to deepen the chocolate flavor. The dough comes together in minutes, and after a quick chill (which helps the cookies stay thick and chewy), they bake up in under 10 minutes. The result is a cookie that tastes like the perfect intersection of a brownie and a chocolate cookie—rich, decadent, and impossible to resist. You’ll find yourself reaching for a box of brownie mix every time a craving strikes, and you’ll wonder why you ever made cookies from scratch. This is the recipe that will make you a legend at bake sales, the hero of holiday cookie swaps, and the most popular person at any potluck. It’s the kind of shortcut that feels like a secret weapon, and once you taste it, you’ll never lose it again.
In this comprehensive guide, I’ll walk you through every detail of making the ultimate brownie mix cookies. We’ll explore the best brownie mixes to use, the secrets to achieving that perfect shiny, crackled top, endless mix-in ideas to suit any occasion, and all the storage and make-ahead tips you need. Whether you’re a seasoned baker or a total beginner, this recipe is foolproof, fast, and absolutely fabulous. Let’s preheat the oven and turn that box of brownie mix into something truly magical.
Why You’ll Love These Brownie Mix Cookies
Only four simple ingredients. A box of brownie mix, a quarter cup of all-purpose flour, two eggs, and a third of a cup of oil. That’s it. You probably have all of these in your pantry right now, and the brownie mix is the ultimate shortcut. No need to measure out cocoa, sugar, or leavening agents—the box has already done that for you. The flour simply gives the cookies enough structure to hold a nice, round shape, and the eggs and oil bind everything together. It’s the kind of recipe that feels like a magic trick, and it’s practically impossible to mess up. Whether you’re a novice baker or a seasoned pro, you’ll appreciate how effortlessly these cookies come together. You can even keep a box of brownie mix in the pantry specifically for this purpose, so you’re never more than a few minutes away from hot, fresh cookies.
Incredibly fudgy, chewy, and chocolatey. These cookies capture everything you love about a brownie—the deep, dark chocolate flavor, the shiny, crackled top, the dense, chewy interior—and put it into a hand-held, cookie form. The edges bake up slightly crisp, while the centers stay soft and almost gooey. They taste like a brownie and a chocolate cookie had the most delicious baby. The secret is the brownie mix itself, which is designed to create that fudgy texture. By turning it into a cookie dough, you get even more of that coveted edge-to-center ratio, with a satisfying chewy bite that’s perfect for dunking in milk. They’re rich, intensely chocolatey, and so satisfying that one or two will completely curb your sweet tooth.
Ready in under 30 minutes. The dough comes together in about five minutes, and after a brief 15-minute chill to prevent spreading, the cookies bake in just 8–10 minutes. That means you can have warm, gooey, bakery-style cookies on the table in less than half an hour. It’s faster than a trip to the grocery store for a packaged treat, and the homemade taste is infinitely better. This speed makes them perfect for last-minute dessert emergencies, unexpected guests, or a quick after-school snack that will make you the coolest parent on the block. The active time is so minimal that you can even whip up a batch while dinner is in the oven. It’s the ultimate quick-fix chocolate fix.
Endlessly customizable with your favorite mix-ins. The basic cookie dough is a blank canvas for all sorts of delicious add-ins. Fold in a cup of semi-sweet chocolate chips for double-chocolate decadence. Add white chocolate chips and dried cranberries for a festive holiday version. Stir in chopped walnuts or pecans for a nutty crunch. Swirl in a spoonful of peanut butter or add a pinch of cinnamon and cayenne for a Mexican hot chocolate twist. You can even press a chocolate kiss or a caramel-filled chocolate square into the center of each cookie right when they come out of the oven. The possibilities are truly endless, and you can make a different version every time you bake them. This versatility means you’ll never get bored, and you can tailor the cookies to any holiday or celebration. The brownie mix is the perfect foundation, and your imagination is the only limit.
Ingredient Deep Dive: The Simple, Fudgy Lineup
Each ingredient in this recipe plays a crucial role in creating the perfect brownie-like cookie. Let’s break them down.
Brownie Mix – The Fudgy Foundation
You’ll need one 18-ounce box of your favorite brownie mix. This is the star of the show. Brownie mixes come in many varieties: traditional fudge, dark chocolate, milk chocolate, and even versions with chocolate chunks or caramel swirls already included. Any of them will work beautifully, but a classic fudge brownie mix will give you the richest, most intensely chocolatey cookie. The mix already contains the perfect ratio of cocoa powder, sugar, flour, and leavening agents, so all you do is add a few wet ingredients to turn it into a cookie dough. Look for a mix that you love on its own, because the flavor will shine through. If you’re using a brownie mix that already includes chocolate chips or chunks, you may want to reduce the amount of additional mix-ins you add. The mix typically weighs 18 to 19 ounces; that’s the standard family-size box. For a gluten-free version, use a gluten-free brownie mix; the rest of the ingredients are naturally gluten-free or easily adaptable. The brownie mix is what gives these cookies their signature shiny top, their fudgy interior, and their deep, irresistible chocolate flavor. It’s a brilliant shortcut that yields bakery-quality results with almost no effort.
All-Purpose Flour – The Structure Builder
A quarter cup of all-purpose flour is the secret to turning brownie batter into a scoopable cookie dough. The brownie mix alone, when combined with eggs and oil, would create a batter that’s too thin and would spread into flat, lace-like cookies. The extra flour gives the dough enough body to hold a rounded shape and results in cookies that are thick and chewy. It also helps create that slight crispness around the edges. Measure the flour accurately by spooning it into the measuring cup and leveling it off. For a gluten-free option, you can use an equal amount of a 1:1 gluten-free flour blend, or simply use a gluten-free brownie mix and omit the extra flour; the cookies may spread a bit more but will still be delicious. You can also experiment with other flours like whole wheat pastry flour for a slightly nuttier flavor, but all-purpose is the most reliable choice. The small amount of extra flour is the key to achieving the perfect cookie texture—not too cakey, not too flat, just perfectly chewy and fudgy.
Eggs – The Rich Binder
Two large eggs, at room temperature, provide structure, richness, and moisture. The eggs help bind the dry brownie mix and flour together into a cohesive dough. They also contribute to the shiny, crackled top that’s so characteristic of brownies. For the best results, use room-temperature eggs; they incorporate more easily into the dough and help create a smoother texture. If you forget to take your eggs out of the fridge, place them in a bowl of warm water for 5–10 minutes before using. The eggs should be beaten slightly before adding to the mix, or you can simply crack them right into the bowl and mix well. They work together with the oil to create the perfect dough consistency. If you’re egg-free, you can use a flax egg (1 tablespoon ground flaxseed mixed with 3 tablespoons water per egg) or a commercial egg replacer, but the texture may be slightly different. The eggs are essential for that dense, brownie-like chew, so don’t skip them unless you absolutely must.
Vegetable Oil (or Melted Butter) – The Moisture and Tenderness
One-third cup of vegetable oil (or melted unsalted butter) adds the necessary moisture to turn the dry mix into a soft, pliable dough. Oil produces a cookie that’s slightly chewier and stays moist longer, while melted butter adds a richer, more buttery flavor. Both are excellent choices. If you use butter, be sure to let it cool slightly after melting so it doesn’t cook the eggs when you mix them together. You can also use coconut oil for a subtle tropical note that pairs surprisingly well with chocolate. For a lower-fat option, you could substitute unsweetened applesauce for half of the oil, but the cookies won’t be quite as rich and may have a slightly cakier texture. The oil should be a neutral-flavored one, like canola or vegetable, so it doesn’t compete with the chocolate. This small amount of fat is all you need to create a dough that’s easy to scoop and bakes into tender, moist cookies. It also contributes to the cookies’ shiny top and helps them spread just the right amount in the oven.
Optional Add-Ins: Chocolate Chips, Nuts, and More
While the four basic ingredients make a fantastic cookie, a cup of semi-sweet chocolate chips takes them over the top. The chips add pockets of melted chocolate throughout the cookies, making every bite even more decadent. You can use milk chocolate, dark chocolate, or white chocolate chips. A half cup of chopped walnuts or pecans adds a satisfying crunch and a nutty flavor that complements the chocolate beautifully. For a holiday touch, fold in crushed candy canes, red and green M&Ms, or a sprinkle of sea salt on top before baking. A teaspoon of vanilla extract can be added for extra depth, and a teaspoon of instant espresso powder will intensify the chocolate flavor without making the cookies taste like coffee. The add-ins are where you can really get creative. Just be careful not to add more than about 1½ cups total of mix-ins, or the cookies may not hold together as well. The base dough is forgiving and ready to take on whatever flavors you’re craving.
Step-by-Step: From Box to Beautiful Cookies
Follow these simple steps for perfectly chewy, fudgy brownie mix cookies every time.
Step 1: Preheat the Oven and Prepare the Baking Sheets
Preheat your oven to 350°F (175°C). Line two large baking sheets with parchment paper or silicone baking mats. The parchment prevents sticking and helps the cookies bake evenly. Do not grease the baking sheets, as the cookies contain enough fat to release on their own. If you’re using a dark-colored baking sheet, you may want to reduce the oven temperature to 325°F to prevent the bottoms from over-browning. Having your baking sheets ready before you mix the dough means you can scoop the cookies immediately after chilling, which is important for maintaining the right dough temperature. The parchment also makes cleanup a breeze. The cookies will have a beautiful, professional look when baked on parchment, and they’ll slide right off with no sticking.
Step 2: Mix the Dough
In a large mixing bowl, combine the 18-ounce box of brownie mix and the ¼ cup of all-purpose flour. Whisk them together to break up any lumps and ensure the flour is evenly distributed. Add the 2 large eggs and the ⅓ cup of vegetable oil (or melted butter). Using a wooden spoon or a rubber spatula, stir the mixture until a thick, cohesive dough forms. It will be stiff and slightly sticky, but it should hold together when pressed. If the dough seems too dry, you can add a teaspoon of water or milk, but this is rarely necessary. If you’re adding chocolate chips, nuts, or other mix-ins, fold them in now. The dough will be dense and very chocolatey. It should smell like the best brownie batter you’ve ever encountered. Be careful not to overmix; just stir until everything is combined. Overmixing can incorporate too much air and make the cookies puffier and more cake-like, rather than fudgy and dense. The dough is now ready for a brief chill.
Step 3: Chill the Dough
Cover the bowl of dough with plastic wrap and place it in the refrigerator for 15–20 minutes. Chilling the dough is crucial for preventing the cookies from spreading too much in the oven. The cold dough will hold its shape better and result in thicker, chewier cookies. If you’re in a hurry, you can even pop the bowl in the freezer for 5–10 minutes. The dough will firm up and be easier to scoop after chilling. Don’t skip this step—it makes a noticeable difference in the final texture. While the dough chills, you can clean up your workspace, make a cup of coffee, or simply anticipate the delicious cookies to come. The brief wait is well worth it. Chilled dough also gives the cookies that beautiful shiny, crackled top, as the cold fat melts slowly in the oven, creating the signature brownie crust.
Step 4: Scoop and Bake
Using a medium cookie scoop (about 1½ tablespoons capacity) or a spoon, portion the chilled dough into rounded balls. Place them on the prepared baking sheets, leaving about 2 inches of space between each cookie. They will spread as they bake. You should get about 20–24 cookies, depending on the size of your scoop. Gently flatten each dough ball just slightly with your palm or the back of a spoon—this helps them spread evenly and creates a more uniform shape. If you like a thicker cookie, you can leave them in a rounded mound. Place the baking sheets in the preheated oven and bake for 8–10 minutes. The cookies are done when the edges are set and the tops are shiny and crackled. The centers may look slightly underdone—that’s exactly what you want. They will continue to bake from the residual heat on the baking sheet as they cool. Do not overbake, or the cookies will lose their fudgy interior and become dry. The aroma in your kitchen will be absolutely intoxicating—rich chocolate, a hint of vanilla, and that unmistakable scent of freshly baked cookies. The tops should have that beautiful crackled appearance, just like a brownie.
Step 5: Cool and Enjoy
Remove the baking sheets from the oven and let the cookies cool on the sheets for 5 minutes. They will be very soft when they first come out of the oven, but they’ll firm up as they cool. After 5 minutes, use a spatula to transfer the cookies to a wire rack to cool completely—or enjoy a few warm, when the chocolate chips are still molten and the cookie is at its gooiest. A glass of cold milk is the perfect companion. The cookies will have that classic brownie taste and texture, in a perfectly portable cookie form. They’re wonderful at room temperature, too, staying chewy and moist for days. Store any leftovers in an airtight container. The cookies also make a fantastic ice cream sandwich: simply sandwich a scoop of vanilla ice cream between two cookies and roll the edges in sprinkles or mini chocolate chips. However you serve them, these brownie mix cookies are guaranteed to be a hit. They’re the ultimate easy dessert that tastes like you spent hours, but your secret is safe with me.
Pro Tips for Perfectly Chewy Cookies Every Time
- Chill the dough. I can’t stress this enough. Chilling solidifies the fat in the dough, which prevents the cookies from spreading into flat disks in the oven. Even a brief 15-minute rest in the refrigerator makes a significant difference. The dough will be easier to scoop, and the cookies will bake up thicker, chewier, and with that beautiful, crackled top. If your kitchen is very warm, you may need to chill the dough for a bit longer. You can even chill the shaped dough balls on the baking sheet before popping them in the oven. This step is the single most important factor for achieving that perfect brownie-like texture in cookie form.
- Don’t overbake. Brownie mix cookies should be slightly underdone in the center when you pull them out of the oven. They will continue to cook on the hot baking sheet, so if they look completely set, they’re likely overbaked. The edges should be firm, but the center should look soft and slightly glossy. A toothpick inserted in the center should come out with a few moist crumbs. Overbaked cookies will be dry and crumbly rather than fudgy and chewy. Trust your instincts and the aroma—when they smell irresistible, they’re probably done. Aim for the lower end of the baking time and check them a minute or two early. It’s better to underbake slightly than to overbake.
- Use a cookie scoop for uniform size. Uniform cookies bake at the same rate, so you won’t end up with some that are underdone while others are overdone. A medium cookie scoop (about 1½ tablespoons) produces perfectly sized cookies that are thick and satisfying. The scoop also makes the process faster and less messy. If you don’t have a scoop, you can use a tablespoon, but try to keep the sizes consistent. This attention to detail makes a difference in the final presentation, especially if you’re gifting them or bringing them to a party. Uniform cookies look professional and inviting, and they stack beautifully in a container.
- Experiment with different brownie mixes. Not all brownie mixes are created equal. Some are darker and more intensely chocolatey, while others are lighter and sweeter. Try a few different brands to find your favorite. A dark chocolate or triple chocolate mix will give you a deeper, richer cookie, while a milk chocolate mix will be sweeter and more kid-friendly. You can even use a blondie mix or a red velvet brownie mix to create completely different cookies. The base recipe remains the same; just swap the mix. This is a fun way to change up the flavor without any additional work. You can even use a gluten-free brownie mix to make the cookies safe for those with gluten sensitivities.
- Add a pinch of flaky sea salt on top. Right after the cookies come out of the oven, sprinkle a tiny pinch of flaky sea salt on top of each one. The salt enhances the chocolate flavor, balances the sweetness, and adds a pleasant, crunchy texture. This simple touch makes the cookies taste gourmet, like they came from a fancy bakery. Maldon sea salt or fleur de sel are ideal, but any flaky salt will work. Just a tiny bit is all you need—you’re not trying to make the cookies salty, just to elevate the chocolate. It’s a small upgrade that makes a big impression, and once you try it, you’ll never go back.
Flavor Twists & Mix-In Ideas
Once you’ve made the classic version, try these fun variations to keep things exciting.
- Double Chocolate Chip Cookies: Fold in 1 cup of semi-sweet or dark chocolate chips. The extra chocolate chunks create pockets of melted chocolate throughout the cookie, making them even more decadent. You can use a mix of chocolate chip sizes, or even chop up a chocolate bar for irregular, gooey pockets. This is the ultimate chocolate lover’s cookie, and it’s always a hit.
- Peanut Butter Swirl Brownie Cookies: Drop small spoonfuls of creamy peanut butter onto the dough balls before baking, and use a toothpick to swirl it in slightly. The peanut butter adds a salty, nutty flavor that pairs perfectly with the chocolate. You can also add a handful of peanut butter chips. For an extra-special touch, press a mini peanut butter cup into the center of each cookie right when they come out of the oven.
- Mint Chocolate Cookies: Add ½ teaspoon of pure peppermint extract to the dough along with the eggs and oil. Fold in 1 cup of dark chocolate chips or Andes mint baking chips. The cool mint flavor is refreshing and perfect for the holidays. A drizzle of melted white chocolate over the cooled cookies adds a festive, snowy finish. These are especially popular at Christmas cookie exchanges.
- Salted Caramel Brownie Cookies: Fold in ½ cup of caramel bits or chopped soft caramels along with the chocolate chips. As the cookies bake, the caramel melts into gooey, sweet pockets. Sprinkle a little flaky sea salt on top right after baking to enhance the caramel flavor. You can also drizzle warm caramel sauce over the cooled cookies for an extra-indulgent treat.
- Mexican Hot Chocolate Cookies: Add 1 teaspoon of ground cinnamon and a pinch of cayenne pepper to the dry ingredients. The warmth of the cinnamon and the subtle heat from the cayenne enhance the chocolate flavor and give the cookies a cozy, spicy kick. Roll the dough balls in a mixture of cinnamon and sugar before baking for a sparkly, aromatic crust. These are wonderful with a cup of coffee or hot chocolate.
Serving & Gifting Ideas
These brownie mix cookies are wonderful on their own, but they also make a fantastic base for creative desserts. Crumble them over a bowl of vanilla ice cream for an instant sundae. Use two cookies to sandwich a scoop of ice cream, then roll the edges in mini chocolate chips, sprinkles, or crushed nuts for a show-stopping ice cream sandwich. They’re perfect for packing in lunchboxes, bringing to potlucks, or serving as part of a holiday cookie platter. For gifting, stack a few cookies in a clear cellophane bag, tie it with a colorful ribbon, and attach a handwritten tag with the recipe name. You can also layer them in a decorative tin with parchment paper between each layer. These cookies ship well and stay fresh for several days, making them an ideal treat to send to friends and family far away. A plate of these cookies, still slightly warm from the oven, is the ultimate gesture of love and comfort. They’re the kind of simple, homemade gift that everyone appreciates, and they’re guaranteed to bring smiles to any face.
Storage, Freezing & Make-Ahead
Make-Ahead: The cookie dough can be made up to 3 days in advance and stored, covered, in the refrigerator. When you’re ready to bake, simply scoop and bake as directed; you may need to add a minute or two to the baking time since the dough will be very cold. You can also scoop the dough into balls, freeze them on a baking sheet until solid, and then transfer them to a freezer bag. Bake directly from frozen, adding 2–3 minutes to the baking time. This is a fantastic way to have fresh, hot cookies on demand without any prep work. Having a stash of frozen dough balls in the freezer is like having a magic cookie button—perfect for unexpected guests or late-night cravings. You can bake just a few at a time, or a whole batch for a party.
Storing Baked Cookies: Store the completely cooled cookies in an airtight container at room temperature. They will stay soft and chewy for up to 5 days. To keep them extra moist, you can add a slice of bread to the container; the cookies will absorb the moisture from the bread, which can be discarded after a day. You can also store them in the refrigerator for up to a week, but bring them to room temperature before serving for the best flavor and texture. The cookies freeze well, too: layer them between sheets of parchment paper in a freezer-safe container, and freeze for up to 3 months. Thaw at room temperature or in the refrigerator. You can even enjoy them frozen—they have a wonderful, chewy, almost fudge-like texture when cold.
Want the full recipe and simple step-by-step instructions?
Page 2 continues with the full ingredients, cooking tips, and easy directions so you can make this recipe perfectly at home.