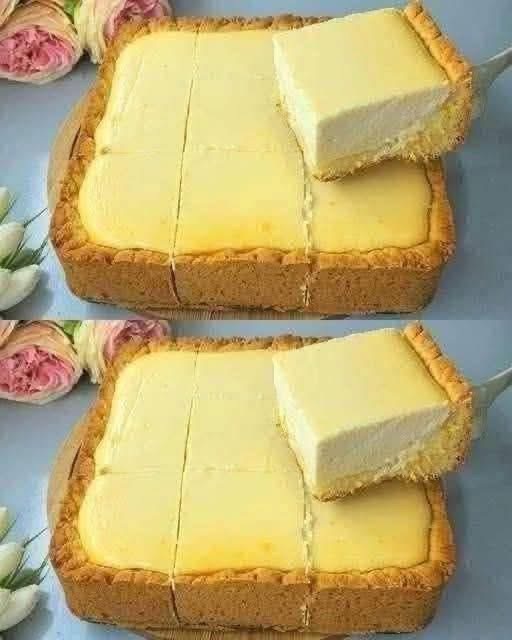
These Creamy Vanilla Cheesecake Bars have a buttery golden crust and a smooth, rich filling that melts in your mouth.
They deliver everything people love about classic cheesecake but are baked in a rectangular pan, making them easier to cut, serve, transport, and share.
The filling is lightly sweetened and flavored with vanilla and fresh lemon. Once chilled, it becomes firm enough to slice while remaining soft, creamy, and luxurious inside.
These cheesecake squares are perfect for birthdays, family dinners, holiday dessert tables, bridal showers, church gatherings, potlucks, or a simple weekend treat.
Why You Will Love These Cheesecake Bars
This recipe is easier to serve than a traditional round cheesecake.
The rectangular shape allows you to cut neat squares in different sizes, depending on how many people you are serving.
You will love these bars because they are:
Smooth and creamy inside
Made with a buttery cookie crust
Easy to slice and serve
Perfect for preparing ahead
Delicious plain or with fruit toppings
Suitable for parties and family gatherings
Rich without being overly sweet
Easier than many traditional cheesecake recipes
The bars also look elegant without requiring complicated decoration.
Recipe Information
Prep Time: 25 minutes
Bake Time: 45–55 minutes
Cooling Time: 1 hour
Chilling Time: At least 4 hours
Total Time: Approximately 6 hours
Servings: 12–16 bars
Ingredients for the Crust
2½ cups graham cracker crumbs or crushed digestive biscuits
½ cup granulated sugar
½ teaspoon ground cinnamon, optional
½ cup unsalted butter, melted
Small pinch of salt
Ingredients for the Cheesecake Filling
32 ounces full-fat cream cheese, softened
1 cup granulated sugar
1 cup sour cream
4 large eggs, at room temperature
2 teaspoons vanilla extract
1 tablespoon fresh lemon juice
1 teaspoon finely grated lemon zest, optional
2 tablespoons cornstarch or all-purpose flour
¼ teaspoon salt
Optional Toppings
Fresh strawberries
Blueberries
Raspberries
Cherry pie filling
Lemon curd
Caramel sauce
Chocolate sauce
Whipped cream
Powdered sugar
The Best Pan to Use
A 9-by-13-inch baking pan works well for these cheesecake bars.
A metal pan usually gives the crust firmer edges and may bake slightly faster.
A glass or ceramic dish also works, but the cheesecake may require a few additional minutes in the oven.
Line the pan with parchment paper, leaving extra paper over two opposite sides.
These parchment handles make it easier to lift the chilled cheesecake from the pan before cutting.
Lightly grease the pan before adding the parchment so the paper stays in place.
Why Room-Temperature Ingredients Matter
Cold cream cheese is difficult to blend smoothly.
It can leave small lumps in the filling, even after extended mixing.
Allow the cream cheese, sour cream, and eggs to sit at room temperature before beginning.
Depending on the temperature of your kitchen, cream cheese may require 45–60 minutes to soften properly.
The ingredients should not be hot.
They only need to be soft enough to combine evenly.
How to Crush the Cookies
Place the graham crackers or digestive biscuits in a food processor.
Pulse until they form fine, even crumbs.
If you do not have a food processor, place the cookies inside a strong resealable bag.
Remove most of the air and seal the bag.
Crush the cookies using a rolling pin or the bottom of a heavy cup.
Fine crumbs create a crust that holds together more effectively than large, uneven pieces.
How to Make the Cookie Crust
Preheat the oven to 325°F.
Line a 9-by-13-inch pan with parchment paper.
Place the cookie crumbs in a medium bowl.
Add the sugar, optional cinnamon, and salt.
Pour in the melted butter.
Mix until all the crumbs are evenly moistened.
The mixture should resemble wet sand and hold together when pressed between your fingers.
Transfer it to the prepared pan.
Press the crumbs firmly and evenly across the bottom.
You can also press a little crust mixture up the sides to create the raised edge shown in the finished dessert.
Use the bottom of a measuring cup or flat glass to compact the crumbs.
Pre-Bake the Crust
Bake the crust for approximately 9–10 minutes.
It should smell lightly toasted and appear slightly darker around the edges.
Remove it from the oven and allow it to cool while preparing the filling.
Pre-baking helps the crust remain firm after the cheesecake filling is added.
Do not overbake it because it will return to the oven with the filling.
How to Make the Cheesecake Filling
Place the softened cream cheese inside a large mixing bowl.
Beat it on low to medium speed until smooth.
Scrape the sides and bottom of the bowl.
Add the sugar gradually.
Continue mixing only until the sugar is combined.
Add the sour cream, vanilla extract, lemon juice, optional lemon zest, cornstarch, and salt.
Mix on low speed until smooth.
Avoid beating at very high speed because too much air can cause the cheesecake to rise dramatically and crack while cooling.
Add the Eggs Carefully
Add the eggs one at a time.
Mix briefly after each addition.
Stop mixing as soon as the final egg is incorporated.
Scrape the bowl again with a silicone spatula.
Finish folding the batter gently by hand to make sure there are no unmixed areas at the bottom.
The finished filling should look smooth, thick, and creamy.
Fill the Baking Pan
Pour the cheesecake mixture over the pre-baked crust.
Use a spatula to spread it evenly into the corners.
Gently tap the pan against the counter once or twice to release large air bubbles.
Do not tap too aggressively because the crust may crack.
Bake the Cheesecake Bars
Place the pan on the center oven rack.
Bake at 325°F for approximately 45–55 minutes.
The edges should look set.
The center should still move slightly when the pan is gently shaken.
It should wobble as one soft section rather than looking liquid.
Avoid baking until the entire center becomes completely firm.
The cheesecake will continue setting while it cools and chills.
How to Prevent Cracks
Use room-temperature ingredients.
Mix the batter gently.
Avoid beating too much air into the eggs.
Bake at a moderate temperature.
Do not overbake the center.
Allow the cheesecake to cool gradually.
A small surface crack will not affect the flavor, especially when the bars are covered with fruit, whipped cream, or another topping.
Optional Water-Bath Method
A water bath can help create a very smooth texture and reduce cracking.
Wrap the outside of the cheesecake pan securely with heavy-duty aluminum foil.
Place it inside a larger roasting pan.
Pour hot water into the outer pan until it reaches about halfway up the sides of the cheesecake pan.
Carefully transfer everything to the oven.
Bake as directed.
Avoid splashing water into the cheesecake batter.
A water bath is optional for bars, but it can create a softer, more custard-like texture.
Cool the Cheesecake Gradually
Turn off the oven.
Open the door slightly and leave the cheesecake inside for approximately 20 minutes.
Remove the pan and place it on a wire rack.
Allow it to cool at room temperature for approximately one hour.
Do not place a very hot cheesecake directly in the refrigerator.
Sudden temperature changes can create condensation and affect the texture.
Chill Before Cutting
Once the cheesecake reaches room temperature, cover the pan.
Refrigerate it for at least four hours.
Overnight chilling gives the best texture and makes the bars easier to cut.
Do not attempt to cut warm cheesecake.
The filling will be too soft and may stick to the knife.
How to Cut Clean Cheesecake Squares
Use the parchment-paper handles to lift the chilled cheesecake from the pan.
Place it on a large cutting board.
Use a sharp knife to cut the cheesecake into squares.
Dip the knife in hot water, then dry it before making each cut.
Wipe the blade clean between slices.
This method creates smooth, neat edges similar to bakery-style cheesecake bars.
Want the full recipe and simple step-by-step instructions?
Page 2 continues with the full ingredients, cooking tips, and easy directions so you can make this recipe perfectly at home.