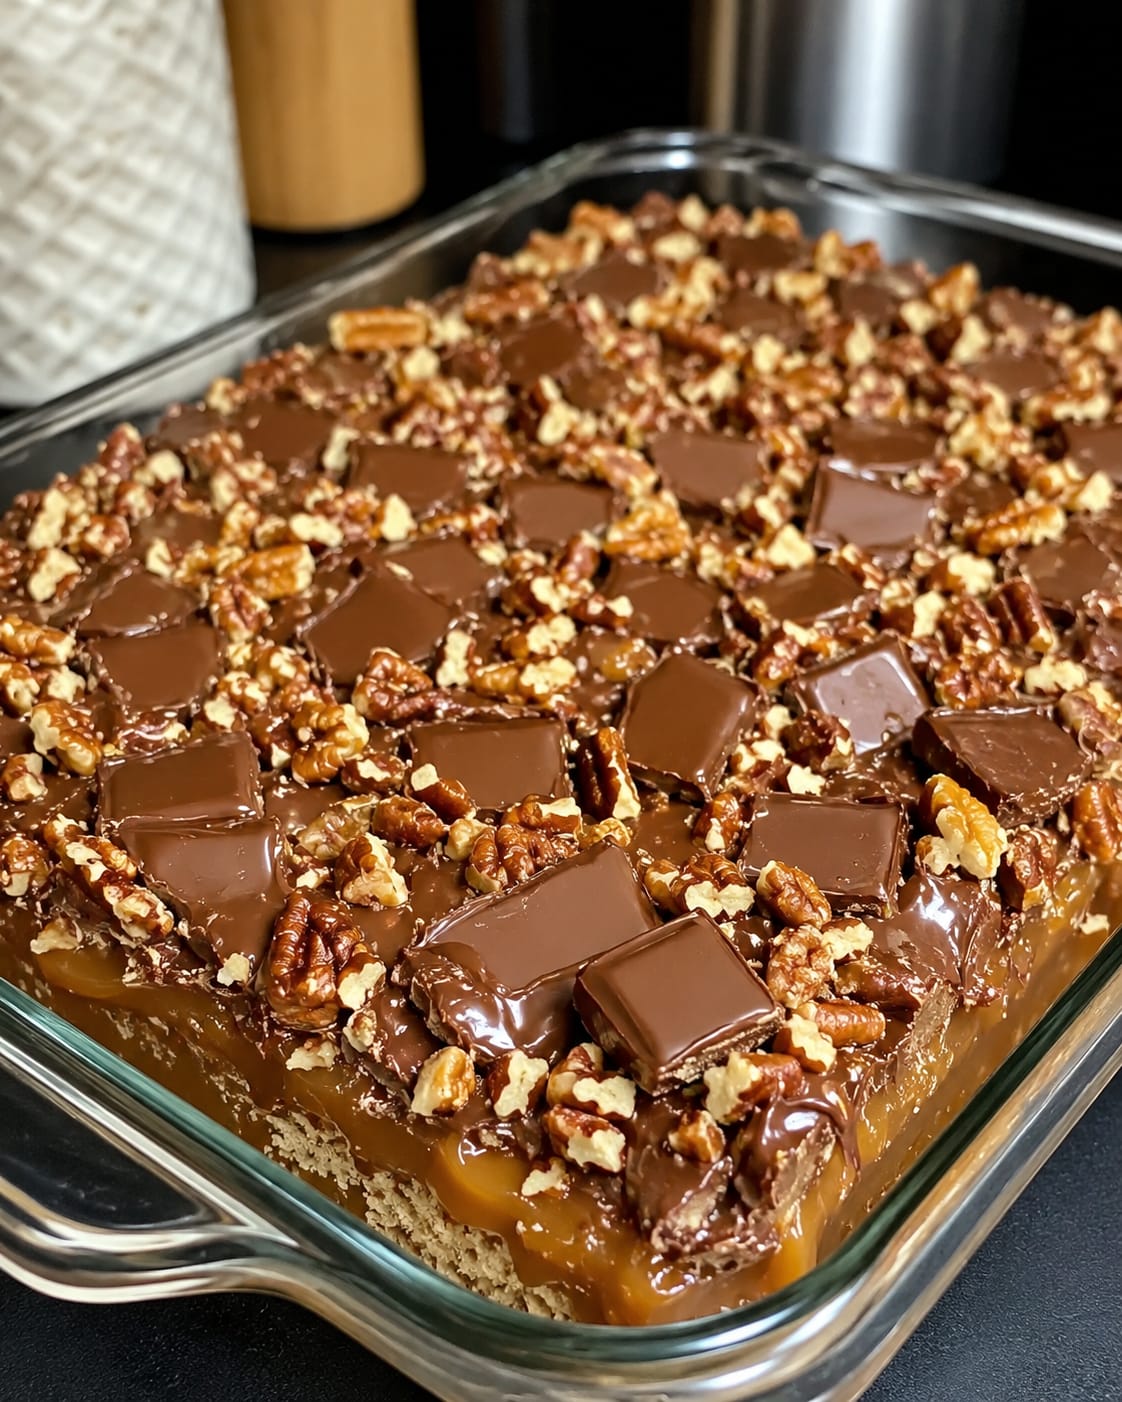
Some desserts arrive with a parade of mixing bowls, complicated techniques, and delicate timers. This Chocolate Caramel Nut Dump Cake is the exact opposite—a gloriously messy, irresistibly gooey, shockingly easy pan of pure bliss that comes together in about five minutes flat. You literally dump everything into a dish, slide it into the oven, and pull out something that tastes like a cross between a chocolate-caramel brownie, a Southern nut-studded cake, and a warm, sticky sundae topping. It’s the dessert you make when you need something spectacular without a shred of effort—the ultimate lazy baker’s secret weapon that tastes anything but lazy.
If you’ve never experienced the magic of a dump cake, prepare to be converted. A dry cake mix is sprinkled into a pan, drenched in melted butter, layered with caramel, chocolate chunks, and nuts, and then baked into a dessert that miraculously separates into a soft, pudding-like layer on the bottom and a crackly, buttery, nutty crust on top. The chocolate melts into dark, fudgy pockets, the caramel burbles into sticky rivers, and the pecans toast to crunchy perfection in the oven’s heat. A generous drizzle of sweetened condensed milk takes it over the edge into impossible richness. Every spoonful is a little different—a crunchy nut here, a gooey chocolate chip there, a ribbon of caramel everywhere.
In this deep-dive guide, we’ll walk through every step of building this indulgent masterpiece, explore the best ingredients to use for maximum flavor and texture, share clever twists and variations, and serve up all the tips for storing and reheating this glorious concoction. Whether you’re feeding a crowd at a potluck, cozying up for a family movie night, or simply need a last-minute dessert that wows, this Chocolate Caramel Nut Dump Cake is about to become your most requested recipe. Let’s get dumping.
Why You’ll Love This Dump Cake
It’s the world’s easiest dessert. No mixer, no bowls, no eggs, no creamery butter? Actually you do use melted butter, but you don’t even have to mix it into the dry mix—it gets poured over the top. The entire assembly takes about five minutes, and the result looks and tastes like you spent an afternoon in the kitchen. If you can open a box and chop some nuts, you can make this cake.
An intoxicating flavor and texture combo. We’ve got the toasty crunch of pecans, the melty richness of chocolate chunks, the deep sweetness of caramel, and that buttery, slightly crisp top layer that contrasts with the soft, almost pudding-like cake beneath. It’s all the best parts of a candy bar, a skillet cookie, and a Southern caramel cake rolled into one pan.
Completely adaptable to what’s in your pantry. Use yellow cake mix, butter cake mix, chocolate cake mix, or even spice cake mix. Swap pecans for walnuts, almonds, or a mix. Use semi-sweet chocolate, dark chocolate, or milk chocolate chips. The caramel sauce can be store-bought or homemade. And the optional sweetened condensed milk is the secret weapon for an extra layer of luscious goo. You can play with this recipe endlessly and never get bored.
A guaranteed crowd-pleaser for any occasion. Potluck? Everyone will ask for the recipe. Family dinner? It’ll be devoured before the main course is cleared. Late-night sweet craving? A corner piece eaten cold straight from the fridge is pure heaven. This dump cake is unpretentious, generous, and unbelievably satisfying—exactly what a dessert should be.
Ingredient Breakdown: The Easy Pantry Lineup
Let’s talk about each ingredient and how to choose the best ones for a truly next-level dump cake.
1. Cake Mix – The Instant Foundation
A standard 15.25-ounce box of yellow cake mix or butter cake mix is the classic choice. It provides the dry base that, when soaked with melted butter, bakes into a soft, tender cake layer. Butter cake mix adds a slightly richer, more golden flavor. For a deeper chocolate experience, use a chocolate fudge or devil’s food cake mix. Don’t prepare the batter according to the box—use it dry. The magic of a dump cake is that the dry mix absorbs the butter and caramel as it bakes, creating its own layers.
2. Melted Butter – The Golden, Buttery Crust
You’ll need ¾ cup of melted unsalted butter. The butter is drizzled over the dry cake mix, and as the cake bakes, it fries the top layer into a crunchy, golden crust while soaking down to create a moist, soft interior. Real butter is essential for the best flavor, but in a pinch, you can use melted coconut oil or a plant-based butter for a dairy-free version. Ensure the butter is melted but not sizzling hot—just warm enough to pour evenly.
3. Caramel Sauce – The Sticky, Sweet River
One cup of caramel sauce (store-bought or homemade) gets poured over the cake mix and butter, creating ribbons of sticky sweetness throughout the cake. Thick, rich caramel sauce from a jar works beautifully; look for a brand with real butter and cream for the best flavor. You can also use dulce de leche for a richer, milkier caramel note. If you have time, homemade caramel sauce takes this dessert to an even higher level, but the jarred version is 100% acceptable and what makes this cake so easy.
4. Chocolate Chunks or Chips – The Melty Pockets of Richness
One cup of chocolate chunks or semi-sweet chocolate chips. Chocolate chunks are larger and create more dramatic, fudgy pockets. Semi-sweet or dark chocolate balances the sweetness of the caramel and cake mix. Milk chocolate is sweeter and will appeal to kids. You can even chop a chocolate bar into rough pieces for a more rustic look. The chocolate melts during baking but holds its shape enough to give you distinct, gooey bites.
5. Pecans or Walnuts – The Toasty Crunch
One cup of chopped pecans or walnuts adds a necessary crunch that cuts through the gooey sweetness. Pecans are buttery, slightly sweet, and classic for Southern-inspired desserts. Walnuts have a stronger, slightly tannic bite that also works wonderfully. You can toast them beforehand for an even deeper, nuttier flavor, but they’ll toast nicely in the oven as the cake bakes. Roughly chop them so you get substantial pieces in every bite.
6. Sweetened Condensed Milk (Optional but Highly Recommended)
Half a cup of sweetened condensed milk drizzled over the top before baking creates an extra layer of gooey, caramelized richness. It sinks into the cake and forms a pudding-like layer on the bottom that is absolutely irresistible. If you want a more traditional, less-sweet dump cake, you can skip it, but it truly elevates the dessert into something special. This is the “extra gooey texture” the recipe hints at—don’t skip it if you’re after maximum decadence.
Step-by-Step: Dump, Drizzle, and Bake
This recipe is all about layering dry ingredients and drenching them in butter and caramel. There’s no mixing required—just follow these steps.
Step 1: Preheat and Prepare the Pan
Preheat your oven to 350°F (180°C). Grease a 9×13-inch baking dish generously with butter or nonstick cooking spray. This prevents the gooey caramel and melted chocolate from sticking to the sides and makes serving much easier. A glass or ceramic dish works perfectly.
Step 2: Sprinkle the Dry Cake Mix
Open the box of cake mix and sprinkle the dry powder evenly over the bottom of the greased dish. Gently shake the pan or use your fingers to spread it into an even layer. Do not add any of the ingredients listed on the box—just the dry mix.
Step 3: Drizzle with Melted Butter
Pour the melted butter evenly over the dry cake mix, trying to cover as much of the surface as possible. Don’t stir it in; the butter will soak into the mix during baking, creating pockets of rich, golden crust and some dry spots that add textural contrast. Use a spoon to drizzle it in a back-and-forth motion.
Step 4: Add the Caramel, Chocolate, and Nuts
Pour the caramel sauce evenly over the top. It doesn’t need to be perfect; it will spread as it heats. Sprinkle the chocolate chunks (or chips) and chopped pecans (or walnuts) across the surface. They should be scattered, not clumped together, so each slice gets a little of everything.
Step 5: Add the Optional Sweetened Condensed Milk
If you’re going for the ultra-gooey version, drizzle the ½ cup of sweetened condensed milk over the top now. It will sink into the layers and create an unbelievably rich, pudding-like base.
Step 6: Bake Until Bubbling and Golden
Place the dish in the preheated oven and bake for 30 to 40 minutes. Start checking at the 30-minute mark. The dump cake is done when the top is golden brown, the edges are bubbling with caramel and melted chocolate, and the center looks set (though it will still be slightly jiggly). The bubbling edges are a good sign that everything has melted and caramelized. If the top is browning too quickly, tent loosely with foil.
Step 7: Cool Before Slicing
Remove the dish from the oven and place it on a wire rack. Let it cool for at least 20 minutes before slicing. This is crucial: the caramel and chocolate will be screaming hot right out of the oven and need time to set slightly. The cake will firm up as it cools, making it much easier to serve. If you can wait 30–40 minutes, the slices will hold together better, but a 20-minute rest is the minimum.
Step 8: Serve Warm or Chilled
Scoop generous portions onto plates. The cake can be served warm, at room temperature, or even chilled from the fridge—each temperature offers a different, equally delicious experience. Warm is gooiest; chilled is fudgier and easier to slice neatly. Top with vanilla ice cream, a dollop of whipped cream, or an extra drizzle of caramel.
Pro Tips for a Perfectly Gooey Crust
- Don’t stir the butter into the cake mix. The magic of a dump cake is that the dry mix stays in pockets, some of which caramelize into crunchy bits while others soften into cake. Stirring creates a uniform batter and defeats the purpose of the “dump” method.
- Make sure your butter covers the dry mix as evenly as possible. Dry patches of cake mix won’t hydrate and can taste floury. Cut the butter into small pats and place them all over the surface, or melt it and drizzle carefully. If you see dry spots after drizzling, add a little extra melted butter or a splash of milk.
- Let it cool before digging in. The caramel and chocolate reach molten temperatures. Letting the cake rest not only prevents burnt tongues but also allows the layers to set, so you get actual slices instead of a delicious but messy puddle.
- Use a mix of chocolate chunks and chips. Chunks give you gooey, half-melted pockets, while chips distribute more evenly. The combination is ideal.
- Toast the nuts beforehand for extra flavor. Spread the chopped pecans or walnuts on a dry baking sheet and toast in the oven at 350°F for 5–7 minutes until fragrant. Let them cool slightly before adding to the cake. This simple step intensifies their nuttiness and adds crunch.
Delicious Twists & Flavor Combos
This dump cake is a blank canvas. Here are a few sensational riffs to try.
- Chocolate Lover’s Dump Cake: Use chocolate fudge cake mix, add dark chocolate chunks, and swap the caramel sauce for hot fudge sauce. Top with toasted walnuts and a drizzle of sweetened condensed milk. It’s a triple-chocolate dream.
- Salted Caramel & Almond: Use butter pecan cake mix (or yellow), sliced almonds instead of pecans, and a generous sprinkle of flaky sea salt over the caramel before baking. The salt cuts the sweetness and makes everything pop.
- Turtle Dump Cake: Follow the classic recipe but use a mix of milk chocolate and dark chocolate, double the pecans, and add an extra swirl of caramel. Serve with scoops of butter pecan ice cream for a full turtle candy experience.
- Banana Caramel Chocolate Dump Cake: Add 2 sliced bananas under the cake mix layer. They’ll soften and caramelize into the bottom of the pan, adding a fruity, creamy element that pairs perfectly with the chocolate and caramel.
- White Chocolate Macadamia Nut Dump Cake: Use a vanilla or white cake mix, white chocolate chips, and macadamia nuts. Swap the caramel sauce for a white chocolate sauce or keep the caramel for a buttery note.
Serving Ideas & Toppings
The cake is stunning on its own, but a few finishing touches turn it into a plated dessert worthy of a dinner party. A generous scoop of vanilla bean ice cream melting over the warm cake is the ultimate pairing—the cold, creamy ice cream mingles with the hot caramel and chocolate in the most divine way. Freshly whipped cream (lightly sweetened) adds an airy contrast to the dense, gooey cake. A drizzle of warm caramel sauce or chocolate ganache just before serving makes it even more decadent. For crunch, sprinkle a few extra toasted pecans on top. A light dusting of flaky sea salt on the warm cake heightens all the sweet flavors. Serve it in deep bowls or shallow plates with a spoon—a fork won’t cut it for that gooey center.
Storage, Reheating & Make-Ahead
Make-Ahead: You can assemble the entire dump cake in the baking dish (up to the point of baking) a few hours ahead. Cover and leave at room temperature if your kitchen is cool, or refrigerate. Drizzle the melted butter right before baking so the dry mix doesn’t become a pasty mess. The baked cake can also be made a day ahead; reheat before serving for the best texture.
Storing Leftovers: Cover the cooled cake tightly with plastic wrap or transfer slices to an airtight container. Store in the refrigerator for up to 5 days. The cake will become fudgier and denser as it chills—similar to a cold brownie, which is absolutely delicious in its own right.
Reheating: To bring back the gooey warmth, reheat individual portions in the microwave for 20–30 seconds, or warm the entire dish in a 300°F oven for 10–15 minutes. The toppings will re-melt and the cake will soften beautifully.
Freezing: Dump cake freezes well. Wrap the cooled cake tightly in plastic wrap and then foil, and freeze for up to 3 months. Thaw overnight in the refrigerator, then reheat in the oven. The texture may be slightly softer, but the flavor remains excellent.
Want the full recipe and simple step-by-step instructions?
Page 2 continues with the full ingredients, cooking tips, and easy directions so you can make this recipe perfectly at home.