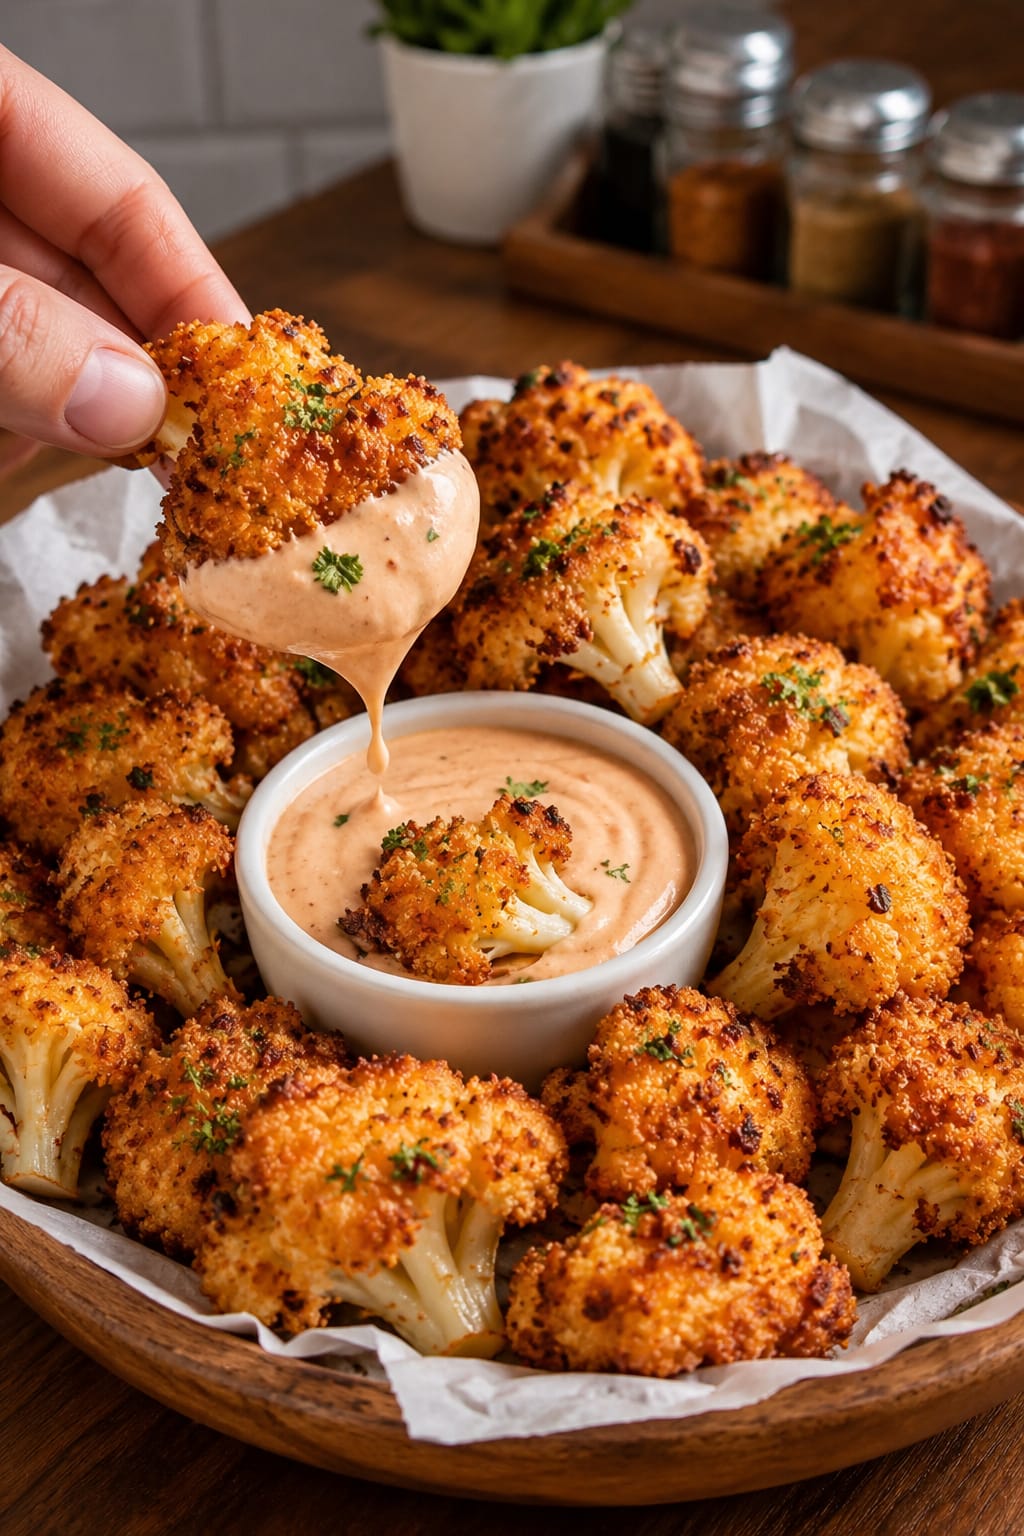
If you think cauliflower is bland, these Air Fried Crispy Cauliflower bites are about to change everything. Each golden, craggy floret emerges from the air fryer with a shatteringly crisp exterior that gives way to a tender, almost creamy center. Tossed in your favorite sauce—spicy buffalo, sticky-sweet chili, or simply seasoned with garlic and parmesan—they’re everything you crave in a crunchy appetizer, minus the heavy oil and deep-fried guilt. Whether you’re looking for a low-carb game-day snack, a healthy after-school bite, or a side dish that steals the show, this air fryer cauliflower recipe is fast, foolproof, and endlessly customizable.
The air fryer’s superpower is its ability to mimic deep frying with a fraction of the oil. That rapid, circulating hot air crisps up breaded cauliflower into nuggets that are truly crunchy—not steamed, not soggy. We’re talking about a coating that crunches audibly when you bite in, seasoned with smoky paprika, garlic, and a whisper of parmesan. And because cauliflower is naturally mild, it becomes a canvas for any flavor profile you throw at it. Buffalo, BBQ, lemon pepper, even a simple dusting of nutritional yeast for a vegan “cheesy” version—the possibilities are endless.
This guide will walk you through every step of creating the crunchiest air-fried cauliflower from scratch, including the best batter and breading techniques, seasoning secrets, sauce options, and all the tips to avoid soggy florets. Get ready to fall in love with cauliflower all over again.
Jump to:
- Why You’ll Love Air Fried Crispy Cauliflower
- Ingredient Breakdown & Breading Options
- Step-by-Step: Perfectly Crispy Every Time
- Pro Tips for Maximum Crunch
- Sauces & Seasoning Twists
- Dipping Sauces & Serving Ideas
- Storage, Reheating & Meal Prep
- Frequently Asked Questions
- Full Recipe Card
Why You’ll Love Air Fried Crispy Cauliflower
Incredibly crunchy without deep frying. The air fryer’s intense, circulating heat dehydrates the outer coating and turns it into a crispy shell, while the cauliflower inside becomes tender but not mushy. With just a light spray of oil, you achieve that golden, fried texture that’s nearly impossible in a conventional oven. This is the secret to healthy “fried” food that truly satisfies.
A blank canvas for flavors. Cauliflower’s mild flavor means it takes on whatever personality you choose. Keep it simple with salt, pepper, and parmesan for a classic crispy side. Toss it in buffalo wing sauce for a vegetarian game-day snack that rivals chicken wings. Drizzle with sweet chili sauce and lime for an Asian-inspired appetizer. The options are literally endless.
Low-carb, keto-friendly, and gluten-free options galore. By swapping all-purpose flour for almond flour or a mix of almond flour and grated parmesan, these cauliflower bites become a perfect keto snack. Without the heavy breading of traditional fried cauliflower, they fit beautifully into low-carb, paleo, and gluten-free lifestyles without sacrificing crunch.
Quick, easy, and family-friendly. From start to finish, a batch of air-fried cauliflower takes about 25 minutes. Kids who claim to hate vegetables devour these crispy, dippable bites, and they’re a brilliant way to get more vegetables on the table without a battle. Serve them with a variety of dipping sauces and watch them disappear.
Ingredient Breakdown & Breading Options
Creating the crispiest cauliflower requires a smart breading strategy. Here’s what you need and why.
The Cauliflower
You’ll need one medium head of cauliflower (about 1½ to 2 pounds), cut into uniform, bite-sized florets. Uniform size ensures even cooking. Wash and dry the florets thoroughly—excess water will make the batter slide off and create steam instead of crispiness. Pat them completely dry with a clean kitchen towel.
The Batter – The Glue That Holds the Crunch
A wet batter is essential for the dry coating to stick. A simple mixture of egg and milk (or unsweetened almond milk for dairy-free) works perfectly. For a vegan batter, use a flax egg (1 tablespoon ground flaxseed mixed with 3 tablespoons water) or a thick slurry of chickpea flour and water. The batter should lightly coat each floret; too thick and it’ll be gummy, too thin and it won’t hold the breading.
The Breading – The Crunch Factor
Here’s where you can customize based on your dietary preferences:
- Classic crispy breading: ½ cup all-purpose flour (or gluten-free flour blend), ½ cup panko breadcrumbs (panko gives the best crunch), plus seasonings. Panko is the key to that audible crackle.
- Keto / low-carb breading: Replace flour with super-fine almond flour and panko with crushed pork rinds or additional almond flour mixed with grated parmesan cheese. The cheese helps create a crispy, golden crust.
- Gluten-free breading: Use a gluten-free all-purpose flour and gluten-free panko (often made from rice). Or simply use almond flour and crushed pork rinds as in the keto version.
Seasonings
A blend of garlic powder, onion powder, smoked paprika, salt, and black pepper creates a savory, smoky foundation. Add a pinch of cayenne pepper for subtle heat. For a parmesan-herb version, add dried Italian seasoning and a generous amount of grated parmesan directly into the breading mixture.
Oil Spray
A crucial step! A light, even spray of avocado oil, olive oil, or any high-heat cooking oil over the breaded cauliflower before air frying is what makes the coating fry instead of just dry out. Don’t skip it—it’s the difference between golden crunch and pale, dusty breading.
Step-by-Step: Perfectly Crispy Every Time
This method works for any air fryer model. Follow these steps for foolproof crunchy cauliflower.
Step 1: Preheat the Air Fryer
Preheat your air fryer to 400°F (200°C) for at least 3–5 minutes. A hot basket immediately starts crisping the coating, preventing it from absorbing too much moisture. If your air fryer doesn’t have a preheat setting, simply run it empty at 400°F for 5 minutes.
Step 2: Prepare the Breading Station
Set up two bowls. In the first bowl, whisk together the egg and milk (or flax egg and water). In the second bowl, combine your flour of choice, panko (or pork rind crumbs), and all the seasonings. Mix the dry ingredients well.
Step 3: Bread the Cauliflower
Working in batches, drop a handful of dry cauliflower florets into the wet batter. Toss to coat, then lift them out, letting any excess drip off. Transfer to the dry breading mixture. Use your other hand or a fork to toss and press the breading onto each floret, making sure every nook is covered. The dry-hand/wet-hand method keeps the process clean. Place the breaded florets on a plate or wire rack until all are done.
Step 4: Spray and Arrange
Lightly spray the air fryer basket with oil to prevent sticking. Arrange the breaded cauliflower in a single layer with space between each floret. Overcrowding will cause them to steam instead of crisp. Spray the tops of the cauliflower generously with oil—this is essential for browning.
Step 5: Air Fry to Golden Perfection
Air fry at 400°F for 10 to 14 minutes, shaking the basket or flipping the florets gently halfway through. The exact time depends on the size of your florets and your air fryer model. They’re ready when the coating is deeply golden, crisp to the touch, and the cauliflower is easily pierced with a fork. If you want extra crunch, add an additional 2–3 minutes, watching closely.
Step 6: Sauce or Season Immediately
As soon as the cauliflower comes out of the air fryer, it’s ready for its flavor finish. For a dry seasoning, toss with a little more parmesan, herbs, or a pinch of finishing salt. For a saucy wing-style dish, drop the hot florets into a large bowl, drizzle your chosen sauce over them, and toss gently until coated. Serve immediately for the ultimate crunch.
Pro Tips for Maximum Crunch
- Dry the cauliflower extremely well. Any surface moisture will steam the batter from the inside out, making it gummy. After washing, lay the florets on a towel and pat them until they feel dry to the touch.
- Use panko breadcrumbs (or crushed pork rinds). Panko has a jagged, flaky shape that creates an airier, crispier texture than regular breadcrumbs. For keto, crushed pork rinds are the closest equivalent.
- Don’t skip the oil spray. A generous, even mist of oil mimics the effect of deep frying by conducting heat directly to the breading. It’s the single most important step for achieving golden color and crunch.
- Cook in a single layer, in batches if needed. Air fryers work by circulating air around the food. If the florets are touching or stacked, the areas that are blocked will remain pale and soft. It’s better to cook in two batches than to overcrowd.
- Serve immediately. Like all fried foods, air-fried cauliflower is at its peak crispiness right out of the basket. As it sits, the coating will soften from the residual steam and sauce. If you need to hold them, place them on a wire rack in a 200°F oven to stay warm and crisp for up to 20 minutes.
Sauces & Seasoning Twists
The real fun begins after air frying. Here are some flavor directions to try.
- Buffalo Cauliflower Wings: Toss hot florets in a mixture of ¼ cup melted butter and ¼ cup Frank’s RedHot sauce. Serve with ranch or blue cheese dressing, carrot sticks, and celery.
- Sweet Chili & Lime: Toss in bottled sweet chili sauce (or a low-sugar version) and a squeeze of fresh lime juice. Garnish with sesame seeds and sliced scallions.
- Garlic Parmesan: Immediately after air frying, toss with melted butter, minced fresh garlic (or roasted garlic), extra grated parmesan, and chopped fresh parsley. This is the version that converts cauliflower haters.
- BBQ Ranch: Toss with your favorite BBQ sauce and a drizzle of ranch dressing. Top with crispy fried onions or extra panko toasted in a pan.
- Everything Bagel: Skip the sauce and toss the hot florets with melted butter and a generous sprinkle of everything bagel seasoning. Dip in cream cheese or a lemony yogurt sauce.
- Spicy Gochujang Glaze: Mix gochujang (Korean chili paste), a little honey or maple syrup, soy sauce, and sesame oil. Toss the cauliflower and top with sesame seeds.
Dipping Sauces & Serving Ideas
A selection of dipping sauces turns this snack into a full-on appetizer experience. Ranch dressing, blue cheese dip, chipotle mayo, honey mustard, tzatziki, or a simple garlic aioli are all fantastic. For a lighter meal, serve the crispy cauliflower over a big salad with greens, cucumber, and a creamy dressing. It also makes an incredible side dish for grilled chicken, steak, or burgers—a healthier swap for fries that’s still undeniably crave-worthy.
Storage, Reheating & Meal Prep
Meal Prep: You can cut the cauliflower florets and mix the dry breading ingredients up to 2 days ahead. The wet batter is best made fresh. For the quickest dinner, batch-bread the cauliflower and freeze the raw, breaded florets in a single layer on a baking sheet. Once frozen, transfer to a bag. Air fry directly from frozen, adding 4–5 minutes to the cook time.
Storing Leftovers: Store leftover cooked cauliflower in an airtight container in the refrigerator for up to 3 days. The crispiness will fade, but the flavor remains excellent.
Reheating: To revive the crunch, reheat in the air fryer at 375°F for 3–5 minutes, or in a hot oven until crisp and heated through. Avoid the microwave, which will make them soft and steamy.
Want the full recipe and simple step-by-step instructions?
Page 2 continues with the full ingredients, cooking tips, and easy directions so you can make this recipe perfectly at home.