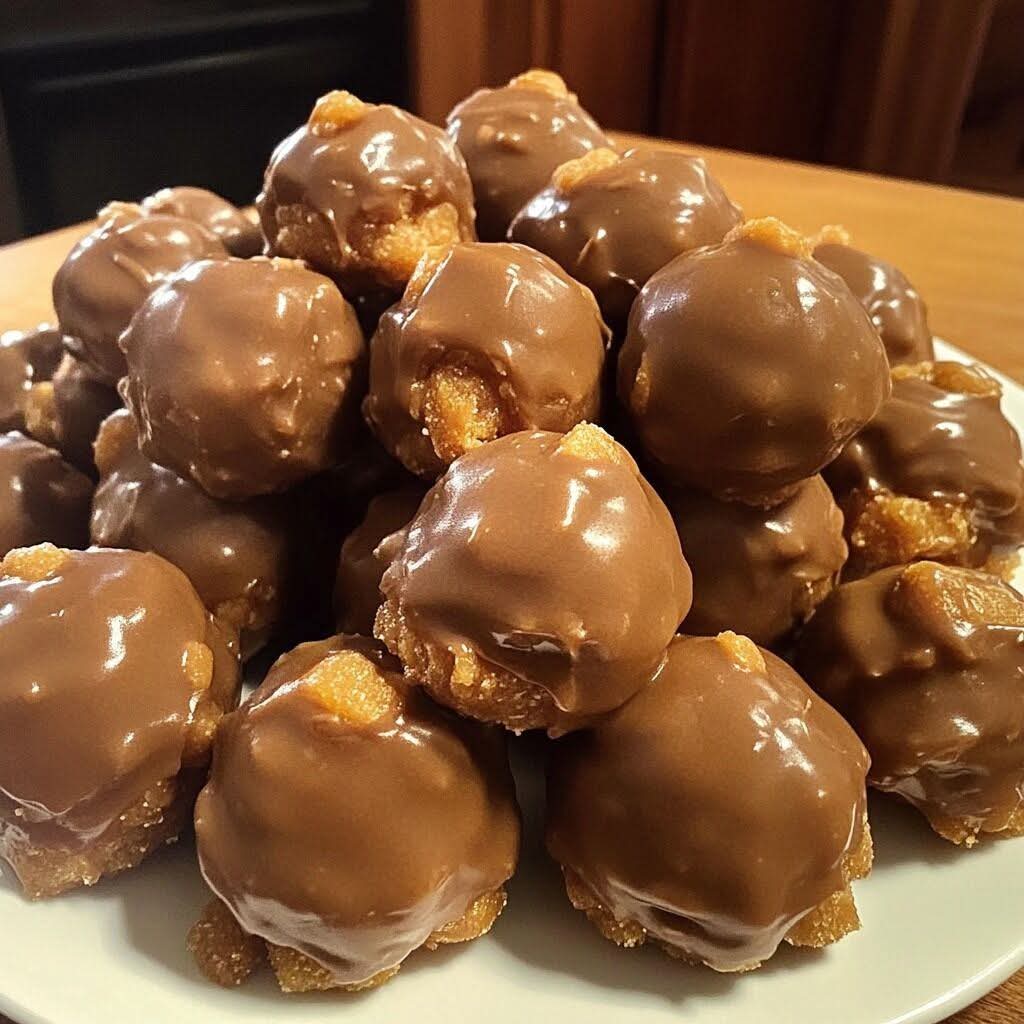
There are candies that are merely sweet, and then there are candies that are a sensation – the kind that make you close your eyes, savor every crunchy, peanut buttery, chocolatey bite, and reach for another before you’ve even finished the first. Butterfinger Balls are emphatically the latter. Imagine a creamy, peanut butter‑infused center, studded with crunchy crushed Butterfinger pieces, all enrobed in a rich, glossy chocolate coating. They’re like a deconstructed Butterfinger candy bar – but even better, because they’re homemade, customizable, and absolutely irresistible.
If you’re looking for a no‑bake treat that’s perfect for parties, holidays, or simply satisfying your sweet tooth, this recipe is about to become your new favorite. These Butterfinger Balls come together in minutes with just a handful of ingredients, no oven required, and they disappear just as fast as you can make them. They’re the perfect combination of creamy, crunchy, and chocolatey – a bite‑sized indulgence that everyone will love.
What Are Butterfinger Balls?
At their heart, these treats are a no‑bake candy that combines the classic flavors of a Butterfinger candy bar – peanut butter, chocolate, and that signature crunchy, flaky texture – into a bite‑sized, poppable ball. The base is a creamy mixture of peanut butter, cream cheese, and powdered sugar, studded with crushed Butterfinger pieces, then dipped in melted chocolate and topped with even more crushed Butterfinger. The result is a treat that’s creamy, crunchy, and utterly addictive.
This recipe falls into the category of “no‑bake desserts” and “homemade candy” – the kind of treat that’s perfect for parties, holiday cookie trays, or simply satisfying a craving. It’s a brilliant way to transform a few simple ingredients into something that looks and tastes like it came from a gourmet candy shop.
What makes this version especially brilliant is the texture contrast. The creamy, peanut butter center is perfectly complemented by the crunchy Butterfinger pieces, while the chocolate coating adds a rich, indulgent finish. Every bite is a symphony of textures and flavors.
Why You’ll Love This Recipe
There are countless reasons to fall in love with these Butterfinger Balls. Here are just a few that will have you making them on repeat:
No baking required – perfect for hot days or when you don’t want to turn on the oven.
Incredibly easy to make – just mix, roll, dip, and chill.
Simple, pantry‑friendly ingredients – nothing fancy, everything you probably already have.
Perfect for parties and holidays – they’re bite‑sized, portable, and always a hit.
Customizable – use different candy bars, add spices, or change the chocolate.
Make‑ahead friendly – they store beautifully in the fridge or freezer.
Kid‑friendly – a great recipe to make with little helpers.
Budget‑friendly – simple, affordable ingredients.
Always a crowd‑pleaser – everyone loves chocolate and peanut butter.
Beautiful presentation – they look like professional candies.
This is the treat that will make you feel like a candy maker. It’s proof that you don’t need complicated techniques to create something truly spectacular.
Ingredients for Butterfinger Balls
This recipe uses simple, flavorful ingredients that come together beautifully. Here’s what you’ll need:
Core Ingredients
8 oz cream cheese, softened
1 cup creamy peanut butter
4 cups powdered sugar
1 teaspoon vanilla extract
2 cups crushed Butterfinger candy bars (about 4–5 fun‑size bars)
12 oz semi‑sweet or dark chocolate chips
1 tablespoon coconut oil or vegetable oil (for smoother melting)
For Topping (Optional)
- Additional crushed Butterfinger – for sprinkling
- Flaky sea salt – for a sweet‑salty contrast
Ingredient Notes and Substitutions
Peanut Butter: Creamy peanut butter is ideal for a smooth center. You can use crunchy peanut butter for extra texture. Natural peanut butter works, but you may need to add a little extra powdered sugar to compensate for the oil separation.
Cream Cheese: Full‑fat cream cheese gives the richest, creamiest texture. Low‑fat cream cheese will work but may result in a slightly softer center. Make sure it’s properly softened – cold cream cheese will leave lumps.
Butterfinger Candy: This is the star of the show. You can use full‑size or fun‑size Butterfinger bars. For the best texture, crush them into small pieces – some fine crumbs and some larger chunks for crunch.
Chocolate: Semi‑sweet chocolate chips are classic, but you can use milk chocolate for a sweeter finish or dark chocolate for a more sophisticated flavor. The coconut oil helps the chocolate melt smoothly and gives it a beautiful glossy finish.
Step‑by‑Step Instructions
Follow these detailed steps to create a flawless batch of Butterfinger Balls every single time. The process is quick, easy, and virtually foolproof.
1. Prepare the Butterfinger Pieces
Place the Butterfinger bars in a zip‑top bag and crush them using a rolling pin or the back of a heavy pan. You want a mix of fine crumbs and slightly larger chunks for the best texture. Set aside about ½ cup of the crushed Butterfinger for topping.
2. Make the Candy Base
In a large mixing bowl, beat the softened cream cheese and peanut butter together until smooth and well combined. Add the powdered sugar and vanilla extract, and beat until the mixture comes together into a thick, cohesive dough. Fold in the crushed Butterfinger pieces (reserving the ½ cup for topping) until evenly distributed.
3. Chill the Mixture
Cover the bowl and refrigerate the mixture for 30–45 minutes, or until firm enough to roll into balls. Chilling is essential – it makes the mixture much easier to handle.
4. Shape the Balls
Line a baking sheet with parchment paper. Using a small cookie scoop or your hands, roll the chilled mixture into 1‑inch balls. Place them on the prepared baking sheet. If the mixture becomes too sticky, chill it for a few more minutes.
5. Chill the Balls
Place the baking sheet in the freezer for 15–20 minutes. This helps the balls firm up, making them easier to dip in chocolate.
6. Melt the Chocolate
In a microwave‑safe bowl, combine the chocolate chips and coconut oil. Microwave in 20‑second bursts, stirring between each, until the chocolate is completely melted and smooth. Alternatively, melt the chocolate using a double boiler on the stovetop.
7. Dip the Balls
Using a fork or a dipping tool, dip each chilled ball into the melted chocolate, turning to coat it completely. Allow the excess chocolate to drip off, then place the coated ball back on the parchment‑lined baking sheet. While the chocolate is still wet, sprinkle with the reserved crushed Butterfinger pieces.
8. Chill and Set
Return the baking sheet to the refrigerator for 15–20 minutes, or until the chocolate is fully set. Once set, transfer the Butterfinger Balls to an airtight container.
Expert Tips for the Perfect Butterfinger Balls
This recipe is simple, but a few expert tricks will elevate it to perfection. Here’s what I’ve learned from making these treats countless times:
Use room‑temperature cream cheese – this ensures a smooth, lump‑free mixture. Cold cream cheese won’t blend properly.
Chill the mixture thoroughly – chilling is essential for easy rolling and dipping. Don’t skip this step!
Chill the balls before dipping – this helps them hold their shape when you dip them in the warm chocolate.
Use a fork for dipping – a fork allows the excess chocolate to drip off, giving you a smoother, more even coating.
Add coconut oil to the chocolate – this helps the chocolate melt smoothly and gives it a beautiful glossy finish.
Crush the Butterfinger well – a mix of fine crumbs and larger chunks gives the best texture.
Work quickly – if the chocolate starts to thicken, reheat it in 10‑second bursts.
Use a piping bag for drizzling – if you want to drizzle extra chocolate over the top, use a piping bag or a zip‑top bag with a tiny corner snipped off.
Delicious Variations
One of the best things about this recipe is how easily it adapts to different tastes and cravings. Here are some of my favorite ways to switch it up:
Reese’s Butterfinger Balls
Use Reese’s peanut butter cups instead of Butterfinger in the center. Crush them and fold into the mixture. The combination of peanut butter cup and Butterfinger flavors is incredible.
White Chocolate Butterfinger Balls
Dip the balls in melted white chocolate instead of semi‑sweet. The white chocolate adds a sweet, creamy contrast to the peanut butter center.
Gluten‑Free Butterfinger Balls
This recipe is naturally gluten‑free – just make sure your Butterfinger bars are gluten‑free (most are).
Salted Caramel Butterfinger Balls
Add ½ teaspoon of flaky sea salt to the peanut butter mixture. The salt enhances the sweetness and adds a wonderful contrast.
Crunchy Butterfinger Balls
Use crunchy peanut butter instead of creamy. The extra crunch adds another layer of texture.
Dark Chocolate Butterfinger Balls
Use dark chocolate chips (70% cacao) for a more sophisticated, less sweet finish. The dark chocolate pairs beautifully with the sweet peanut butter center.
Dairy‑Free Butterfinger Balls
Use dairy‑free cream cheese and dairy‑free chocolate chips. The rest of the ingredients are naturally dairy‑free.
Serving Suggestions
These versatile treats can be served in a variety of ways, making them perfect for any occasion:
On a dessert platter – they look beautiful arranged on a platter with other homemade candies.
As a party favor – package them in cellophane bags tied with ribbon for a thoughtful homemade gift.
For holidays – they’re perfect for Christmas, Easter, Valentine’s Day, or Halloween.
For game day – these bite‑sized treats are perfect for snacking during the big game.
With a cup of coffee – the rich chocolate and peanut butter pair beautifully with coffee.
As a snack – enjoy them straight from the fridge!
For potlucks – these treats travel well and are always a hit.
Storage and Reheating Guidelines
These treats store beautifully, making them a fantastic make‑ahead option.
Refrigeration: Store in an airtight container in the refrigerator for up to 2 weeks. They’re delicious cold or at room temperature.
Freezing: These Butterfinger Balls freeze beautifully. Place them in a freezer‑safe container, separating layers with parchment paper, and freeze for up to 2 months. Thaw in the refrigerator or at room temperature.
Pro tip: If the chocolate becomes slightly cloudy or bloomed (white spots), it’s purely cosmetic – the flavor is completely unaffected. Let them come to room temperature before serving for the best texture.
Want the full recipe and simple step-by-step instructions?
Page 2 continues with the full ingredients, cooking tips, and easy directions so you can make this recipe perfectly at home.