Frequently Asked Questions
Can I use natural peanut butter instead of conventional?
You can, but the filling may be softer, oilier, and more difficult to roll. Natural peanut butter lacks the stabilizers that keep conventional peanut butter thick and homogeneous. To compensate, make sure the peanut butter is very well stirred, and add an extra ¼ cup of powdered sugar or a few tablespoons of graham cracker crumbs to absorb excess oil. Refrigerating the dough before rolling also helps. The balls may spread slightly more and need a firmer chill before dipping. The flavor will be delicious, but the texture will be slightly different.
Why did my chocolate coating crack after setting?
Cracking can happen if the chocolate coating was too thick, or if the balls were too cold when dipped and then brought to a warm room too quickly. The rapid temperature change causes the chocolate to contract and expand unevenly. To prevent this, let the dipped balls set at cool room temperature rather than in the fridge. A thin, even coating is less prone to cracking than a thick one. Adding coconut oil to the chocolate helps it remain slightly more flexible. If cracks appear, they’re purely cosmetic and won’t affect the taste. You can drizzle extra chocolate over the cracks for a decorative cover-up.
Can I make these peanut butter balls without the crispy rice cereal?
Absolutely. The cereal adds a light crunch that many people love, but if you prefer a completely smooth, velvety filling, simply omit it. The balls will be slightly denser and creamier. No other adjustments are needed. You can also substitute an equal amount of crushed vanilla wafers, graham cracker crumbs, or even quick oats for a different kind of texture. Each variation has its own charm, and the classic plain version is just as beloved.
How do I get the chocolate coating to be smooth and shiny?
The coconut oil or shortening added to the chocolate helps create a glossy finish, but the key is to melt the chocolate gently and avoid getting any water in it. Even a drop of water can cause the chocolate to seize and become dull. Stir the chocolate until it’s perfectly smooth, and let it cool slightly so it’s not too thin. Dipping cold balls also helps the chocolate set quickly with a smooth surface. If you want a truly professional shine, you can temper the chocolate using a thermometer, but for a home recipe, the coconut oil method produces a beautiful, glossy finish with minimal effort.
Can I make these dairy-free?
Yes. Use a plant-based butter (like Earth Balance) and dairy-free chocolate chips. Ensure your powdered sugar is vegan if needed. The rice cereal may need to be checked for dairy; many store-brand crispy rice cereals are dairy-free. The filling will be slightly softer due to the different fat content in plant-based butter, so you may want to chill the dough a bit longer before rolling. The final result is still deliciously creamy and chocolatey, and no one will miss the dairy.
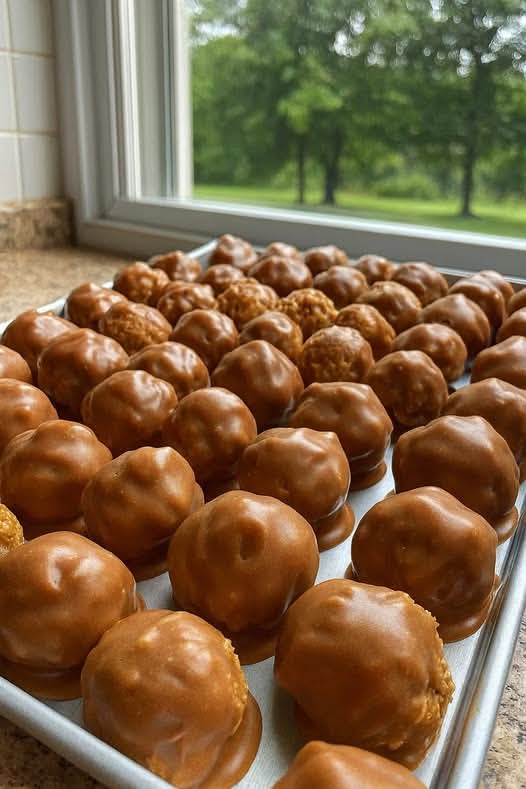
Grandma’s Peanut Butter Balls
A classic no-bake candy with a creamy, crunchy peanut butter filling dipped in smooth chocolate. The beloved recipe that’s been passed down for generations—perfect for holidays, gifting, and everyday cravings.
Prep Time:
30 minutes
Chill Time:
1–2 hours (includes freezing)
Total Time:
About 2 hours
Yield:
30–36 balls
Ingredients
- 1 cup creamy peanut butter (conventional, like Jif or Skippy)
- ½ cup (1 stick) unsalted butter, softened to room temperature
- 3–3½ cups powdered sugar (plus more for hands if needed)
- 1 teaspoon vanilla extract
- Pinch of salt (if using unsalted peanut butter)
- 1 cup crispy rice cereal (such as Rice Krispies), optional
- 12 oz semi-sweet chocolate chips (about 2 cups)
- 1 tablespoon coconut oil or vegetable shortening
- Optional toppings: flaky sea salt, crushed peanuts, sprinkles, melted white chocolate for drizzling
Instructions
- Make the filling: In a large bowl, beat the softened butter until smooth. Add the peanut butter and beat until well combined and fluffy. Gradually mix in 3 cups of powdered sugar, vanilla, and a pinch of salt. If using, gently fold in the crispy rice cereal by hand. The dough should be thick and pliable; if too soft, add more powdered sugar. If too dry, add a teaspoon of milk.
- Roll into balls: Line a baking sheet with parchment paper. Using a tablespoon or small cookie scoop, portion the dough and roll into 1-inch balls. Place on the sheet. Freeze for 30 minutes to 1 hour, or refrigerate for at least 2 hours, until the balls are very firm and cold.
- Melt the chocolate: In a microwave-safe bowl, combine the chocolate chips and coconut oil. Microwave in 30-second bursts, stirring between each, until melted and smooth. Let cool for 2–3 minutes.
- Dip the balls: Using a fork, dip each cold peanut butter ball into the melted chocolate, letting excess drip off. Place back on the parchment-lined sheet. Sprinkle with any desired toppings while the chocolate is still wet.
- Set the chocolate: Let the balls sit at room temperature until the chocolate is fully set, about 1 hour. You can refrigerate them for 15–20 minutes to speed this up. Store in an airtight container at room temperature or in the fridge.
Notes
- For the best texture, use a conventional creamy peanut butter. Natural peanut butter can make the filling soft and oily; if using, add extra powdered sugar and chill well.
- The crispy rice cereal is optional but adds a wonderful light crunch. For a smooth filling, omit it—the balls will be denser and creamier.
- Store in an airtight container at room temperature for up to 1 week, in the fridge for up to 2 weeks, or freeze for up to 3 months. Enjoy straight from the freezer for a firmer treat.
- To make keto, use powdered erythritol, sugar-free peanut butter, and sugar-free chocolate chips. For vegan, use plant-based butter and dairy-free chocolate.
These Grandma’s Peanut Butter Balls are more than just a candy—they’re a connection to the past, a taste of childhood, and a simple pleasure that brings people together. Whether you make them for Christmas, a birthday, or just because, they carry with them the warmth and love of a grandmother’s kitchen. Roll a batch, share them generously, and start a new tradition that will be remembered for generations.