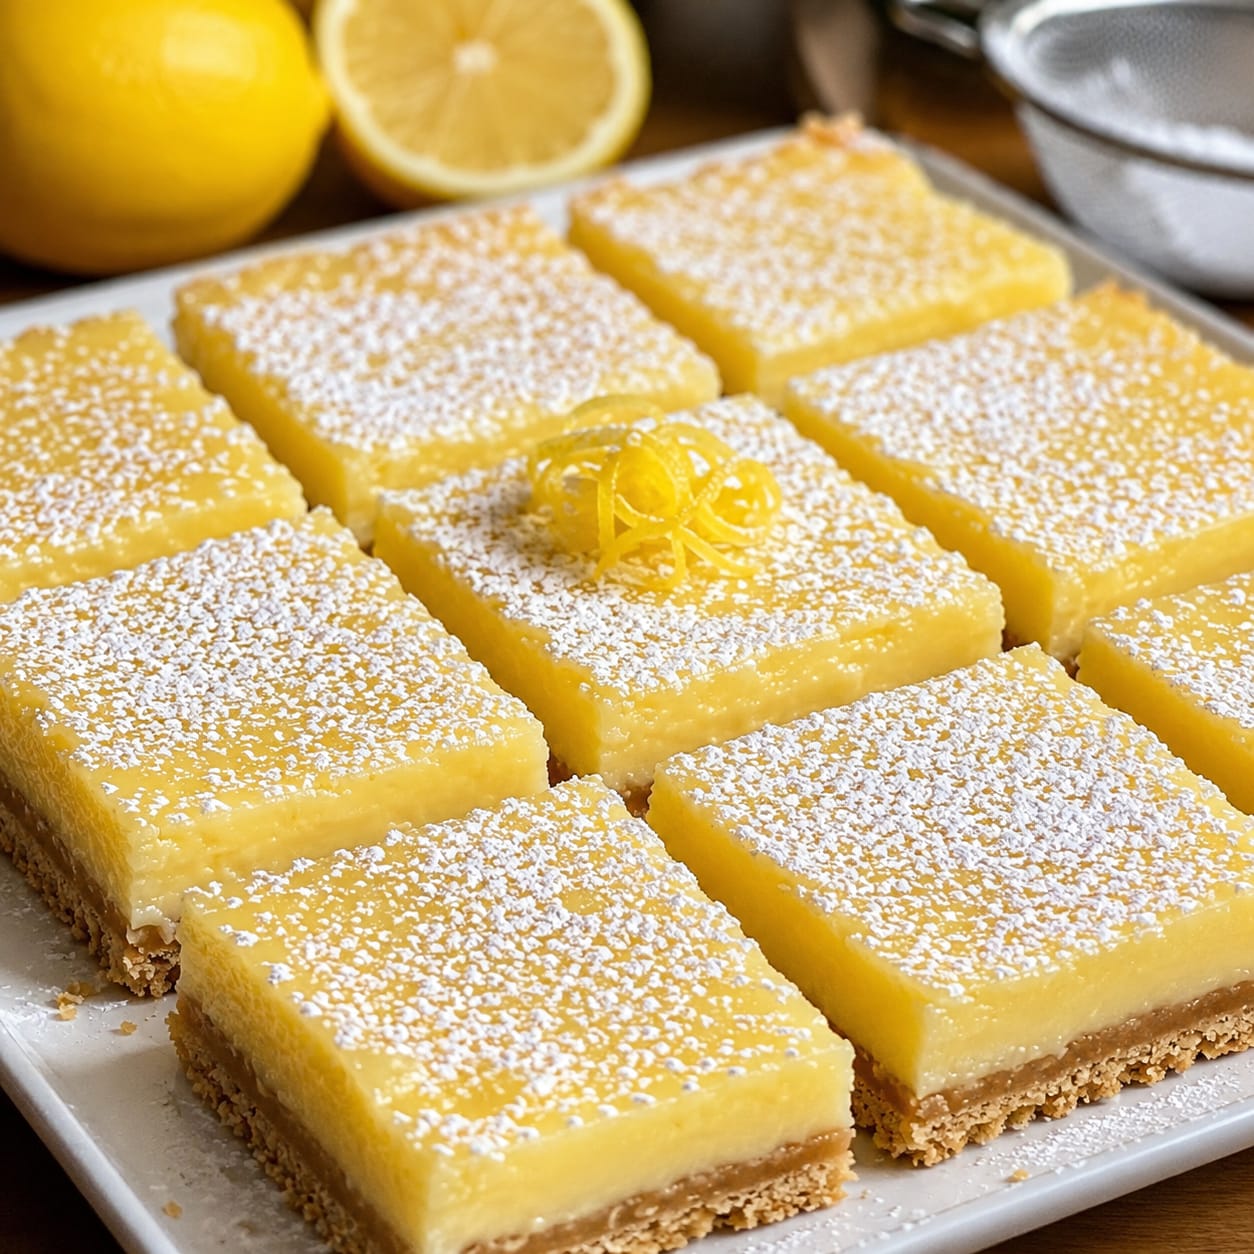
If sunshine had a flavor, it would be lemon—bright, tangy, and undeniably cheerful. These Keto Creamy Lemon Squares capture that sunny essence in a perfectly low-carb, sugar-free dessert that’s part silky cheesecake bar, part classic lemon bar, and entirely irresistible. A buttery, tender almond flour shortbread crust cradles a luscious, creamy lemon filling that’s rich with cream cheese, fragrant with fresh lemon zest, and sweetened just enough to let the citrus shine. Each bite melts on your tongue with a velvety texture and a clean, refreshing finish that doesn’t weigh you down. They’re the ultimate warm-weather treat, a potluck showstopper, or a little square of brightness on a gray day. Zesty, creamy, and delightfully keto—these lemony squares are a tangy treat for your taste buds. Bake, indulge, and savor the keto sunshine! 🍋🍰
Traditional lemon bars rely heavily on granulated sugar and all-purpose flour, making them a carb-heavy indulgence that’s off-limits for anyone following a keto or low-carb lifestyle. This recipe reimagines the classic with smarter ingredients that don’t sacrifice flavor or texture. The crust is a simple press-in mixture of super-fine almond flour, butter, and a powdered keto sweetener, which bakes into a golden, shortbread-like base that’s sturdy enough to hold its shape when sliced. The filling is a luscious blend of cream cheese and heavy whipping cream, whipped together with eggs, fresh lemon juice, lemon zest, and a touch of vanilla—no flour, no starch, just pure, creamy citrus bliss. As it bakes, the filling sets into a soft, custard-like layer that’s smooth and tangy, with a texture somewhere between a lemon cheesecake and a lemon curd. After a thorough chill, the squares slice cleanly and hold their shape beautifully, making them perfect for serving at parties, packing in lunchboxes, or enjoying as an afternoon pick-me-up with a cup of tea.
In this in-depth guide, we’ll explore every detail of creating these dreamy keto lemon squares: from the best keto sweeteners to use for a smooth, non-gritty texture, to the secrets of a perfectly set filling that doesn’t crack, to creative variations that let you customize the recipe to your taste. You’ll find make-ahead instructions, storage tips, and all the little tricks that ensure your lemon squares turn out beautifully every single time. Let’s preheat the oven and fill the kitchen with the scent of fresh lemons and butter—your new favorite keto dessert is just a few steps away.
Why You’ll Love These Keto Lemon Squares
Truly low-carb and keto-friendly. With an almond flour crust and a filling sweetened with a powdered keto sweetener (like erythritol or monk fruit), each square contains only about 3–4 grams of net carbs. They’re completely sugar-free, gluten-free, and grain-free, making them suitable for a wide range of dietary needs. They prove that you can enjoy a classic, tangy lemon dessert without the sugar spike.
Incredibly creamy, with a perfect balance of sweet and tangy. The combination of cream cheese, heavy cream, and eggs creates a filling that’s silky and rich, like the center of a lemon cheesecake. The fresh lemon juice and zest provide a bright, zesty punch that cuts through the richness, while the vanilla rounds everything out. They’re not overly sweet—just perfectly balanced, with the lemon flavor front and center.
Easy to make with simple techniques. No water bath, no complicated steps. The crust is pressed into the pan and pre-baked for a few minutes. The filling is mixed in a single bowl and poured right over the hot crust. After a short bake, the squares chill in the refrigerator until set. It’s a straightforward, nearly foolproof recipe that yields impressive, bakery-quality results.
Make-ahead friendly and perfect for sharing. These squares actually improve after a night in the fridge, as the flavors meld and the texture firms up. You can make them a day or two ahead of a party or gathering, cutting your day-of stress. They travel well and look beautiful on a platter, dusted with powdered sweetener and topped with lemon zest. They’re destined to become your signature keto dessert.
Ingredient Deep Dive: The Zesty Keto Cast
Each ingredient plays a specific role in creating that perfect balance of buttery crust and creamy, tangy filling. Let’s break them down.
The Almond Flour Crust – Buttery and Tender
You’ll need 1½ cups of super-fine blanched almond flour, ¼ cup of melted butter, and 2 tablespoons of powdered keto sweetener. Almond flour provides a sturdy, grain-free base with a pleasantly nutty flavor that complements the lemon. Super-fine almond flour is essential—coarse almond meal will create a gritty, crumbly crust. The melted butter binds the crust together and adds richness; you can substitute coconut oil for a dairy-free version, though the flavor will change slightly. The sweetener just balances the savory notes. Press the mixture firmly into a parchment-lined 8×8-inch pan to create an even, compact layer. Pre-baking the crust for 10–12 minutes before adding the filling ensures it stays crisp and doesn’t become soggy. The crust will be lightly golden and set when it comes out of the oven.
Cream Cheese and Heavy Cream – The Creamy Foundation
The filling uses 8 ounces of full-fat cream cheese, softened to room temperature, and ¼ cup of heavy whipping cream. The cream cheese provides the dense, creamy body and a subtle tang that echoes the lemon. Full-fat is crucial for the richest texture and to prevent the filling from being watery. Softening it well ensures a smooth, lump-free batter. The heavy cream adds extra richness and helps create that soft, custard-like consistency. It also lightens the filling just a touch, so it’s not as dense as a pure cheesecake. Both ingredients should be at room temperature for the smoothest blend. For a dairy-free version, use a plant-based cream cheese and coconut cream, though the texture will differ.
Eggs – The Structure and Set
Two large eggs, at room temperature, give the filling structure and allow it to set into a sliceable square. They also contribute to the custard-like texture. It’s important to add the eggs one at a time, mixing on low speed just until incorporated. Overbeating the eggs can incorporate too much air, which may cause the filling to puff up and then crack as it cools. A gentle hand at this stage yields a smooth, dense, creamy result.
Powdered Keto Sweetener – Smooth, No-Grit Sweetness
You’ll need ½ cup of a powdered erythritol-based or monk fruit sweetener. Powdered is critical because it dissolves completely into the filling, leaving no gritty texture. If you only have granulated sweetener, blitz it in a blender or coffee grinder until it becomes a fine powder. The sweetener is split between the crust and the filling. Taste the filling before baking and adjust—some prefer a bit more or less sweetness, but keep in mind the tang from the lemon will mellow slightly during baking. A few drops of liquid stevia can be added if you like an extra sweet kick without adding more bulk.
Fresh Lemon Juice and Zest – The Sunshine Flavor
The zest of 2 lemons and ⅓ cup of fresh lemon juice (from about 2–3 lemons) are the stars of the show. The zest contains the essential oils that carry the intense lemon perfume; don’t skip it. Rub the zest into the sweetener with your fingertips before adding it to the filling to release those oils even more. Freshly squeezed lemon juice is a must—bottled juice has a muted, sometimes metallic flavor. The acidity of the lemon helps set the filling, similar to a key lime pie. For a slightly milder lemon flavor, reduce the juice to ¼ cup; for an extra pucker, go up to ½ cup, but the filling may be softer.
Vanilla Extract and a Pinch of Salt – Flavor Balancers
A teaspoon of vanilla extract adds warmth and rounds out the sharp lemon notes. A tiny pinch of salt enhances the sweetness and brightens the overall flavor. These small additions make a noticeable difference. You can also add a few drops of lemon extract for an even more intense lemon punch, though it’s optional.
Step-by-Step: Baking the Perfect Lemon Squares
This recipe is simple, but following the steps in order ensures a crust that stays crisp and a filling that sets beautifully without cracks. Let’s get started.
Step 1: Preheat and Prepare the Pan
Preheat your oven to 350°F (175°C). Line an 8×8-inch square baking pan with parchment paper, leaving a little overhang on two opposite sides for easy lifting. Lightly grease the parchment with butter or nonstick spray.
Step 2: Make the Crust
In a medium bowl, combine the almond flour, 2 tablespoons of powdered sweetener, and the melted butter. Stir with a fork until the mixture resembles damp sand and holds together when squeezed. Dump the mixture into the prepared pan and press it firmly and evenly into the bottom. Use the flat bottom of a glass or measuring cup to compact it well. Pre-bake the crust for 10–12 minutes, until the edges are just beginning to turn golden. Remove from the oven and let it cool slightly while you make the filling. Keep the oven on.
Step 3: Make the Creamy Lemon Filling
In a large mixing bowl, beat the softened cream cheese with a hand mixer on medium speed until completely smooth and creamy. Add the remaining 6 tablespoons of powdered sweetener (remember you used 2 tablespoons in the crust) and the lemon zest. Beat until the sweetener is fully incorporated. Add the eggs, one at a time, beating on low speed just until combined after each addition. Do not overbeat. Mix in the heavy cream, lemon juice, vanilla extract, and a tiny pinch of salt. The batter should be smooth and pourable. Scrape down the sides and give it a final gentle stir by hand to ensure everything is mixed.
Step 4: Pour and Bake
Pour the filling over the pre-baked crust, using a spatula to spread it evenly. Gently tap the pan on the counter a few times to release any air bubbles. Place the pan in the oven and bake for 22–28 minutes. The filling will be mostly set with a slight jiggle in the center—it will continue to set as it cools. The edges should be puffed and just beginning to pull away from the sides. Do not overbake, or the filling can crack and become rubbery. If you notice the top browning too quickly, tent loosely with foil.
Step 5: Cool and Chill Thoroughly
Remove the pan from the oven and place it on a wire rack to cool completely to room temperature, about 1 hour. Then transfer the pan to the refrigerator and chill for at least 4 hours, preferably overnight. The chilling time is essential for the filling to fully set and achieve that dense, creamy texture that slices cleanly. Cutting too soon will result in a soft, messy square.
Step 6: Slice and Serve
Once fully chilled, use the parchment overhang to lift the entire block out of the pan. Place it on a cutting board. Using a sharp, thin-bladed knife, cut into 16 small squares, wiping the knife clean between cuts for neat edges. Dust the tops with a light sifting of powdered sweetener, and garnish with additional lemon zest, a tiny slice of lemon, or a few fresh berries if desired. Serve cold, straight from the fridge. The squares will soften at room temperature, so keep them chilled until shortly before enjoying.
Pro Tips for a Smooth, Crack-Free Filling
- Use room-temperature ingredients. Cold cream cheese will leave lumps, and cold eggs won’t incorporate evenly. Let everything sit on the counter for about 30–45 minutes before you begin. This ensures a silky-smooth batter.
- Don’t overmix after adding the eggs. Overbeating incorporates too much air, which can cause the filling to rise dramatically in the oven and then collapse and crack as it cools. Mix on low speed just until each egg is blended in. A few gentle folds with a spatula at the end help eliminate large air pockets.
- Bake until just set with a slight jiggle. The center should wobble slightly when you gently shake the pan, but the edges should be firm. Overbaking dries out the filling and can cause cracking. The residual heat will finish setting the center as it cools.
- Cool gradually and chill thoroughly. Don’t rush the cooling process. Let the pan cool on the counter before refrigerating; a drastic temperature change can cause cracks. The long chill in the fridge is what gives these squares their firm, sliceable texture.
- Use powdered sweetener for a smooth mouthfeel. Granular sweetener will remain crunchy and unpleasant. If you only have granulated, blend it into a fine powder first. This is the single most important tip for the filling’s texture.
Flavor Twists & Customizations
Once you’ve mastered the classic lemon version, try these fun variations to mix things up.
- Lime Cheesecake Squares: Swap the lemon juice and zest for lime. Add a teaspoon of lime zest and ⅓ cup of fresh lime juice. For an extra tropical twist, stir a teaspoon of coconut extract into the filling and top with toasted coconut flakes.
- Raspberry Lemon Squares: Before baking, drop small dollops of sugar-free raspberry jam onto the filling and swirl with a knife. The raspberry and lemon combination is classic and gorgeous. Add a few fresh raspberries on top before serving.
- Lemon Blueberry Cheesecake Bars: Fold in ½ cup of fresh blueberries (tossed in a tiny bit of almond flour to prevent sinking) before pouring the filling over the crust. The berries burst during baking, creating pockets of juicy sweetness. A lovely variation for summer.
- Lavender Lemon Squares: Add 1 teaspoon of dried culinary lavender to the sweetener and rub together to release the oils before mixing. The floral notes pair beautifully with the lemon and create a sophisticated, tea-party-worthy dessert.
- Chocolate Swirl Lemon Squares: Melt 2 ounces of sugar-free dark chocolate and drizzle it over the filling before baking, then swirl with a knife. The chocolate and lemon combination is surprisingly divine—rich and bright all at once.
Serving & Presentation Ideas
These lemon squares are gorgeous on their own, but a few simple touches make them stunning. Dust them generously with powdered sweetener through a fine-mesh sieve for a snowy, elegant look. Top each square with a small rosette of freshly whipped cream and a tiny lemon zest curl. Arrange them on a platter with fresh berries—blueberries and raspberries complement the yellow beautifully. For a party, serve them in mini cupcake liners for easy grabbing. A drizzle of sugar-free white chocolate or a sprinkle of toasted sliced almonds adds a gourmet touch. Serve with herbal tea, iced coffee, or a glass of sparkling water with a lemon slice for a refreshing pairing. These squares are also wonderful as a light dessert after a heavy meal, as they’re rich but not overly dense, and the lemon cleanses the palate.
Storage, Make-Ahead & Freezing
Make-Ahead: These squares are ideal for making ahead. They need at least 4 hours to chill, but overnight is even better. You can bake them 2 days in advance and keep them covered in the refrigerator. The flavor deepens and the texture becomes even creamier. Simply garnish just before serving.
Storing: Store leftover squares in an airtight container in the refrigerator. They will keep for up to 5 days. Keep them cold, as they soften quickly at room temperature. For the best presentation, add any powdered sweetener dusting just before serving, as it can dissolve into the surface over time.
Freezing: These squares freeze beautifully. Place the completely cooled and chilled squares on a parchment-lined tray and freeze until solid. Then transfer them to a freezer-safe container with parchment between layers. Freeze for up to 3 months. Thaw in the refrigerator overnight, or enjoy them partially frozen for a lemon cheesecake ice-cream-like treat. The texture remains excellent after thawing.
Want the full recipe and simple step-by-step instructions?
Page 2 continues with the full ingredients, cooking tips, and easy directions so you can make this recipe perfectly at home.