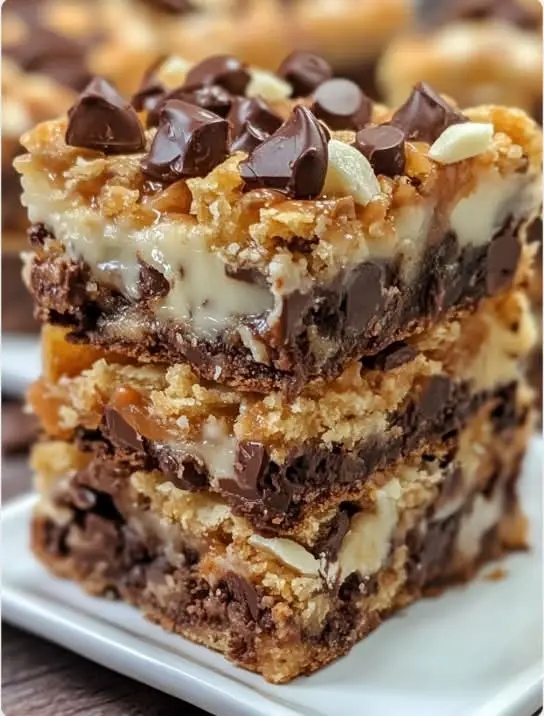
There are desserts that are merely sweet, and then there are desserts that are pure nostalgia – the kind that transport you back to childhood bake sales, family reunions, and holiday gatherings where the cookie tray was always the center of attention. 7 Layer Magic Cookie Bars are emphatically the latter. Imagine a buttery graham cracker crust, a gooey layer of sweetened condensed milk, and a treasure trove of chocolate chips, butterscotch chips, shredded coconut, and crunchy pecans – all baked to golden, caramelized perfection. It’s the kind of treat that’s impossibly easy to make, yet always disappears in minutes.
If you’re looking for a dessert that’s quick, impressive, and guaranteed to be a hit, this recipe is about to become your new favorite. With just a handful of ingredients and a simple layering technique, you can create a bar cookie that’s rich, chewy, and absolutely addictive. They’re perfect for bake sales, potlucks, holiday cookie trays, or simply enjoying with a glass of cold milk.
What Are 7 Layer Magic Cookie Bars?
At their heart, Magic Cookie Bars are a layered, no‑mix dessert bar that’s built in a single pan, without any mixing bowls or complicated techniques. The layers are simple: a buttery graham cracker crust, a drizzle of sweetened condensed milk, and a generous scattering of chocolate chips, butterscotch chips, shredded coconut, and nuts. As they bake, the sweetened condensed milk caramelizes and binds everything together into a chewy, gooey, utterly irresistible treat.
This recipe falls into the category of “vintage desserts” and “potluck classics” – the kind of recipe that’s been passed down through generations, appearing in community cookbooks and on holiday tables for decades. The beauty of this recipe is its simplicity – no mixing bowls, no electric mixers, just layer and bake.
What makes this version especially brilliant is the balance of textures and flavors. The buttery, crumbly crust provides a sturdy base, the sweetened condensed milk creates a gooey, caramel‑like layer, the chocolate and butterscotch chips add bursts of sweetness, the coconut adds a chewy texture, and the nuts provide a satisfying crunch. Every bite is a perfect combination of sweet, salty, chewy, and crunchy.
Why You’ll Love This Recipe
There are countless reasons to fall in love with these 7 Layer Magic Cookie Bars. Here are just a few that will have you making them on repeat:
- Incredibly easy – no mixing bowls, no electric mixers, just layer and bake.
- Minimal ingredients – just 7 simple ingredients that you probably already have.
- Perfect for any occasion – bake sales, potlucks, holidays, or a simple treat.
- Kid‑friendly – a great recipe to make with little helpers.
- Customizable – swap the chips, change the nuts, or add different toppings.
- Make‑ahead friendly – they store beautifully.
- Freezer‑friendly – perfect for stocking your freezer.
- Always a crowd‑pleaser – everyone loves these chewy, gooey bars.
- Naturally gluten‑free option – use gluten‑free graham crackers.
- Nostalgic and comforting – a vintage recipe that never goes out of style.
This is the recipe that will make you the hero of any bake sale. It’s proof that you don’t need complicated techniques to create something truly delicious.
Ingredients for 7 Layer Magic Cookie Bars
This recipe uses simple, wholesome ingredients that come together beautifully. Here’s what you’ll need:
Core Ingredients
- 1½ cups graham cracker crumbs
- ½ cup unsalted butter, melted
- 1 can (14 oz) sweetened condensed milk
- 1 cup semi‑sweet chocolate chips
- 1 cup butterscotch chips
- 1½ cups sweetened shredded coconut
- 1 cup chopped pecans or walnuts
Ingredient Notes and Substitutions
Graham Cracker Crumbs: You can buy pre‑crushed graham cracker crumbs or crush your own. For a gluten‑free version, use gluten‑free graham crackers.
Butter: Unsalted butter is preferred so you can control the salt level. For a dairy‑free version, use vegan butter.
Sweetened Condensed Milk: This is the magic ingredient that holds everything together. Do not substitute with evaporated milk – it won’t work.
Chocolate Chips: Semi‑sweet chocolate chips are classic, but you can use milk chocolate or dark chocolate chips.
Butterscotch Chips: These add a caramel‑like sweetness. You can substitute with peanut butter chips or white chocolate chips.
Coconut: Sweetened shredded coconut adds a chewy texture. You can use unsweetened coconut, but the bars will be less sweet.
Nuts: Pecans or walnuts are classic. You can omit them or use almonds or macadamia nuts.
Step‑by‑Step Instructions
Follow these simple steps to create a perfect batch of 7 Layer Magic Cookie Bars every single time.
1. Preheat and Prepare
Preheat your oven to 350°F (175°C). Lightly grease a 9×13‑inch baking pan or line it with parchment paper for easy removal.
2. Make the Crust
In a small bowl, combine the graham cracker crumbs and melted butter. Stir until the crumbs are evenly coated. Press the mixture firmly into the bottom of the prepared pan. Use the flat bottom of a measuring cup to press it down tightly.
3. Layer the Ingredients
Pour the sweetened condensed milk evenly over the crust, spreading it gently with a spatula to cover the entire surface.
Sprinkle the chocolate chips evenly over the sweetened condensed milk, followed by the butterscotch chips.
Sprinkle the shredded coconut and chopped nuts over the top, pressing them down gently with your hands.
4. Bake
Bake for 25–30 minutes, or until the edges are golden brown and the top is bubbly. The center should be set but still slightly soft.
5. Cool and Slice
Let the bars cool completely in the pan on a wire rack – at least 1 hour. For cleaner slices, refrigerate for 30 minutes before cutting. Cut into squares or bars.
6. Serve
Serve at room temperature or chilled.
Expert Tips for the Perfect Magic Cookie Bars
This recipe is simple, but a few expert tricks will elevate it to perfection. Here’s what I’ve learned from making these bars countless times:
- Press the crust firmly – a compacted crust prevents crumbling when you slice the bars.
- Don’t overbake – the bars are done when the edges are golden and the center is set but still slightly soft. Overbaking will make them dry.
- Let them cool completely – this is the most important step. If you cut the bars while they’re warm, they’ll fall apart. Be patient!
- Refrigerate for cleaner slices – chilling the bars before cutting helps them firm up, giving you neat, beautiful squares.
- Use a sharp knife – a sharp knife makes clean cuts without crumbling the bars.
- Double the recipe – these bars freeze beautifully, so make a double batch and save some for later.
- Get creative with toppings – try adding dried cranberries, raisins, or different nuts.
- Use a parchment sling – line the pan with parchment paper, leaving overhang on two sides, for easy lifting and removal.
Delicious Variations
One of the best things about this recipe is how easily it adapts to different tastes and cravings. Here are some of my favorite ways to switch it up:
Peanut Butter Magic Cookie Bars
Replace the butterscotch chips with peanut butter chips and add ½ cup of peanut butter drizzled over the sweetened condensed milk.
White Chocolate Macadamia Bars
Use white chocolate chips and chopped macadamia nuts instead of chocolate chips and pecans.
Salted Caramel Magic Bars
Drizzle caramel sauce over the top before baking and sprinkle with flaky sea salt.
Tropical Magic Bars
Add ½ cup of dried pineapple and ½ cup of dried mango along with the coconut and nuts.
Gluten‑Free Magic Bars
Use gluten‑free graham crackers for the crust. The rest of the ingredients are naturally gluten‑free.
Vegan Magic Bars
Use vegan butter, dairy‑free sweetened condensed milk, and dairy‑free chips.
No‑Nut Magic Bars
Omit the nuts and add an extra ½ cup of coconut or chocolate chips.
Serving Suggestions
These versatile bars can be served in a variety of ways, making them perfect for any occasion:
- With a glass of cold milk – the classic pairing.
- With a cup of coffee – the perfect afternoon treat.
- For bake sales – these bars are always the first to sell out.
- For holidays – a beautiful addition to any cookie platter.
- For potlucks – easy to transport and always a hit.
- As a homemade gift – package them in a festive tin for a thoughtful present.
- With a scoop of vanilla ice cream – for a decadent dessert.
Storage and Reheating Guidelines
These bars store beautifully, making them a fantastic make‑ahead option.
Room Temperature: Store in an airtight container at room temperature for up to 1 week. They’ll stay soft and chewy.
Refrigeration: Store in an airtight container in the refrigerator for up to 2 weeks.
Freezing: These bars freeze beautifully. Place them in a freezer‑safe container, separating layers with parchment paper, and freeze for up to 2 months. Thaw at room temperature.
Reheating: For warm, gooey bars, reheat in a 300°F oven for 5–7 minutes. You can also microwave individual bars for 10–15 seconds.
Pro tip: If you’re freezing the bars, freeze them in a single layer first, then transfer to a bag to prevent sticking.
Want the full recipe and simple step-by-step instructions?
Page 2 continues with the full ingredients, cooking tips, and easy directions so you can make this recipe perfectly at home.