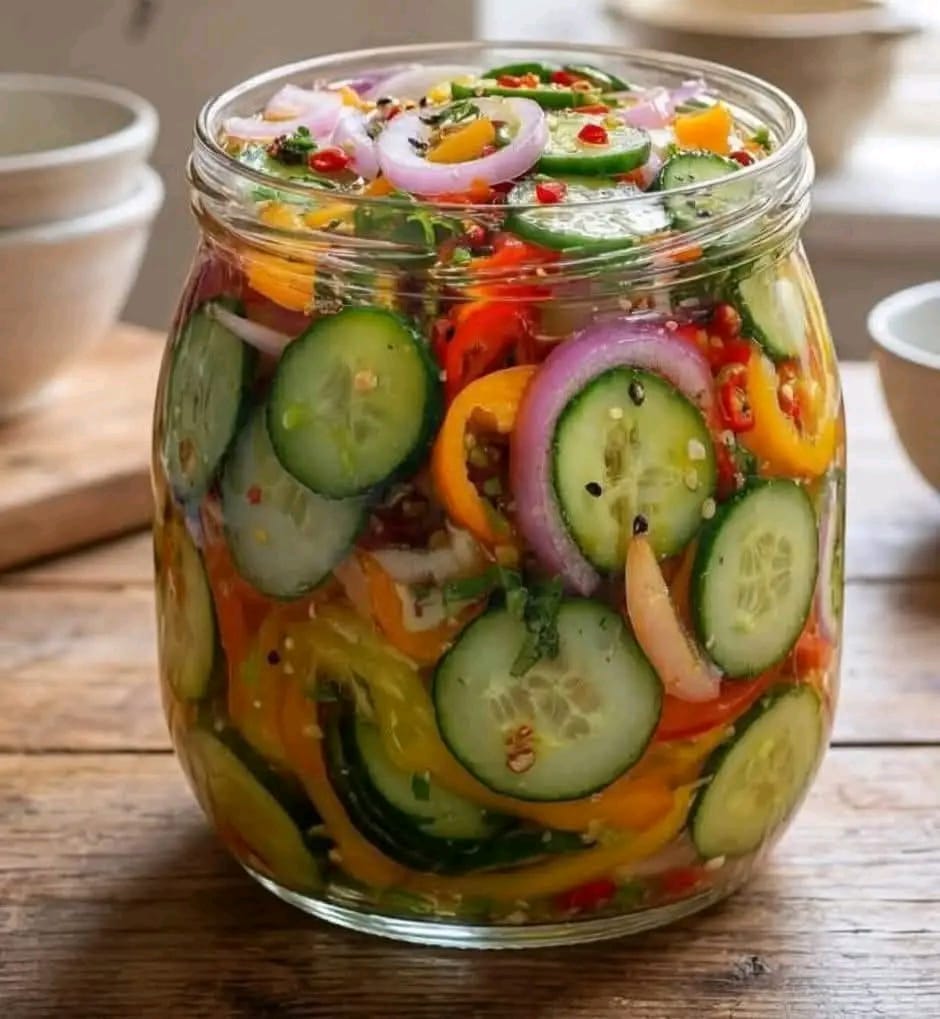
There are salads that are merely a side dish, and then there are salads that are a celebration of health and flavor – the kind that make you feel good from the inside out. Anti‑Inflammatory Pickled Cucumber, Onion, and Bell Pepper Salad is emphatically the latter. Imagine crisp, refreshing cucumbers, zesty red onions, and vibrant bell peppers, all marinated in a tangy, herb‑infused brine that’s as delicious as it is nourishing. It’s the kind of salad that brightens up any meal, supports your immune system, and adds a burst of color and flavor to your table.
If you’re looking for a simple, no‑cook recipe that’s packed with anti‑inflammatory ingredients, this is it. This pickled vegetable salad is naturally fermented (or quick‑pickled) with apple cider vinegar, which is rich in beneficial acids that support digestion and reduce inflammation. The vegetables themselves – cucumbers, onions, and bell peppers – are loaded with vitamins, antioxidants, and fiber. It’s a salad that’s as good for your body as it is for your taste buds.
What Is Anti‑Inflammatory Pickled Vegetable Salad?
At its heart, this dish is a quick‑pickled vegetable salad that combines the crisp, fresh flavors of cucumbers, onions, and bell peppers with a tangy, herbaceous brine. Unlike traditional fermented pickles, which can take weeks to develop, this version is ready in just a few hours – making it a fast, convenient way to enjoy the benefits of pickled vegetables. The brine is a simple mixture of apple cider vinegar, water, salt, and a touch of honey or maple syrup, infused with anti‑inflammatory herbs and spices like garlic, dill, and turmeric.
This recipe falls into the category of “gut‑healthy foods” and “anti‑inflammatory recipes” – dishes that are designed to nourish your body and reduce chronic inflammation. The combination of vinegar, fresh vegetables, and herbs creates a salad that’s low in calories, packed with nutrients, and incredibly satisfying.
What makes this version especially brilliant is the balance of flavors and health benefits. The tangy vinegar helps balance blood sugar and supports digestion, while the vegetables provide a rich source of vitamins A and C, potassium, and fiber. The herbs and spices – garlic, dill, and turmeric – add anti‑inflammatory properties that make this salad a true health elixir.
Why You’ll Love This Recipe
There are countless reasons to fall in love with this Anti‑Inflammatory Pickled Vegetable Salad. Here are just a few that will have you making it on repeat:
Packed with anti‑inflammatory ingredients – apple cider vinegar, garlic, turmeric, and fresh vegetables all support a healthy inflammatory response.
Gut‑healthy and probiotic‑rich – the vinegar and natural fermentation process support digestive health.
No cooking required – perfect for hot days or when you don’t want to turn on the stove.
Quick and easy – comes together in just 15–20 minutes, then chill.
Make‑ahead friendly – the flavors deepen and improve over time.
Versatile – serve as a side dish, a salad topping, or a crunchy snack.
Budget‑friendly – simple, affordable ingredients.
Customizable – add different vegetables, herbs, or spices to suit your taste.
Low in calories and naturally gluten‑free – fits a variety of dietary needs.
Always a crowd‑pleaser – everyone loves the tangy, crunchy goodness.
This is the recipe that will make you feel like you’re doing something good for your body with every bite. It’s proof that healthy eating can be delicious, simple, and satisfying.
Ingredients for Anti‑Inflammatory Pickled Vegetable Salad
This recipe uses fresh, wholesome ingredients that come together beautifully. Here’s what you’ll need:
For the Vegetables
- 2 medium cucumbers, thinly sliced (English or Persian cucumbers work best)
- 1 medium red onion, thinly sliced
- 1 large red bell pepper, thinly sliced
- 1 large yellow or orange bell pepper, thinly sliced
For the Pickling Brine
1 cup apple cider vinegar (with “the mother” for probiotic benefits)
1 cup water (filtered or spring water is best)
1 tablespoon honey or maple syrup (optional, for a touch of sweetness)
1½ teaspoons sea salt (or kosher salt)
3 cloves garlic, thinly sliced
1 teaspoon whole black peppercorns
1 teaspoon mustard seeds
1 teaspoon dill seeds (or 2–3 fresh dill sprigs)
½ teaspoon turmeric powder (or 1-inch fresh turmeric, thinly sliced)
½ teaspoon red pepper flakes (optional, for heat)
Optional Add‑Ins
- Fresh dill sprigs – for extra herbaceous flavor
- 1 small jalapeño, thinly sliced – for extra heat
- ½ cup sliced carrots – for added color and crunch
- 1 teaspoon celery seeds – for a subtle earthy note
Ingredient Notes and Substitutions
Cucumbers: English or Persian cucumbers are ideal – they have thin skins and fewer seeds, making them perfect for pickling. If you’re using regular slicing cucumbers, you may want to peel them and remove the seeds.
Apple Cider Vinegar: For the best health benefits, use raw, unfiltered apple cider vinegar with “the mother.” It contains beneficial bacteria and enzymes that support gut health. White vinegar or rice vinegar can be substituted, but the flavor and health benefits will be different.
Honey or Maple Syrup: This adds a touch of sweetness to balance the tangy vinegar. You can omit it for a completely sugar‑free version.
Turmeric: This is the star anti‑inflammatory spice. Fresh turmeric is wonderful, but powdered turmeric works beautifully too. For better absorption, add a pinch of black pepper to the brine – it enhances the bioavailability of curcumin, the active compound in turmeric.
Step‑by‑Step Instructions
Follow these simple steps to create a perfect batch of Anti‑Inflammatory Pickled Vegetable Salad every single time. The process is quick, easy, and virtually foolproof.
1. Prepare the Vegetables
Wash all the vegetables thoroughly. Thinly slice the cucumbers, red onion, and bell peppers. For the best texture, aim for uniform thickness – about ⅛ to ¼ inch. If you have a mandoline, it makes quick work of this.
2. Pack the Jar
In a large glass jar or a non‑reactive bowl, layer the sliced vegetables with the garlic slices, peppercorns, mustard seeds, dill seeds, and turmeric. Pack them tightly but not too firmly – you want the brine to circulate and coat every piece.
3. Make the Brine
In a small saucepan, combine the apple cider vinegar, water, honey (if using), and salt. Bring to a gentle simmer over medium heat, stirring until the salt and honey are fully dissolved. Remove from heat and let cool slightly for about 5 minutes.
4. Pour the Brine
Pour the warm brine over the packed vegetables, making sure they’re completely submerged. Use a spoon or a chopstick to gently press down on the vegetables and release any trapped air bubbles.
5. Cool and Chill
Let the jar cool to room temperature, then cover with a lid and refrigerate for at least 2–4 hours (or overnight) before serving. The longer it sits, the more the flavors develop.
6. Serve
Serve the pickled vegetable salad cold as a side dish, on top of salads, in sandwiches, or simply enjoy it straight from the jar.
Expert Tips for the Perfect Pickled Salad
This recipe is simple, but a few expert tricks will elevate it to perfection. Here’s what I’ve learned from making this salad countless times:
Use fresh, crisp vegetables – the quality of your vegetables affects the final texture. Fresh, crisp cucumbers and bell peppers will stay crunchy longer.
Slice uniformly – even slices ensure that the vegetables pickle evenly.
Pack the jar tightly – this helps the vegetables stay submerged in the brine.
Don’t skip the simmer step – warming the brine helps dissolve the salt and honey and allows the flavors to meld.
Let it rest – the flavors develop over time. For the best flavor, wait at least 24 hours before digging in.
Keep it submerged – make sure the vegetables are fully covered by the brine. If necessary, use a small weight or a clean stone to keep them down.
Store in the refrigerator – this is a quick‑pickle, not a traditional fermented pickle, so it must be kept refrigerated.
Make it your own – experiment with different herbs, spices, and vegetables to create your perfect version.
Delicious Variations
One of the best things about this recipe is how easily it adapts to different tastes and cravings. Here are some of my favorite ways to switch it up:
Spicy Pickled Vegetable Salad
Add 1 sliced jalapeño and 1 teaspoon of red pepper flakes to the jar. The heat adds a wonderful kick that’s perfect for those who like a little fire.
Mediterranean Pickled Salad
Add fresh oregano sprigs and lemon zest to the brine. The bright, herbaceous flavors are perfect for pairing with grilled fish or chicken.
Sweet and Sour Pickled Salad
Increase the honey to 2 tablespoons for a sweeter, more balanced brine. This version is especially popular with kids.
Root Vegetable Pickled Salad
Add thinly sliced carrots, radishes, or turnips to the mix. The root vegetables add a beautiful color and a slightly different texture.
Herb‑Infused Pickled Salad
Add fresh dill, parsley, and cilantro to the jar. The fresh herbs add a bright, vibrant flavor that’s absolutely delicious.
Turmeric and Ginger Pickled Salad
Add 1 inch of fresh ginger (thinly sliced) and 1 teaspoon of turmeric to the brine. This version is even more anti‑inflammatory and deeply flavorful.
Serving Suggestions
This versatile salad can be served in a variety of ways, making it perfect for any occasion:
As a side dish – serve alongside grilled meats, roasted vegetables, or grain bowls.
On top of salads – add a handful to your green salad for extra crunch and tang.
In sandwiches and wraps – adds a bright, acidic contrast to rich fillings.
As a garnish – top tacos, burgers, or grain bowls with a few pickled vegetables.
As a healthy snack – enjoy straight from the jar for a satisfying, low‑calorie snack.
For picnics and potlucks – it’s easy to transport and always a hit.
With cheese and charcuterie – the tangy vegetables are a perfect accompaniment to a cheese board.
Storage and Shelf Life
This pickled salad stores beautifully, making it a fantastic make‑ahead option.
Refrigeration: Store in an airtight glass jar in the refrigerator for up to 2 weeks. The flavors continue to develop over time – they’re often best after 2–3 days.
Freezing: This salad does not freeze well – the vegetables will become mushy. It’s best enjoyed fresh from the refrigerator.
Pro tip: If the brine becomes cloudy or the vegetables develop an off odor, discard them – this indicates spoilage. Always use clean utensils when removing vegetables from the jar to prevent contamination.
Want the full recipe and simple step-by-step instructions?
Page 2 continues with the full ingredients, cooking tips, and easy directions so you can make this recipe perfectly at home.