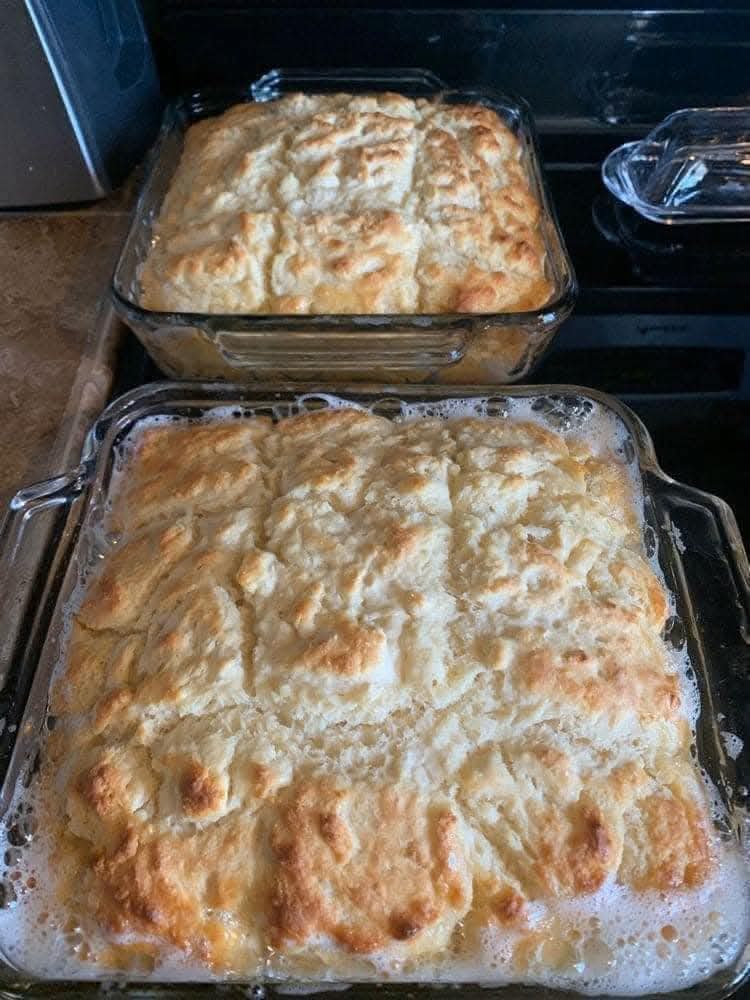
There are biscuits that are merely a side dish, and then there are biscuits that are the star of the meal – the kind that make you close your eyes, savor every flaky, buttery bite, and reach for another before you’ve even finished the first. Butter Swirl Biscuits are emphatically the latter. Imagine a tender, golden biscuit with layers upon layers of flaky, buttery goodness, each bite melting in your mouth like a warm, savory dream. They’re the kind of biscuit that makes breakfast, brunch, or dinner feel like a special occasion.
If you’ve ever struggled with making biscuits from scratch – battling tough, dry, or dense results – this recipe is about to change everything. The secret is in the technique: freezing and grating the butter, folding the dough to create those glorious layers, and using a simple buttermilk base that yields biscuits that are impossibly light and tender. These Butter Swirl Biscuits are the answer to every biscuit lover’s prayers – and they’re surprisingly easy to make.
What Are Butter Swirl Biscuits?
At their heart, these biscuits are a classic Southern‑style biscuit that’s been elevated with a clever technique: butter is grated into the dry ingredients, then the dough is folded and rolled multiple times to create layers of butter between the dough. When baked, the butter melts, creating steam that pushes the layers apart, resulting in biscuits that are impossibly flaky, tender, and buttery.
This recipe falls into the category of “homemade comfort food” and “baking from scratch” – the kind of recipe that feels like a labor of love but is actually quite simple once you know the technique. These biscuits are the perfect addition to any meal, whether you’re serving them with fried chicken, smothering them in gravy, or simply slathering them with butter and jam.
What makes this version especially brilliant is the swirling technique. By folding the dough multiple times and rolling it out, you create those beautiful, spiraling layers of butter that bake into the most magnificent, flaky texture. It’s a technique that’s often used in croissant and puff pastry making – and it works just as beautifully for biscuits.
Why You’ll Love This Recipe
There are countless reasons to fall in love with these Butter Swirl Biscuits. Here are just a few that will have you making them on repeat:
Incredibly flaky and tender – the layering technique creates biscuits that melt in your mouth.
Bursting with buttery flavor – the butter is the star of the show.
Simple, pantry‑friendly ingredients – nothing fancy, everything you probably already have.
Impressive technique, easy results – the folding method is simple but yields spectacular results.
Versatile – serve them for breakfast, brunch, or dinner.
Perfect for any occasion – holidays, potlucks, or a simple family meal.
Make‑ahead friendly – the dough can be prepared in advance.
Freezer‑friendly – perfect for stocking your freezer.
Kid‑friendly – everyone loves a warm, buttery biscuit.
Always a crowd‑pleaser – they disappear in minutes.
This is the biscuit recipe that will make you feel like a baking pro. It’s proof that with a little technique and a lot of butter, you can create something truly spectacular.
Ingredients for Butter Swirl Biscuits
This recipe uses simple, wholesome ingredients that come together beautifully. Here’s what you’ll need:
Core Ingredients
2½ cups all‑purpose flour
1 tablespoon baking powder
1 teaspoon salt
1 tablespoon granulated sugar
½ teaspoon baking soda
1 cup unsalted butter, cold (2 sticks)
1 cup buttermilk, cold
For the Top (Optional)
- 1 large egg
- 1 tablespoon water
- Melted butter – for brushing
- Flaky sea salt – for sprinkling
Ingredient Notes and Substitutions
Butter: Unsalted butter is preferred so you can control the salt level. The key to flaky biscuits is COLD butter – I recommend freezing the butter for at least 30 minutes before grating. The cold butter creates steam pockets as it melts in the oven, which is what gives biscuits their flaky texture.
Buttermilk: Buttermilk adds a slight tang and reacts with the baking soda to create lift. If you don’t have buttermilk, you can make a substitute by adding 1 tablespoon of lemon juice or vinegar to 1 cup of milk and letting it sit for 5–10 minutes.
Flour: All‑purpose flour is ideal. For a more tender, Southern‑style biscuit, you can substitute ½ cup of the all‑purpose flour with cake flour. For a gluten‑free version, use a gluten‑free all‑purpose flour blend.
Baking Powder and Baking Soda: These are the leavening agents that help the biscuits rise. Make sure they’re fresh – old baking powder can result in flat, dense biscuits.
Step‑by‑Step Instructions
Follow these detailed steps to create a flawless batch of Butter Swirl Biscuits every single time. The technique takes a little practice, but the results are spectacular.
1. Freeze the Butter
Place the butter in the freezer for at least 30 minutes (or up to an hour) before you start. This is essential for creating those flaky layers – the cold butter will stay solid as you grate it, creating pockets of butter in the dough.
2. Preheat and Prepare
Preheat your oven to 450°F (230°C). Line a baking sheet with parchment paper. In a large bowl, whisk together the flour, baking powder, salt, sugar, and baking soda.
3. Grate the Butter
Using a box grater, grate the frozen butter directly into the flour mixture. Work quickly – you want the butter to stay as cold as possible. Toss the butter pieces in the flour to coat them evenly. The mixture should resemble coarse crumbs with visible butter pieces.
4. Add the Buttermilk
Make a well in the center of the flour mixture and pour in the cold buttermilk. Use a fork or a spatula to gently stir until the dough just comes together. Do not overmix – the dough will be shaggy and slightly sticky.
5. Turn Out and Fold
Turn the dough out onto a lightly floured surface. Gently knead the dough 2–3 times just to bring it together. Then, using a rolling pin, roll the dough into a rectangle about ¾‑inch thick. Fold the dough in half (like a letter), then roll it out again to ¾‑inch thickness. Repeat this folding and rolling process 3–4 times. This is what creates those beautiful, flaky layers.
6. Cut the Biscuits
Roll the dough to about ½‑inch thickness. Use a biscuit cutter (a round cutter or even a drinking glass) to cut out biscuits. Press straight down – don’t twist the cutter, as this can seal the edges and prevent the biscuits from rising properly. You should get about 8–10 biscuits. Re‑roll the scraps gently and cut out additional biscuits.
7. Brush and Bake
Place the biscuits on the prepared baking sheet, leaving about 1 inch of space between them. If you’re using an egg wash, whisk the egg and water together and brush it over the tops of the biscuits. This gives them a beautiful golden, glossy finish. Bake for 12–15 minutes, or until the biscuits are golden brown and puffed.
8. Brush with Butter and Serve
Remove from the oven and immediately brush the tops with melted butter. If desired, sprinkle with a pinch of flaky sea salt. Serve warm.
Expert Tips for the Perfect Swirl Biscuits
This recipe is simple, but a few expert tricks will elevate it to perfection. Here’s what I’ve learned from making these biscuits countless times:
Keep everything cold – the butter, buttermilk, and even the bowl and flour should be as cold as possible. Cold butter is the secret to flaky biscuits.
Don’t overwork the dough – overworking develops gluten, which will make your biscuits tough instead of tender. Mix until the dough just comes together.
Don’t twist the cutter – when cutting the biscuits, press straight down without twisting. Twisting seals the edges and prevents the biscuits from rising properly.
Use a sharp cutter – a sharp cutter gives you clean edges, which helps the biscuits rise.
Place biscuits close together – placing the biscuits close together (almost touching) on the baking sheet helps them rise higher.
Bake at a high temperature – 450°F is essential for creating that puffed, golden exterior while keeping the inside tender.
Watch the time – biscuits can go from golden to burned quickly. Start checking at the 10‑minute mark.
Serve immediately – biscuits are best served warm, straight from the oven.
Delicious Variations
One of the best things about this recipe is how easily it adapts to different tastes and cravings. Here are some of my favorite ways to switch it up:
Cheddar and Chive Butter Swirl Biscuits
Fold 1 cup of shredded sharp cheddar cheese and ¼ cup of chopped fresh chives into the dough after adding the buttermilk. The cheese adds a savory, tangy depth that’s absolutely irresistible.
Garlic Herb Butter Swirl Biscuits
Add 1 teaspoon of garlic powder and 1 tablespoon of dried Italian seasoning to the dry ingredients. Brush the baked biscuits with garlic butter and sprinkle with fresh parsley.
Whole Wheat Butter Swirl Biscuits
Replace half the all‑purpose flour with whole wheat flour. The biscuits will be slightly denser but still delicious.
Sweet Butter Swirl Biscuits
Add 2 tablespoons of sugar to the dry ingredients. Brush the baked biscuits with honey butter (honey + melted butter) for a sweet, breakfast‑style treat.
Biscuit Sandwiches
Use the biscuits to make breakfast sandwiches – split them open and fill with scrambled eggs, bacon, and cheese. They’re also perfect for ham and cheese or sausage biscuits.
Gluten‑Free Butter Swirl Biscuits
Use a gluten‑free all‑purpose flour blend that contains xanthan gum. The texture will be slightly different but still delicious.
Dairy‑Free Butter Swirl Biscuits
Use vegan butter and dairy‑free buttermilk (add lemon juice to unsweetened oat or soy milk). The results are surprisingly close to the original.
Serving Suggestions
These versatile biscuits can be served in a variety of ways, making them perfect for any occasion:
With butter and jam – the classic way to enjoy a warm biscuit.
With gravy – sausage gravy or country gravy is the perfect companion.
With fried chicken – a Southern classic that never gets old.
With soup or stew – perfect for dipping.
For breakfast sandwiches – fill with eggs, cheese, and bacon.
With honey – a drizzle of honey adds a touch of sweetness.
With a cup of coffee – the perfect afternoon treat.
Storage and Reheating Guidelines
These biscuits store beautifully, making them a fantastic make‑ahead option.
Room Temperature: Store in an airtight container at room temperature for up to 2 days. They’re best eaten fresh, but they’ll still be good.
Refrigeration: Store in an airtight container in the refrigerator for up to 4 days. Reheat before serving.
Freezing: These biscuits freeze beautifully. Place cooled biscuits in a freezer‑safe container or bag and freeze for up to 2 months. Reheat directly from frozen in a 350°F oven for 10–12 minutes.
Reheating: For the best texture, reheat in a 350°F oven for 5–7 minutes. You can also microwave individual biscuits for 15–20 seconds, though they may be slightly softer.
Pro tip: If you’re freezing the biscuits, freeze them before baking – simply place the cut biscuits on a baking sheet and freeze until solid, then transfer to a freezer bag. Bake from frozen at 450°F for 15–18 minutes.
Want the full recipe and simple step-by-step instructions?
Page 2 continues with the full ingredients, cooking tips, and easy directions so you can make this recipe perfectly at home.