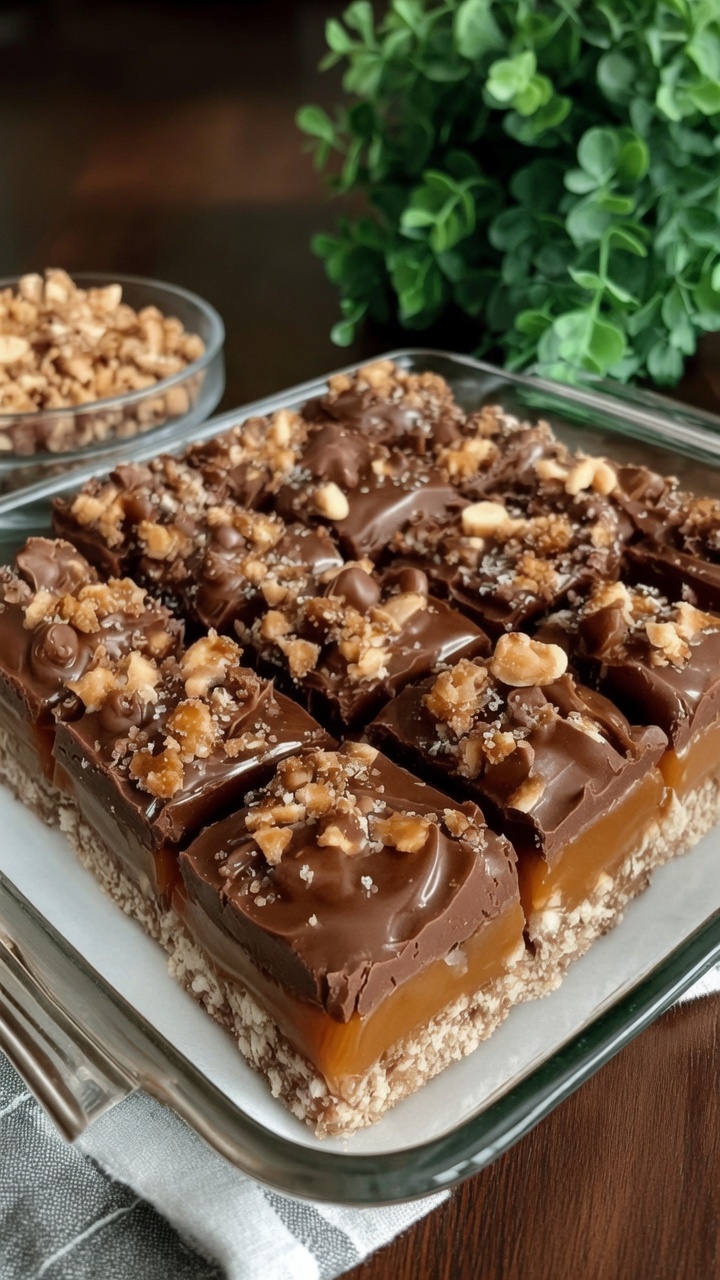
There are snacks that are merely fuel, and then there are snacks that feel like a guilty pleasure – even when they’re packed with protein and good-for-you ingredients. High Protein Crunch Bars are emphatically the latter. Imagine a crispy, chewy, peanut‑buttery bar that delivers all the satisfaction of a classic candy bar, but with a protein punch that keeps you full and fueled for hours. They’re the perfect post‑workout treat, afternoon pick‑me‑up, or healthy dessert that doesn’t taste healthy at all.
If you’ve ever stood in the grocery aisle staring at expensive protein bars with ingredient lists longer than your arm, this recipe is your liberation. These homemade crunch bars come together in minutes with simple, wholesome ingredients – no baking required, no artificial additives, and no compromise on flavor. They’re crispy, chewy, chocolatey, and absolutely addictive. And the best part? You control exactly what goes into them.
What Are High Protein Crunch Bars?
At their heart, these bars are a no‑bake, protein‑packed snack that combines the creamy richness of nut butter with the satisfying crunch of crispy rice cereal or puffed quinoa, all held together with a touch of honey or maple syrup and boosted with your favorite protein powder. They’re essentially a healthier, high‑protein twist on classic crispy rice treats – but with way more staying power and a fraction of the sugar[reference:0].
This recipe falls into the category of “clean eating snacks” – treats that are made with real, recognizable ingredients and designed to fuel your body rather than just satisfy a craving. The nut butter provides healthy fats and a creamy base, the protein powder adds a significant protein boost, and the crispy cereal gives that irresistible crunch that makes these bars so satisfying[reference:1].
What makes these bars especially brilliant is their versatility. You can customize them with different nut butters, protein powder flavors, mix‑ins like chocolate chips or dried fruit, and even a glossy chocolate topping. They’re the ultimate make‑ahead snack for busy weeks, meal prep, or on‑the‑go energy.
Why You’ll Love This Recipe
There are countless reasons to fall in love with these High Protein Crunch Bars. Here are just a few that will have you making them on repeat:
No baking required – perfect for hot days or when you don’t want to turn on the oven.
Packed with protein – each bar delivers 10–15g of protein to keep you full and energized[reference:2][reference:3].
Quick and easy – comes together in just 10–15 minutes of active prep[reference:4].
Made with simple, real ingredients – no artificial additives, preservatives, or mystery ingredients.
Naturally gluten‑free option – use certified gluten‑free crispy rice cereal[reference:5].
Endlessly customizable – swap nut butters, change the protein powder flavor, or add mix‑ins.
Budget‑friendly – much cheaper than store‑bought protein bars.
Meal‑prep friendly – make a batch and enjoy all week.
Kid‑approved – even picky eaters love these crispy, chocolatey treats[reference:6].
Perfect for post‑workout, travel, or a quick snack – grab and go!
This is the recipe that will make you wonder why you ever bought protein bars at the store. It’s proof that healthy snacking can be delicious, satisfying, and incredibly easy.
Ingredients for High Protein Crunch Bars
This recipe uses simple, wholesome ingredients that come together beautifully. Here’s what you’ll need:
For the Crunch Bar Base
1 cup natural peanut butter or almond butter (no sugar added)[reference:7][reference:8]
½ cup honey or maple syrup (or sugar‑free syrup for low‑carb)[reference:9]
1½ cups crispy rice cereal or puffed quinoa (use certified gluten‑free if needed)[reference:10][reference:11]
1 scoop (about 30g) vanilla or chocolate protein powder[reference:12][reference:13]
1 teaspoon pure vanilla extract[reference:14][reference:15]
Pinch of salt[reference:16][reference:17]
For the Chocolate Topping (Optional but Highly Recommended)
- ½ cup dark chocolate chips (sugar‑free or 70% dark)[reference:18]
- 1 teaspoon coconut oil[reference:19]
Optional Add‑Ins
- 2 tablespoons chia seeds or flaxseed meal (for extra fiber + crunch)[reference:20]
- 2 tablespoons mini chocolate chips[reference:21]
- ¼ cup chopped nuts or pretzels[reference:22]
- 2 tablespoons unsweetened shredded coconut[reference:23]
Ingredient Notes and Substitutions
Nut Butter: Natural peanut butter gives that classic flavor, but almond butter, cashew butter, or sunflower seed butter all work beautifully[reference:24][reference:25]. Make sure to use a runny, no‑sugar‑added variety for the best texture and flavor. If your nut butter is thick, gently warm it before mixing.
Sweetener: Honey adds a floral sweetness, while maple syrup brings a woodsy depth[reference:26]. For a low‑carb or keto version, use a sugar‑free syrup like monk fruit or allulose[reference:27]. The sweetness of the bars can be adjusted to your preference – start with ½ cup and add more if needed.
Crispy Cereal: Classic crispy rice cereal is the traditional choice, but puffed quinoa, puffed millet, or even crushed high‑protein cereal all work wonderfully[reference:28][reference:29]. For a gluten‑free version, make sure your cereal is certified gluten‑free[reference:30].
Protein Powder: Whey, casein, or plant‑based protein powder all work[reference:31]. For the best texture, use a powder that blends smoothly – vanilla pairs beautifully with peanut butter, while chocolate adds an extra layer of richness[reference:32]. If you’re using an unflavored powder, you may want to add a little extra sweetener or cocoa powder to boost the flavor.
Step‑by‑Step Instructions
Follow these simple steps to create a perfect batch of High Protein Crunch Bars. The process is quick, easy, and incredibly rewarding.
1. Prepare Your Pan
Line an 8×8‑inch baking dish with parchment paper, leaving some overhang on two opposite sides[reference:33]. This creates a “sling” that makes it easy to lift the bars out of the pan once they’re set.
2. Warm the Nut Butter and Sweetener
In a medium saucepan over low heat, combine the peanut butter and honey (or maple syrup)[reference:34]. Stir continuously for about 2–3 minutes until the mixture is smooth, glossy, and well‑blended. Remove from heat. You can also do this in a microwave‑safe bowl in 20‑second bursts[reference:35].
Pro tip: Keep the heat low – you want to melt and combine the ingredients, not boil them. Overheating can make the bars too hard when they set.
3. Add the Dry Ingredients
Stir in the vanilla extract, salt, protein powder, and any optional add‑ins like chia seeds or flaxseed meal[reference:36]. Mix until smooth and fully incorporated. The mixture should be thick and sticky – like a dense cookie dough[reference:37].
4. Fold in the Crispy Cereal
Gently fold in the crispy rice cereal until it’s evenly coated and distributed throughout the mixture[reference:38][reference:39]. Be careful not to crush the cereal – you want those satisfying crunchy pieces to stay intact. The mixture will be sticky and clumpy – that’s exactly what you want[reference:40].
5. Press Into the Pan
Transfer the mixture to your prepared baking dish[reference:41]. Press it down very firmly using a spatula, the back of a spoon, or your hands (use a piece of parchment paper on top to prevent sticking)[reference:42]. Make sure the mixture is packed tightly and evenly across the entire pan[reference:43]. The firmer you press, the better your bars will hold together.
6. Add the Chocolate Topping (Optional)
If you’re adding a chocolate topping, melt the chocolate chips and coconut oil together. You can do this in the microwave in 20–30 second bursts, stirring between each, or over a double boiler[reference:44]. Once smooth, pour the melted chocolate over the top of the pressed base and spread it evenly with a spatula[reference:45]. For an extra protein boost, you can stir an additional scoop of protein powder into the melted chocolate before pouring[reference:46].
7. Chill Until Firm
Refrigerate the bars for at least 30–60 minutes, or until firm[reference:47]. For a quicker set, place them in the freezer for 20–25 minutes[reference:48]. The bars are ready when they’re solid to the touch and the chocolate topping (if using) is fully set.
8. Slice and Serve
Use the parchment overhang to lift the entire slab out of the pan[reference:49]. Place it on a cutting board and use a sharp knife to cut into 8–10 bars (or smaller bite‑size squares)[reference:50][reference:51]. For cleaner cuts, use a sharp, slightly wet knife[reference:52].
Expert Tips for the Perfect Crunch Bars
This recipe is simple, but a few expert tricks will elevate it to perfection. Here’s what I’ve learned from making these bars countless times:
Press, press, press – this is the most important tip. The mixture needs to be packed very firmly into the pan[reference:53]. If you don’t press hard enough, the bars will crumble when you cut them.
Use a runny nut butter – thick, stiff nut butters can make the mixture dry and crumbly. If your nut butter is thick, warm it gently before mixing.
Don’t overheat the nut butter mixture – low and slow is the key. Overheating can make the bars too hard when they set[reference:54].
Fold the cereal gently – you want to keep those crispy pieces intact for maximum crunch[reference:55].
Chill thoroughly – don’t rush the chilling step. The bars need time to set properly[reference:56].
Add extra protein powder for firmer bars – if you want your bars extra firm, add an additional ¼ cup of protein powder[reference:57].
For gooier bars – add 1–2 tablespoons of melted butter or milk to the mixture[reference:58].
Use parchment paper – this makes removal and cleanup a breeze[reference:59].
Store properly – these bars are best kept refrigerated to maintain their texture[reference:60].
Delicious Variations
One of the best things about this recipe is how easily it adapts to different tastes and cravings. Here are some of my favorite ways to switch it up:
Chocolate Peanut Butter Crunch Bars
Use chocolate protein powder and add 2 tablespoons of cocoa powder to the base mixture[reference:61]. Top with extra chocolate for a double‑chocolate treat that tastes like a Reese’s cup in bar form.
Salted Caramel Crunch Bars
Drizzle sugar‑free caramel sauce over the top before adding the chocolate layer[reference:62]. Sprinkle with a pinch of flaky sea salt for that perfect sweet‑salty balance.
Rocky Road Crunch Bars
Fold in ½ cup of mini marshmallows and ¼ cup of chopped nuts along with the crispy cereal[reference:63]. The marshmallows create a gooey texture that’s absolutely irresistible.
Mint Chocolate Crunch Bars
Add ½ teaspoon of mint extract to the base mixture and use chocolate protein powder[reference:64]. Top with dark chocolate and a sprinkle of crushed peppermint candies for a refreshing twist.
Coconut Crunch Bars
Fold in ¼ cup of unsweetened shredded coconut along with the crispy cereal[reference:65]. Roll the finished bars in additional toasted coconut for a tropical flavor profile.
White Chocolate Crunch Bars
Swap the dark chocolate topping for white chocolate chips[reference:66]. The creamy, vanilla sweetness of white chocolate pairs beautifully with the peanut butter base.
Nut‑Free Crunch Bars
Replace the peanut butter with sunflower seed butter and ensure your crispy cereal is nut‑free[reference:67]. These are perfect for school lunches or anyone with nut allergies.
Low‑Carb / Keto Crunch Bars
Use sugar‑free syrup (like monk fruit or allulose), sugar‑free chocolate chips, and a low‑carb crispy cereal or crushed pork rinds mixed with almond flour[reference:68]. This version keeps the carbs low while delivering all the flavor and crunch.
Serving Suggestions
These versatile crunch bars can be enjoyed in countless ways. Here are some of my favorites:
As a post‑workout snack – the protein and carbs make them perfect for refueling after exercise.
With a cup of coffee or tea – the chocolatey, peanut buttery flavor is a wonderful companion to your morning brew.
As a healthy dessert – serve them alongside fresh berries for a satisfying end to any meal.
Crumbled over Greek yogurt – add texture and protein to your breakfast bowl[reference:69].
In lunchboxes – a kid‑friendly, nutritious snack that travels well.
On a road trip or hike – the perfect portable energy boost.
With a glass of cold milk – the classic pairing that never gets old.
Want the full recipe and simple step-by-step instructions?
Page 2 continues with the full ingredients, cooking tips, and easy directions so you can make this recipe perfectly at home.