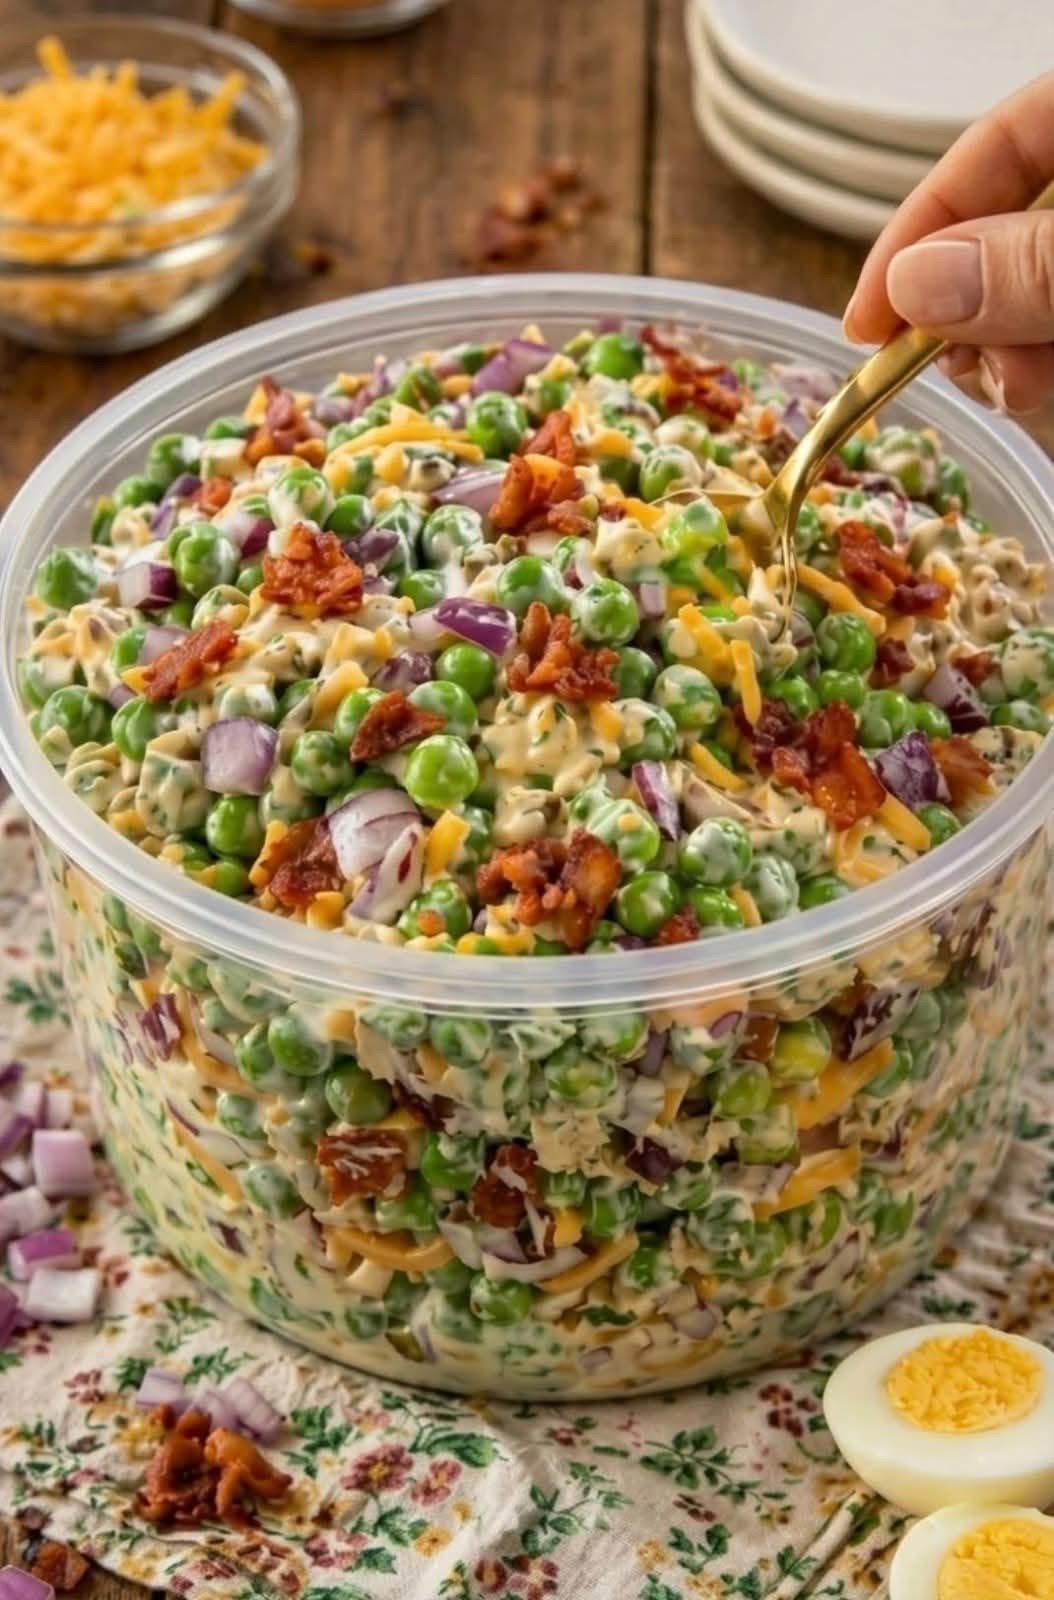
This Creamy Bacon Cheddar Pea Salad is cool, crunchy, savory, and filled with comforting flavor.
Sweet green peas are combined with crispy bacon, shredded cheddar cheese, finely chopped red onion, and a smooth homemade dressing. Every spoonful contains a delicious balance of freshness, creaminess, saltiness, and gentle sweetness.
This classic cold pea salad is easy to prepare and does not require baking. It is perfect for family dinners, summer barbecues, holiday meals, church gatherings, picnics, potlucks, and make-ahead lunches.
The salad tastes even better after resting in the refrigerator because the dressing has time to coat the peas and absorb the flavors of the bacon, cheese, onion, and herbs.
Why This Recipe Is Popular
Creamy pea salad is popular because it uses simple ingredients while delivering a rich and satisfying flavor.
Frozen peas make preparation fast and convenient. They remain bright, sweet, and slightly crisp without needing long cooking.
Bacon adds a salty and smoky flavor. Cheddar cheese creates richness, while red onion adds color and a gentle bite.
The creamy dressing brings everything together and can be adjusted to taste. It can be made sweeter, tangier, lighter, or more savory depending on the ingredients used.
This recipe is also easy to prepare in advance, making it especially useful when you are cooking several dishes for a party or holiday meal.
Recipe Information
The preparation time is approximately twenty minutes.
The chilling time is at least one hour.
The total time is approximately one hour and twenty minutes.
This recipe provides approximately ten servings as a side dish.
Main Ingredients
Green peas form the fresh and naturally sweet base of the salad.
Crispy bacon provides smoky flavor and a crunchy texture.
Sharp cheddar cheese adds richness and a stronger savory taste.
Red onion gives the salad color and a slightly sharp flavor that balances the creamy dressing.
Mayonnaise and sour cream create the smooth base of the dressing.
Apple cider vinegar adds acidity, while a small amount of sugar balances the tanginess.
Fresh parsley or dill can be added for additional color and a lighter herbal flavor.
Ingredients
You will need thirty-two ounces of frozen green peas, eight slices of cooked bacon, one and a half cups of shredded sharp cheddar cheese, and one small red onion finely chopped.
For the dressing, you will need three-quarters of a cup of mayonnaise, half a cup of sour cream or plain Greek yogurt, one tablespoon of apple cider vinegar, one tablespoon of granulated sugar or honey, half a teaspoon of garlic powder, half a teaspoon of salt, and one-quarter teaspoon of black pepper.
You may also add two tablespoons of chopped parsley, dill, or green onions.
Two chopped hard-boiled eggs can be included when you want a richer and more filling salad.
The Best Peas to Use
Frozen green peas are the best choice for this salad.
They have a bright color, fresh flavor, and firm texture that works well with the creamy dressing.
Canned peas are softer and may become mushy when mixed. They can be used when necessary, but they should be drained very carefully.
Fresh peas can also work when they are available. Blanch them briefly in boiling water, then transfer them immediately to ice water.
Frozen peas do not need to be boiled. They only need to thaw completely before being added to the salad.
Avoid cooking frozen peas for a long time because they may lose their bright color and become too soft.
How to Thaw Frozen Peas
Place the frozen peas inside a large colander.
Rinse them briefly with cool water.
Allow them to drain until fully thawed.
You can also place the unopened bag inside the refrigerator overnight.
After thawing, spread the peas over a clean kitchen towel or several layers of paper towels.
Pat them gently to remove excess moisture.
Drying the peas is important because extra water can thin the dressing and collect at the bottom of the bowl.
Do not use warm water to thaw the peas because it may soften them too quickly.
Choosing the Best Bacon
Thick-cut bacon creates larger and crunchier pieces.
Regular sliced bacon also works well and cooks more quickly.
Cook the bacon until crisp so it maintains some texture after being mixed with the dressing.
Soft bacon may become chewy inside the salad.
You can prepare the bacon inside a skillet, oven, or air fryer.
Allow the cooked bacon to drain on paper towels before chopping it.
The bacon should cool completely before being added to the peas. Warm bacon can soften the cheese and make the dressing greasy.
Reserve a small amount for decorating the top shortly before serving.
How to Cook Bacon in a Skillet
Arrange the bacon slices inside a large cold skillet.
Place the skillet over medium heat.
Cook slowly, turning the slices when necessary, until they become evenly browned and crisp.
Transfer the cooked bacon to a paper-towel-lined plate.
Allow it to cool before crumbling or chopping it into small pieces.
Pour the bacon grease into a heat-safe container rather than pouring it into the sink.
How to Cook Bacon in the Oven
Preheat the oven to 400°F.
Line a rimmed baking sheet with parchment paper or aluminum foil.
Arrange the bacon slices in a single layer.
Bake for approximately fifteen to twenty minutes, depending on their thickness.
Remove the bacon when it becomes crisp and deeply golden.
Transfer it to paper towels and allow it to cool.
Oven cooking is especially useful when preparing a large quantity for a party.
Choosing the Best Cheese
Sharp cheddar cheese provides a noticeable flavor that remains present after being mixed with the creamy dressing.
Mild cheddar can be used for a softer flavor.
White cheddar, Colby Jack, Monterey Jack, or Pepper Jack may also be used.
Freshly shredded cheese has a softer texture and stronger flavor than many packaged shredded products.
Packaged shredded cheese is convenient and works well when preparation time is limited.
Small cubes of cheddar can replace shredded cheese when you want a chunkier salad.
Avoid adding cheese while the bacon or peas are warm.
Preparing the Red Onion
Peel the red onion and chop it into very small pieces.
Small pieces distribute more evenly and prevent one bite from having an excessively strong onion flavor.
When the onion tastes too sharp, place the chopped pieces inside a bowl of cold water for approximately ten minutes.
Drain them thoroughly and pat them dry before adding them to the salad.
This simple step softens the onion flavor while preserving the crisp texture and purple color.
Sweet onion or green onion can replace red onion when you prefer a milder taste.
How to Make the Creamy Dressing
Place the mayonnaise and sour cream inside a medium mixing bowl.
Add the apple cider vinegar, sugar or honey, garlic powder, salt, and black pepper.
Whisk until smooth and evenly combined.
Taste the dressing before adding it to the salad.
Add a little more vinegar for extra tanginess.
Add a small amount of sugar when you prefer a sweeter dressing.
For a lighter result, replace part of the mayonnaise with plain Greek yogurt.
The dressing should be thick enough to coat the peas without collecting heavily at the bottom of the bowl.
Combine the Salad
Place the completely thawed and dried peas inside a large mixing bowl.
Add most of the chopped bacon, shredded cheddar cheese, red onion, and herbs.
Reserve a small amount of bacon and cheese for the top.
Pour approximately three-quarters of the dressing over the ingredients.
Fold everything together gently with a large spoon or silicone spatula.
Add the remaining dressing only when necessary.
The peas should be evenly coated without being buried beneath excessive sauce.
Mix the Salad Gently
Frozen peas are firmer than canned peas, but they can still become damaged when mixed too aggressively.
Use a folding motion instead of stirring rapidly.
Move the ingredients from the bottom of the bowl toward the top.
Continue only until the bacon, cheese, onion, and dressing are evenly distributed.
Avoid pressing the peas against the side of the bowl.
A gentle mixing method keeps the salad attractive and prevents it from becoming mushy.
Chill Before Serving
Cover the bowl tightly.
Refrigerate the salad for at least one hour.
Two to four hours of chilling produces an even better flavor.
During this time, the dressing thickens and the ingredients become evenly seasoned.
Stir the salad gently before serving.
When the dressing becomes too thick, add one tablespoon of milk, sour cream, or mayonnaise.
Do not add a large amount of liquid because the peas may continue releasing some moisture.
Add the Final Garnish
Shortly before serving, transfer the salad to a clean serving bowl.
Sprinkle the reserved bacon and cheddar cheese over the top.
Add chopped parsley, dill, green onions, or a small amount of black pepper.
Hard-boiled egg slices can also be arranged around the edge.
Do not add all the bacon garnish too early because it may lose some crispness while resting in the dressing.
Simple Recipe Overview
Thaw the frozen peas and dry them thoroughly.
Cook the bacon until crisp and allow it to cool.
Combine mayonnaise, sour cream, vinegar, sugar, garlic powder, salt, and pepper to create the dressing.
Mix the peas with bacon, cheddar cheese, red onion, herbs, and dressing.
Cover and refrigerate for at least one hour.
Stir gently and add the reserved bacon and cheese shortly before serving.
Tips for the Best Pea Salad
Use frozen peas instead of cooking them until soft.
Dry the thawed peas carefully so the dressing remains thick.
Cook the bacon until crisp and cool it before mixing.
Chop the onion finely so its flavor does not overpower the salad.
Add only enough dressing to coat the ingredients.
Chill the salad before serving so the flavors can develop.
Reserve some bacon and cheese for the final garnish.
Taste the salad after chilling and adjust the seasoning when necessary.
Common Mistakes to Avoid
Do not add frozen peas directly to the dressing.
Avoid boiling the peas for a long time.
Do not mix warm bacon with the cheese and dressing.
Avoid leaving water on the thawed peas.
Do not add too much onion.
Avoid pouring all the dressing into the bowl before checking the consistency.
Do not stir the salad aggressively.
Do not leave the completed salad at room temperature for an extended period.
Want the full recipe and simple step-by-step instructions?
Page 2 continues with the full ingredients, cooking tips, and easy directions so you can make this recipe perfectly at home.