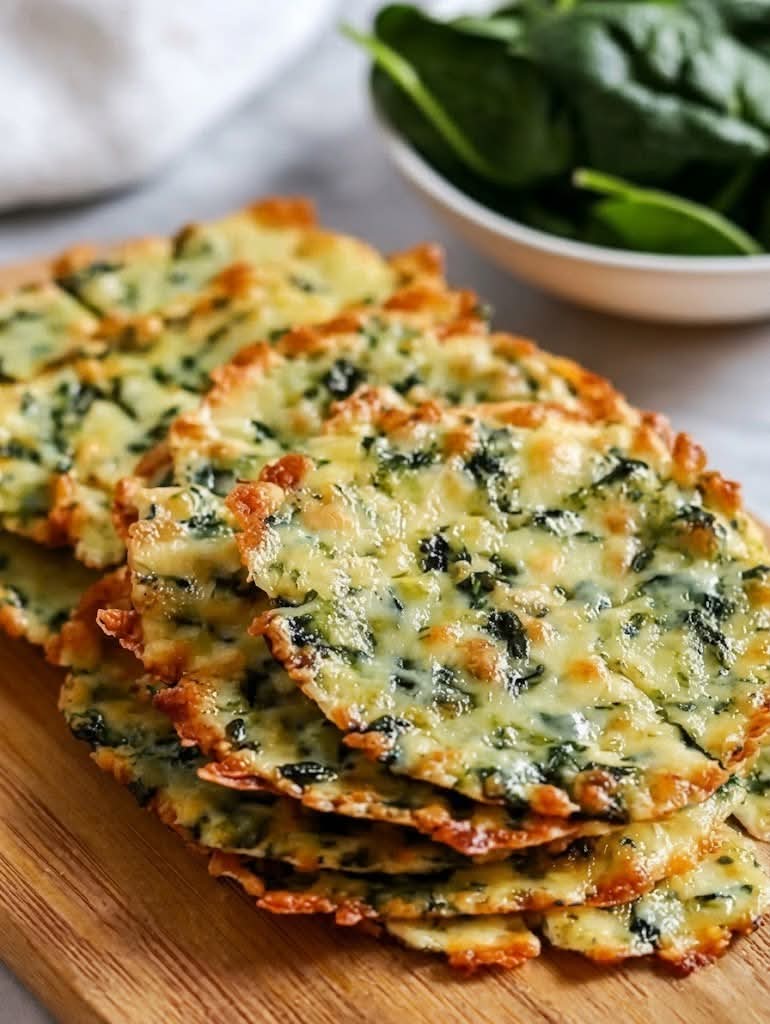
When a craving for something crunchy, salty, and deeply cheesy strikes, these Crispy Spinach Cheese Crisps are the answer. They’re the magical combination of sharp Parmesan, a whisper of spinach, and a delicate lacy crunch that shatters with every bite. Baked (or air-fried) into golden, wafer-thin rounds, these low-carb, keto-friendly crisps are the ultimate snack, appetizer, or soup topper. With just a handful of ingredients and a few minutes in the oven, you can create something that tastes gourmet, looks stunning on a cheese board, and satisfies that need for a savory crunch without the carbs. They’re the kind of snack you’ll make on repeat because they’re so easy, so delicious, and so much better than anything from a bag.
These crisps are a celebration of simplicity. Fresh spinach is finely chopped and mixed with a generous amount of grated Parmesan cheese, a touch of garlic, and a pinch of seasoning. When exposed to the oven’s heat, the cheese melts, spreads, and then toasts into a thin, crispy disk with the spinach embedded like little green jewels. The edges become lacy and deeply golden, while the center stays crisp and light. They’re naturally gluten-free, grain-free, and packed with flavor. You can customize them with different cheeses, herbs, or spices, making them endlessly versatile. Pile them on a platter with dips, serve them alongside a bowl of tomato soup, or just snack on them straight from the cooling rack. They’re destined to become your new favorite healthy-ish indulgence.
In this detailed guide, we’ll walk through every aspect of making perfect spinach cheese crisps at home—from the best cheese to use and how to prevent sogginess to creative variations and serving suggestions. You’ll discover pro tips for getting that perfect golden-brown crunch and learn how to store them so they stay crispy. Let’s preheat the oven and get ready to fall in love with the simplest, most addictive snack you’ll ever make.
Why You’ll Love These Spinach Cheese Crisps
Insanely crunchy and satisfying. These crisps are the epitome of texture: lacy, golden, and snappy. They provide that satisfying crunch that potato chips or crackers offer, but with a fraction of the carbs and a huge boost of flavor. They’re light and airy, with just enough structure to hold their shape, making them the perfect vehicle for dips or toppings. Each bite is a little symphony of salty cheese and earthy spinach.
Only a handful of real ingredients. At their core, these crisps require just two things: cheese and spinach. A little garlic powder and black pepper round out the flavor. There’s no flour, no fillers, no weird additives. They’re naturally low-carb, keto, gluten-free, and grain-free. For anyone looking for a clean, wholesome snack that doesn’t taste like a compromise, these are a revelation. They also sneak in a little green vegetable, which is always a win.
Quick and easy to make. The active prep time is about 10 minutes, and they bake in just 8 to 12 minutes. You can whip up a batch while dinner is cooking or when a snack attack hits. The ingredient list is short, the method is foolproof, and the cleanup is minimal—especially if you use parchment paper. They’re a brilliant recipe to have in your back pocket for parties, lunchboxes, or a healthy late-night nibble.
Endlessly customizable. Parmesan is the classic base, but you can experiment with other hard cheeses like cheddar, Asiago, or Manchego. Add different herbs, a pinch of red pepper flakes for heat, or even a sprinkle of everything bagel seasoning. The spinach can be swapped for finely chopped kale or fresh basil. Once you master the basic technique, you can create dozens of flavor variations to suit your mood or whatever you have in the fridge.
Ingredient Deep Dive: The Simple, Cheesy Lineup
Each ingredient plays a specific role in achieving that perfect crispy texture and savory flavor.
Parmesan Cheese – The Crispy, Savory Base
You’ll need 2 cups of freshly grated Parmesan cheese. Parmesan is the gold standard for cheese crisps because it has a very low moisture content and a high protein-to-fat ratio, which means it melts, spreads, and then crisps into a firm, lacy wafer. Pre-grated, shelf-stable Parmesan often contains anti-caking agents that can inhibit melting and crisping, so it’s best to buy a block and grate it yourself on the fine holes of a box grater or use a Microplane. Parmigiano-Reggiano is ideal for its nutty, complex flavor, but a more affordable domestic Parmesan also works beautifully. You can substitute part of the Parmesan with finely grated Pecorino Romano for a sharper, saltier edge, or use Asiago for a milder, slightly sweet flavor. The key is to use a hard, low-moisture cheese.
Fresh Spinach – The Color and Earthy Note
One cup of tightly packed fresh spinach leaves, very finely chopped, is mixed into the cheese. The spinach should be as dry as possible before chopping—any excess water will steam the crisps and prevent them from becoming crunchy. After washing, use a salad spinner or pat the leaves thoroughly with paper towels. Then roll them up and slice into very thin ribbons (chiffonade) or chop finely. The spinach wilts slightly during baking, becoming embedded in the cheese. It adds a subtle earthy flavor, a pop of green color, and a little extra nutrition. You can substitute an equal amount of fresh kale (finely chopped and massaged to soften), arugula, or fresh herbs like basil or parsley. Frozen spinach is not recommended because it contains too much water, even after squeezing, and can make the crisps soggy.
Seasonings – The Flavor Boosters
A pinch of garlic powder and a few grinds of black pepper are all you need to enhance the cheese and spinach. Garlic powder disperses evenly without burning, whereas fresh garlic would scorch in the high heat. A tiny pinch of salt may be needed, but be careful—Parmesan is already salty. Taste the cheese before adding extra salt. You can also add a pinch of red pepper flakes for a gentle heat, or a sprinkle of dried Italian seasoning or onion powder for more depth. The seasonings should be finely ground so they blend seamlessly into the cheese.
Step-by-Step: Baking (or Air Frying) the Perfect Crisps
These crisps come together in minutes and bake into golden perfection. Follow these steps for flawless results every time.
Step 1: Preheat the Oven and Prepare the Pan
Preheat your oven to 400°F (200°C). Line a large baking sheet with parchment paper. Do not use wax paper; it can smoke. A silicone baking mat also works well, but parchment gives the crispiest results. The parchment should be flat and unwrinkled so the cheese spreads evenly.
Step 2: Prepare the Spinach
Wash the spinach leaves and dry them extremely well—any moisture left on the leaves will create steam and ruin the crisp texture. Roll the dry leaves into a tight bundle and slice across into very thin ribbons (chiffonade). Then run your knife over the ribbons a few times to chop them even finer. You should have finely chopped, almost confetti-like pieces. Set aside.
Step 3: Mix the Cheese and Spinach
In a medium bowl, combine the freshly grated Parmesan cheese, the finely chopped spinach, garlic powder, and black pepper. Toss with a fork until the spinach is evenly distributed throughout the cheese. The cheese should be the dominant component, with the spinach acting as a colorful accent.
Step 4: Form the Mounds
Spoon tablespoon-sized mounds of the cheese-spinach mixture onto the parchment-lined baking sheet, spacing them at least 2 inches apart. The mounds will spread significantly as they melt, so give them plenty of room. For more uniform crisps, use a cookie scoop. Gently flatten each mound with the back of the spoon or your fingers to create an even layer; this helps them bake uniformly and prevents thick centers that don’t crisp through.
Step 5: Bake Until Golden and Bubbly
Place the baking sheet in the preheated oven and bake for 8 to 12 minutes. Start checking at the 8-minute mark. You’ll see the cheese melt, bubble, and then spread into lacy rounds. The crisps are ready when the edges are a deep golden brown and the centers are set and lightly golden. They will still be slightly flexible when hot but will firm up as they cool. If you prefer an extra-crunchy, darker crisp, bake for an additional 1–2 minutes, but watch closely—cheese can go from golden to burnt quickly. The baking time can vary depending on the exact cheese and the thickness of your mounds.
Step 6: Cool Completely
Remove the baking sheet from the oven and let the crisps cool on the sheet for 5 to 10 minutes. Do not try to move them while they are hot, as they will be soft and may tear. As they cool, they will become firm and crispy. Once completely cool and hardened, use a thin spatula to gently lift them off the parchment. If any crisps are still slightly soft in the center, you can return them to the oven for another 2–3 minutes. Transfer to a wire rack to finish cooling if needed, then serve immediately or store for later.
Air Fryer Method
Preheat the air fryer to 375°F (190°C). Cut a piece of parchment paper to fit the bottom of the basket, leaving a little room for air circulation. Arrange the cheese mounds on the parchment with plenty of space. Air fry for 5 to 7 minutes, until golden and crisp. The air fryer method is faster and yields an exceptionally crunchy crisp. Let them cool in the basket for a couple of minutes before removing.
Pro Tips for the Crispiest, Golden-Brown Crisps
- Use freshly grated, low-moisture cheese. Pre-shredded cheese often contains starches or cellulose that prevent proper melting and crisping. Grating your own Parmesan ensures a smooth melt and a perfectly crisp result. Hard cheeses like Parmesan, Asiago, and aged cheddar work best; soft cheeses like mozzarella or brie will just puddle and not crisp.
- Keep the spinach bone-dry. Any water left on the leaves will cause steam, and steam is the enemy of crispness. After washing, spin the spinach in a salad spinner, then pat it with paper towels until it feels completely dry to the touch. Then chop it finely. This extra step pays off in maximum crunch.
- Give them space. The cheese mounds will spread into circles about 3 inches in diameter. Crowding them on the pan will cause the cheese to merge into one large sheet, which can be harder to crisp evenly. Two inches of space between each mound is a good rule of thumb.
- Cool completely before moving. The transformation from melted cheese to crispy wafer happens as the fat cools and the protein sets. Let the crisps cool on the parchment until they are no longer warm to the touch. If you try to lift them while they’re still hot, they’ll bend and could break.
- Store with a desiccant if necessary. In humid environments, cheese crisps can absorb moisture from the air and lose their crunch. Store them in an airtight container with a small food-grade silica gel packet or a few grains of uncooked rice wrapped in cheesecloth. If they soften, re-crisp them in the oven at 350°F for 3–5 minutes.
Flavor Twists & Customizations
Once you’ve mastered the basic Parmesan-spinach crisp, the variations are endless. Here are some of my favorite riffs.
- Jalapeño Cheddar Crisps: Replace the Parmesan with finely shredded sharp cheddar cheese (press it between paper towels first to remove excess oil), and substitute the spinach with finely minced fresh jalapeño (seeds removed). Add a pinch of cumin. These are spicy, cheesy, and incredible with a cool ranch dip.
- Italian Herb & Sun-Dried Tomato Crisps: Mix the Parmesan with 1 teaspoon of dried Italian seasoning and 2 tablespoons of very finely chopped, oil-drained sun-dried tomatoes. The tomatoes add a sweet-tart chewiness that contrasts with the crunchy cheese. Pat the tomatoes well with paper towels before adding to remove excess oil.
- Everything Bagel Cheese Crisps: Skip the spinach and sprinkle a pinch of everything bagel seasoning over each mound of Parmesan before baking. The sesame seeds, dried onion, and garlic toast beautifully and add an extra layer of savory crunch. These are fantastic with cream cheese.
- Bacon & Chive Cheddar Crisps: Use finely shredded cheddar and mix in 2 tablespoons of cooked, finely crumbled bacon and 1 tablespoon of minced fresh chives. The smoky bacon and oniony chives make these crisps taste like a loaded baked potato in chip form.
- Rosemary & Black Pepper Parmesan Crisps: Add 1 teaspoon of finely chopped fresh rosemary and a generous amount of cracked black pepper to the Parmesan-spinach mixture. The floral rosemary and spicy pepper give these crisps an elegant, sophisticated flavor perfect for a wine and cheese party.
Serving Ideas & Dipping Sauces
These spinach cheese crisps are delightful on their own, but they shine even brighter as part of a spread. Arrange them on a cheese board with grapes, nuts, and cured meats. Serve them alongside a warm bowl of tomato soup or roasted red pepper soup for dipping. They make a fantastic crunchy topping for Caesar salad or a creamy pasta. For dipping, try marinara sauce, ranch dressing, garlic aioli, pesto, or a creamy spinach and artichoke dip. They’re also a great low-carb alternative to crackers for scooping up chicken salad, tuna salad, or pimento cheese. And they’re elegant enough to pass around at a cocktail party with a glass of sparkling wine or a cold beer.
Storage, Make-Ahead & Keeping Them Crunchy
Make-Ahead: You can prepare the cheese-spinach mixture up to 2 days in advance and store it in an airtight container in the refrigerator. When ready to bake, simply scoop and bake as directed. This is a great time-saver for parties. The baked crisps can also be made a few hours ahead and left at room temperature, loosely covered, but they’re best the same day they’re baked.
Storing: To keep the crisps crunchy, store them in an airtight container at room temperature. They will stay crisp for up to 2 days, depending on humidity. If they soften, they can be re-crisped. Do not refrigerate them, as the moisture in the fridge will make them soggy very quickly. If you live in a very humid environment, consider storing them with a food-grade silica gel packet.
Re-Crisping: If the crisps lose their crunch, spread them on a baking sheet and bake at 350°F for 3–5 minutes, until they’re crisp again. Let them cool completely before serving. The air fryer at 350°F for 2–3 minutes also works wonderfully. They’ll be just as good as freshly baked.
Freezing: Freezing is not recommended, as the crisps are very susceptible to moisture and can become soggy upon thawing. If you must freeze them, do so in an airtight container with a desiccant, and then re-crisp them in the oven directly from frozen. However, they’re so quick and easy to make that fresh is always best.
Want the full recipe and simple step-by-step instructions?
Page 2 continues with the full ingredients, cooking tips, and easy directions so you can make this recipe perfectly at home.