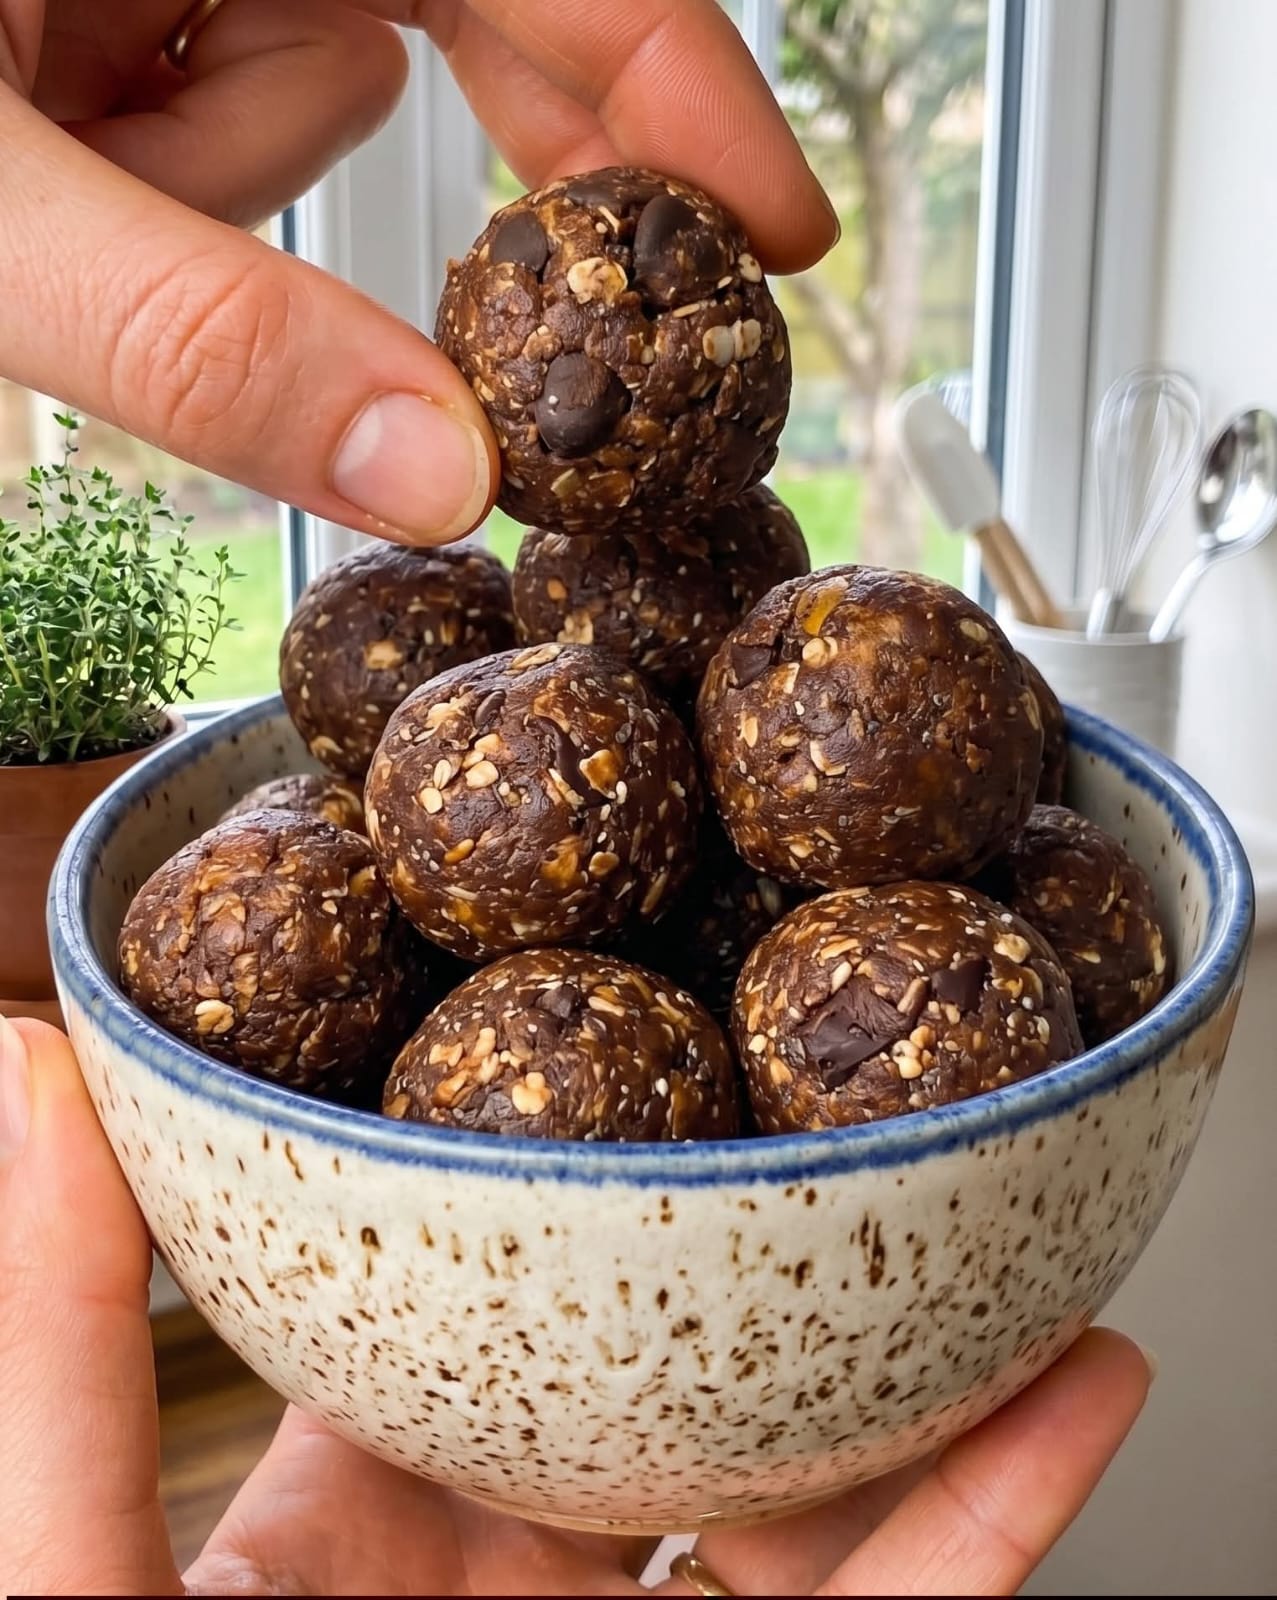
If you’ve ever wished you could eat brownie batter by the spoonful and call it a healthy snack, these No-Bake Cacao Protein Balls are about to make your dreams come true. They’re rich, fudgy, and intensely chocolatey, with a deep, dark flavor from raw cacao powder and a natural sweetness from soft, sticky Medjool dates. A scoop of chocolate or vanilla protein powder transforms them into a muscle-building powerhouse, while a handful of rolled oats and a swirl of creamy nut butter give them the perfect chewy texture. Each ball is like a truffle—dense, satisfying, and rolled in a dusting of cocoa, shredded coconut, or crushed nuts. They’re the ultimate grab-and-go breakfast, pre-workout fuel, or post-dinner treat that satisfies the fiercest chocolate cravings without a drop of refined sugar. Best of all, they come together in a food processor in about ten minutes, with absolutely no baking required. Keep a batch in your fridge, and you’ll always have a wholesome, protein-packed snack ready whenever you need a boost.
These cacao protein balls are part energy bite, part protein bar, and completely irresistible. The base is a simple, whole-food blend of dates, rolled oats, and almond butter (or peanut butter), which provides natural sweetness, fiber, and healthy fats. A generous scoop of protein powder not only boosts the protein content to about 6–8 grams per ball but also acts as a binder, helping the mixture hold its shape. Raw cacao powder, which is less processed than traditional cocoa, delivers a powerful punch of antioxidants and an intense, slightly bitter chocolate flavor that pairs perfectly with the sweet dates. A pinch of sea salt enhances everything, and a splash of vanilla extract rounds out the flavor. The mixture gets pulsed together until it forms a sticky, moldable dough, which you then roll into little spheres. You can leave them plain for a simple, fudgy bite, or roll them in a coating of your choice: shredded coconut, crushed almonds, hemp seeds, or even a dusting of extra cacao powder. They’re naturally gluten-free (if you use certified gluten-free oats), easily made vegan, and adaptable to whatever protein powder and nut butter you have on hand. They store beautifully in the fridge or freezer, making them the ultimate meal-prep snack. Whether you’re rushing out the door in the morning, hitting the gym after work, or just craving a little something sweet after dinner, these cacao protein balls are the answer. They’re proof that healthy eating can be deeply indulgent, and they’re destined to become a permanent fixture in your kitchen.
In this comprehensive guide, I’ll walk you through every detail of making the perfect cacao protein balls: how to choose the best dates for a smooth, consistent texture, the best protein powders to use (and how to avoid a chalky taste), dozens of flavor variations and coating ideas, and all the tips for storing and enjoying them. Get ready to meet your new favorite snack.
Why You’ll Love These Cacao Protein Balls
They taste like brownie batter, but are packed with nutrition. The deep, dark chocolate flavor from raw cacao powder, combined with the natural caramel-like sweetness of Medjool dates, creates a taste that’s shockingly close to a decadent brownie. Yet each ball is made from whole, unprocessed ingredients—no refined sugar, no flour, no butter. They’re a guilt-free indulgence that satisfies your sweet tooth while nourishing your body with fiber, healthy fats, and protein. It’s the kind of snack that makes you feel like you’re cheating, even when you’re being good.
A solid protein boost in a small package. Thanks to a scoop of high-quality protein powder, each of these balls delivers around 6–8 grams of protein (depending on the size and the brand of powder). Combined with the protein from the nut butter and oats, a couple of these balls make a substantial, satisfying snack that will keep you full and fueled. They’re perfect for a post-workout recovery bite, a mid-afternoon energy lift, or a quick breakfast when you’re short on time. The protein also helps stabilize blood sugar, so you avoid the crash that comes with sugary snacks.
Incredibly easy, no-bake, and ready in 10 minutes. There’s no oven required, no complicated techniques, and very little cleanup. You simply toss all the ingredients into a food processor, pulse until a sticky dough forms, and roll it into balls. It’s a great recipe for beginner cooks, busy parents, or anyone who wants a healthy snack without the fuss. Kids love helping with the rolling, and the process is so quick that you can make a batch while dinner is cooking. Plus, they’re naturally gluten-free (when using certified gluten-free oats) and can be made vegan, paleo, or keto with a few simple swaps.
Endlessly customizable and perfect for meal prep. This recipe is a blank canvas for your creativity. Use different nut butters, swap the protein powder flavor, add a teaspoon of instant coffee for a mocha kick, or stir in a handful of mini chocolate chips. Roll them in shredded coconut, chopped nuts, or hemp seeds for a beautiful, textured finish. The balls store beautifully in the fridge for up to two weeks, and they freeze even longer. Make a double batch on Sunday, and you’ll have a healthy, grab-and-go snack ready all week long. You can even pack them in lunchboxes, gym bags, or take them on road trips. They’re the ultimate portable, non-perishable energy bite that never gets boring.
Ingredient Deep Dive: The Fudgy, Protein-Packed Cast
Let’s explore each ingredient and how it contributes to the perfect cacao protein ball.
Medjool Dates – The Natural Sweetener and Binder
You’ll need 1 cup of tightly packed, pitted Medjool dates (about 10–12 large dates). Medjool dates are the gold standard for energy balls because they’re incredibly soft, sticky, and sweet, with a rich, caramel-like flavor. They act as both the sweetener and the binder, holding all the dry ingredients together without any added sugar or syrup. It’s important that your dates are fresh and soft; if they’re dry or hard, they won’t blend smoothly and the balls will be crumbly. To revive dry dates, soak them in warm water for 10–15 minutes, then drain well before using. You can substitute with other varieties of dates, but Medjools have the most moisture and the best flavor. If you prefer a less sweet ball, you can reduce the dates slightly and add a tablespoon of almond milk to help the dough come together. The dates also provide fiber, potassium, and antioxidants. Using whole dates means you’re getting the full nutritional profile of the fruit, rather than just its sugar.
Rolled Oats – The Wholesome, Chewy Base
One cup of old-fashioned rolled oats provides structure, fiber, and a pleasant, chewy texture. The oats absorb moisture from the dates and nut butter, helping the balls hold their shape and giving them substance. For a gluten-free version, use certified gluten-free oats. Quick oats can be used in a pinch, but they’ll produce a slightly softer, less chewy ball. Steel-cut oats are too hard and won’t process well. The oats also add whole-grain nutrition, including soluble fiber that’s good for heart health and digestion. If you prefer a grain-free version, you can substitute the oats with an equal amount of unsweetened shredded coconut or almond flour. The coconut will add a tropical note and a bit more chew, while almond flour will create a denser, more fudgy ball. The oats are a staple in this recipe because they’re affordable, accessible, and they provide that satisfying, cookie-like texture that makes these balls feel like a treat.
Raw Cacao Powder – The Intense Chocolate Flavor
Three tablespoons of raw cacao powder (or unsweetened cocoa powder) deliver a deep, dark chocolate flavor that’s rich and slightly bitter. Raw cacao is made by cold-pressing unroasted cocoa beans, which preserves more of the natural antioxidants and flavonoids. It has a more intense, complex flavor than Dutch-processed cocoa. You can use either one, but cacao powder gives these balls an extra nutritional boost and a beautiful, dark color. If you prefer a milder chocolate taste, reduce the cacao to 2 tablespoons. You can also add a tablespoon of cacao nibs for extra crunch and an even more intense chocolate punch. The cacao powder is also rich in magnesium and iron. Because it’s unsweetened, the natural sweetness of the dates balances it perfectly, creating a flavor that’s reminiscent of dark chocolate. It’s the ingredient that makes these balls taste so decadent. Sift it if it’s lumpy to ensure it blends evenly into the dough.
Protein Powder – The Muscle-Building Boost
One scoop (about 30 grams) of chocolate or vanilla protein powder adds a significant protein punch while also contributing to the dough’s structure and flavor. Whey protein blends smoothly and creates a creamy, fudgy texture. Plant-based proteins (pea, rice, hemp) work well too, but they can absorb more liquid, so you may need to add a teaspoon of water or almond milk if the dough seems too dry. The flavor of your protein powder will come through, so use one you genuinely enjoy. Chocolate protein powder amplifies the cacao flavor, while vanilla adds a subtle creaminess. Unflavored or unsweetened powder can be used, but you may want to add a bit of extra sweetener (like a drizzle of maple syrup) to compensate. If you don’t want to use protein powder, you can replace it with an additional ¼ cup of oats and 2 tablespoons of almond flour, but the protein content will be lower. The protein powder is what elevates these from a standard energy bite to a functional, post-workout snack. It also acts as a binder, so don’t skip it unless you’re adjusting the other ingredients accordingly.
Nut Butter and Vanilla Extract – The Creamy, Flavorful Binders
A quarter cup of creamy almond butter, peanut butter, or cashew butter adds richness, healthy fats, and a velvety texture. It helps the dough come together and makes the balls taste more indulgent. Almond butter has a mild, slightly sweet flavor that pairs beautifully with chocolate. Peanut butter adds a classic, nostalgic flavor that’s reminiscent of a peanut butter cup. Cashew butter is the creamiest and most neutral, letting the chocolate shine. Use a well-stirred, natural nut butter for the best consistency; avoid the dry, hard bit at the bottom of the jar. You can also use sunflower seed butter for a nut-free version. A teaspoon of pure vanilla extract adds a warm, aromatic note that enhances the chocolate and the sweetness of the dates. A pinch of sea salt balances the flavors and makes the chocolate taste even richer. Don’t skip the salt—it’s a small addition with a big impact. The nut butter also provides additional protein, making these balls even more satiating. If the dough is too sticky to roll, you can add a little more protein powder or oats. If it’s too dry, add a tiny bit more nut butter or a few drops of almond milk. The dough should hold together easily when squeezed and not stick excessively to your hands.
Step-by-Step: From Food Processor to Perfect Balls
Follow these detailed steps for perfectly fudgy, protein-packed cacao balls every time.
Step 1: Prep the Dates
Remove the pits from the Medjool dates if they aren’t already pitted. If your dates are dry or tough, soak them in a bowl of warm water for 10–15 minutes to soften. After soaking, drain them thoroughly and pat them dry with a paper towel. Soft, moist dates are essential for a smooth, cohesive dough. If your dates are already very soft and sticky, you can skip the soaking step.
Step 2: Pulse the Dry Ingredients
In the bowl of a food processor, combine the rolled oats, cacao powder, protein powder, and a pinch of sea salt. Pulse a few times to roughly chop the oats and mix the dry ingredients together. This step ensures the cacao and protein powder are evenly distributed before adding the sticky wet ingredients. The oats should be broken down slightly but not turned into a fine flour. You want some texture remaining for a chewy ball. If you don’t have a food processor, you can use a high-speed blender, but you’ll need to blend in short pulses and scrape down the sides frequently to avoid overprocessing. A food processor is ideal because it gives you more control over the texture.
Step 3: Add the Wet Ingredients
Add the pitted dates, nut butter, and vanilla extract to the food processor. Process the mixture for 30–60 seconds, pausing to scrape down the sides as needed, until the ingredients come together into a thick, sticky dough. The dough should hold together when pinched between your fingers. It should look like a cohesive, dark, fudgy mass. If the dough seems too dry and crumbly, add a teaspoon of water or almond milk and pulse again. If it’s too wet and sticky, add a tablespoon of oats or protein powder and pulse to combine. The texture should be moldable and slightly tacky but not so sticky that it coats your hands. The heat from the food processor will slightly warm the dates, making them even stickier and helping everything bind. Be careful not to overprocess; you don’t want a smooth paste—you want to retain some texture from the oats and dates for a satisfying bite.
Step 4: Roll into Balls
Using a tablespoon or a small cookie scoop, portion out the dough and roll it between your palms into smooth, round balls about 1 inch in diameter. You should get about 14–16 balls, depending on the size. If the dough sticks to your hands, lightly dampen your palms with water or coat them with a tiny bit of neutral oil (like coconut oil). This will make rolling much easier and give the balls a nice, smooth finish. Place the rolled balls on a parchment-lined plate or baking sheet. At this point, you can roll the balls in your desired coating: shredded coconut, crushed nuts, hemp seeds, sesame seeds, or a light dusting of extra cacao powder. The coating adds flavor, texture, and a beautiful appearance. To coat, simply pour the topping into a shallow bowl and roll each ball gently until it’s covered. Press the coating in lightly with your fingers to help it adhere. If you prefer plain balls, they’re delicious just as they are. The uncoated balls will have a slightly moist, fudgy surface that’s equally appealing.
Step 5: Chill and Enjoy
Place the baking sheet of rolled balls in the refrigerator for at least 30 minutes to firm up. Chilling helps the balls set and enhances their flavor. The texture becomes denser and more satisfying. Once chilled, transfer the balls to an airtight container for storage. They can be eaten straight from the fridge for a firmer bite, or allowed to sit at room temperature for a few minutes to soften slightly. The balls are delightfully chewy, rich, and packed with chocolate flavor. Enjoy them as a quick breakfast, a post-workout refuel, or a healthy dessert. They’re also great crumbled over yogurt, smoothie bowls, or oatmeal. One or two balls is usually enough to satisfy a craving and provide a nice energy lift.
Pro Tips for the Best Texture and Flavor
- Use soft, fresh dates. The moisture and stickiness of Medjool dates are what bind the balls together. Hard, dry dates won’t break down properly and will result in a crumbly, dry dough. If your dates are even slightly firm, soak them in warm water to rehydrate. After soaking, drain them extremely well—excess water can make the dough too wet. The ideal date is so soft you can squish it easily between your fingers. If you buy dates in bulk, store them in the refrigerator or freezer to keep them fresh longer. Fresh, pliable dates will give you the best flavor and texture, and they’re worth seeking out.
- Don’t overprocess the mixture. You want the dough to be well combined but not turned into a smooth paste. A few small chunks of date or oat add pleasant texture and make the balls more interesting to eat. If you process too long, the mixture can become too oily (especially if using natural peanut butter) and the balls may not hold their shape as well. Pulse in short bursts, and stop as soon as the dough comes together when pressed. The dough should be a bit chunky and rustic, not perfectly smooth. This not only tastes better but also makes the balls look homemade and charming.
- Adjust the consistency as needed. The moisture content of dates and nut butter can vary. If the dough is too dry, add a tiny splash of almond milk or water (a teaspoon at a time). If it’s too wet, add a little more protein powder or oats. The dough should be easy to roll without sticking excessively to your hands. If you’re making the balls in a humid environment, the dough may be stickier; popping it in the fridge for 15–20 minutes before rolling can help. Lightly oiled hands also work wonders for sticky dough.
- Chill the dough if it’s too sticky to roll. If you find the dough is sticking to your hands and difficult to shape, refrigerate the entire bowl of dough for 20–30 minutes. Chilling firms up the nut butter and dates, making them much easier to handle. This is especially helpful in a warm kitchen. You can also scoop the dough and roll it into balls wearing disposable food-safe gloves, which prevent sticking. The balls will become firmer and easier to roll as they chill. After rolling, the final refrigerator rest sets them perfectly.
- Experiment with coatings. The coating not only makes the balls look pretty, but it also adds flavor, texture, and prevents them from sticking together in storage. Some favorite coatings include unsweetened shredded coconut, finely chopped almonds or pistachios, cacao nibs, hemp seeds, sesame seeds, or a simple dusting of cacao powder. For a more indulgent treat, you can even dip the balls in melted dark chocolate and let them set in the fridge. The coating should be applied right after rolling, while the surface of the balls is still slightly sticky. Press the coating gently to help it adhere. A mix of coatings creates a beautiful, gift-worthy assortment.
Flavor Twists & Coating Ideas
Once you’ve mastered the basic cacao protein ball, try these fun variations to switch things up.
- Mocha Protein Balls: Add 1–2 teaspoons of instant espresso powder (or finely ground coffee) to the dry ingredients. The coffee intensifies the chocolate flavor and gives these balls a subtle caffeine kick. Roll them in cocoa powder or finely chopped coffee beans for a sophisticated, energizing snack.
- Peanut Butter Cup Balls: Use peanut butter as your nut butter and roll the finished balls in crushed roasted peanuts. For an extra-decadent version, press a small square of dark chocolate into the center of each ball before rolling it closed. This creates a molten, chocolatey center that makes them taste like a gourmet peanut butter cup.
- Mint Chocolate Balls: Add ¼ teaspoon of pure peppermint extract (not mint flavoring) along with the vanilla. The cool, refreshing mint pairs beautifully with the dark cacao. Roll the balls in crushed candy canes (during the holidays) or in a dusting of powdered sugar-free sweetener mixed with a tiny bit of cacao.
- Coconut Almond Joy Balls: Replace the nut butter with almond butter, and add ¼ cup of unsweetened shredded coconut to the dough. Roll the finished balls in more shredded coconut. The combination of chocolate, almond, and coconut is a classic for a reason. For a true Almond Joy experience, press a whole almond into the center of each ball before rolling.
- Spiced Mexican Chocolate Balls: Add ½ teaspoon of ground cinnamon and a tiny pinch of cayenne pepper to the dry ingredients. The warm spices enhance the cacao and give the balls a gentle, lingering heat. Roll them in a mixture of cacao powder and cinnamon for a beautiful, aromatic finish.
Serving, Gifting & Occasions
These cacao protein balls are perfect for so many occasions. Pack them in a small container for a post-workout snack at the gym. Add a few to lunchboxes for a healthy school or office treat. Arrange them on a platter with other homemade energy bites, fresh fruit, and nuts for a beautiful, wholesome snack board. They make a wonderful, thoughtful homemade gift: pile them in a cellophane bag tied with a ribbon, or layer them in a decorative tin. Because they’re sturdy and non-perishable for a few days, they ship well in cool weather, making them a great care package for college students or loved ones far away. Serve them at a brunch, baby shower, or holiday party as a lighter dessert option that still feels indulgent. They’re also fantastic crumbled over a bowl of Greek yogurt with fresh berries for a high-protein breakfast. However you serve them, they’re a guaranteed hit with both kids and adults. The rich, chocolatey flavor makes them feel like a treat, while the wholesome ingredients let you feel good about every bite.
Storage, Freezing & Meal Prep
Make-Ahead: The dough can be made up to 2 days in advance. Store it covered in the refrigerator, then roll into balls when you’re ready. The balls themselves are ideal for meal prep: make a double batch on Sunday, and you’ll have a healthy snack ready for the entire week. They’re the perfect grab-and-go option for busy mornings.
Storing: Keep the finished protein balls in an airtight container in the refrigerator. They will stay fresh for up to 2 weeks. The cool temperature keeps them firm and fudgy. You can also store them at room temperature for a few days if your kitchen is cool (below 70°F), but they’re at their best when chilled. If you’ve rolled them in a coating, the coating will stay crisp in the fridge.
Freezing: These balls freeze beautifully. Place them in a single layer on a baking sheet and freeze until solid, then transfer them to a freezer-safe bag or container. They’ll keep for up to 3 months. You can eat them straight from the freezer—they’re firmer and chewier, almost like a frozen fudge bite—or let them thaw in the refrigerator for a few hours or at room temperature for about 15 minutes. Freezing is a fantastic way to always have a healthy snack on hand. You can pull out just a couple at a time, so nothing goes to waste.
Want the full recipe and simple step-by-step instructions?
Page 2 continues with the full ingredients, cooking tips, and easy directions so you can make this recipe perfectly at home.