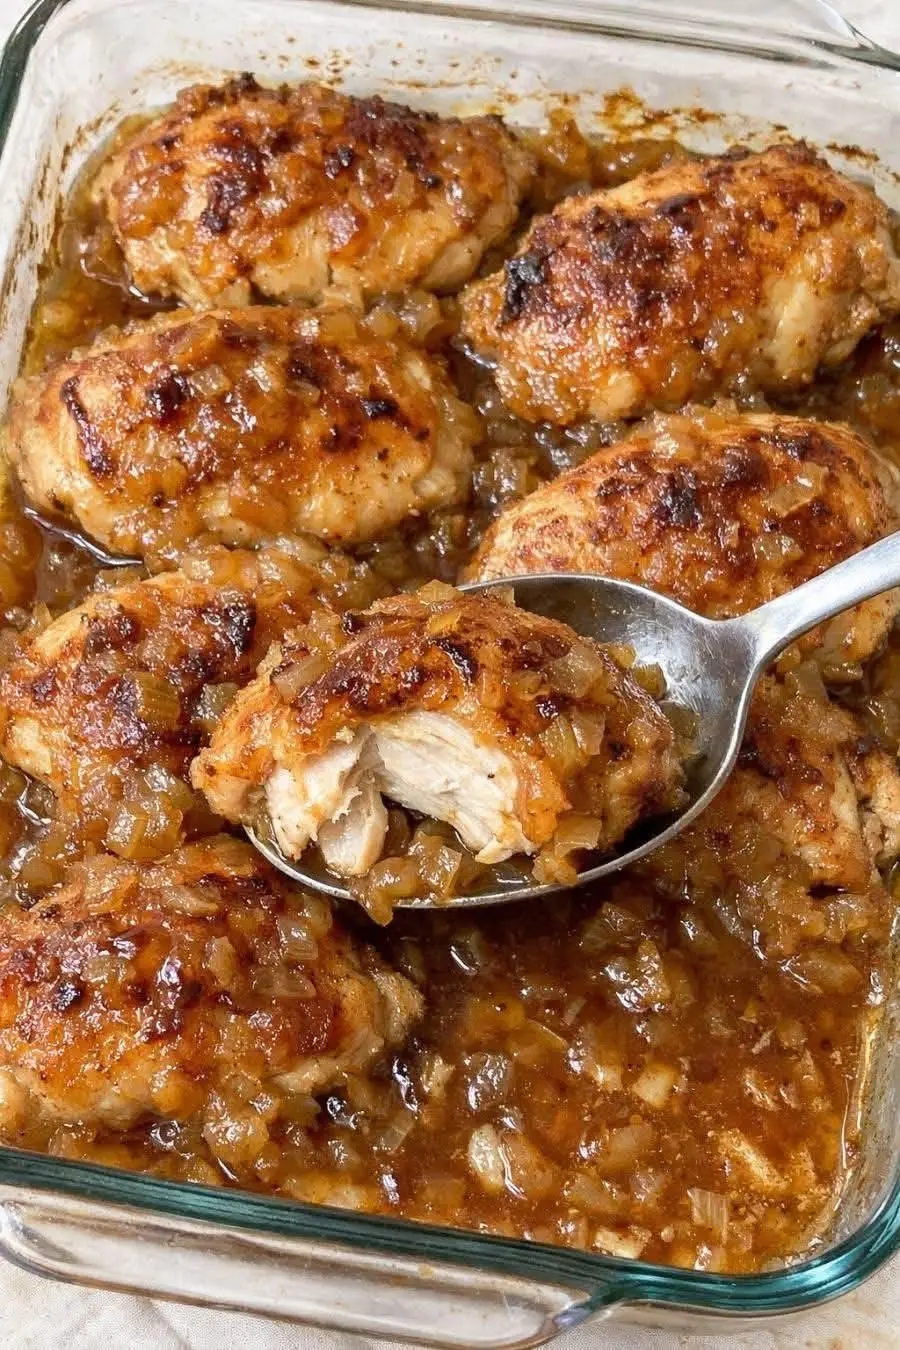
There’s a reason why the simplest recipes often become our most treasured. They don’t demand a long grocery list, they don’t need fancy techniques, and they get dinner on the table while we’re still sane. This Oven Baked 3-Ingredient Chicken is exactly that kind of miracle—just three core ingredients, a hot oven, and about half an hour, and you’ll have tender, juicy chicken breasts coated in a golden, cheesy, slightly tangy crust that tastes like a million bucks. It’s the dinner you turn to when the fridge is nearly empty, the clock is ticking, and everyone still expects something delicious. The mayonnaise and Parmesan work together like magic, keeping the lean meat impossibly moist while creating a bubbly, savory topping that caramelizes into a beautiful, golden-brown finish. Serve it with a simple salad, steamed vegetables, or over rice, and you’ve got a complete meal that feels indulgent but couldn’t be easier.
This recipe belongs to a glorious category of cooking that proves great flavor doesn’t need a dozen ingredients. The mayonnaise, often misunderstood, is the secret weapon—it’s made mostly of oil and eggs, so when it hits the oven’s heat, it essentially bastes the chicken from the outside, locking in moisture and browning beautifully. The Parmesan adds its salty, nutty depth and forms a lacy, crisp crust. With just a few shakes of garlic powder, black pepper, and maybe a pinch of paprika for color, you’ve created something that tastes like a restaurant-quality entrée from nothing more than a few pantry staples. It’s the kind of recipe you’ll find yourself making on repeat because it’s fast, it’s affordable, and it works perfectly every single time. Kids love it, adults love it, and the cook loves the lack of cleanup.
In this detailed guide, I’ll walk you through everything you need to know to make the best 3-ingredient baked chicken of your life. We’ll cover why this simple combination works so brilliantly, the tricks for getting a perfect golden crust without drying out the meat, and a host of easy variations that let you customize the flavor to your family’s tastes. Whether you’re a new cook looking for a foolproof first recipe or a seasoned home chef in need of a quick weeknight hero, this oven-baked chicken is about to become your new best friend. Let’s preheat the oven and get cooking.
Why You’ll Love This 3-Ingredient Chicken
Only three core ingredients, yet incredible flavor. Chicken breasts, mayonnaise (or a thick substitute), and grated Parmesan cheese—that’s the entire list. Salt, pepper, and a pinch of garlic powder are pantry staples, but even without them, the mayo and Parmesan carry enough tang and umami to make this dish genuinely delicious. It’s the ultimate stripped-down recipe that proves you don’t need a dozen spices or an elaborate marinade to create something wonderful.
Juicy, tender meat every time. Chicken breasts are notoriously lean and can dry out quickly in a hot oven. The mayonnaise coating solves that problem completely. As it bakes, it forms a protective barrier that locks in moisture, essentially steaming the chicken under a rich, creamy layer. The result is meat that’s silky and tender, not dry and stringy. You’ll never suffer through a cardboard-like chicken breast again.
A golden, cheesy crust that everyone loves. The Parmesan in the topping melts, toasts, and browns into a savory, nutty crust that’s almost like a crispy cheese chip on top of the chicken. It adds a wonderful textural contrast—creamy underneath, crunchy on top—and a deep, salty flavor that makes each bite irresistible. Even picky eaters who might push plain chicken around their plate will ask for seconds when it’s coated in this magical blend.
Ready in about 30 minutes with minimal effort. From mixing the topping to sliding the dish into the oven, the active prep time is under five minutes. The oven does the rest of the work, freeing you up to toss a salad, boil some rice, or simply relax. It’s the perfect fast, healthy weeknight dinner that requires almost no planning or cleanup. You can even mix the topping earlier in the day and spread it on the chicken just before baking.
Ingredient Deep Dive: The Magic Three
Understanding why these three ingredients work so perfectly together helps you customize and achieve flawless results every time.
1. Boneless, Skinless Chicken Breasts – The Lean Canvas
You’ll need 4 medium boneless, skinless chicken breasts (about 1½ to 2 pounds total). Look for breasts that are similar in size so they cook at the same rate. If some are much thicker, you can pound them slightly with a meat mallet or cut them horizontally to an even thickness—about ¾ inch is ideal. This ensures the topping browns at the same time the chicken cooks through. Pat the chicken completely dry with paper towels before adding the topping; excess moisture can cause the mayonnaise mixture to slide off. You can also use boneless chicken thighs for an even juicier result; they’re forgiving and stay incredibly moist. If using thighs, the cook time will be similar, but they’re done at a slightly higher internal temperature (175°F for thighs vs. 165°F for breasts) and benefit from a few extra minutes.
2. Mayonnaise – The Creamy, Flavorful Moisture Barrier
One cup of real, full-fat mayonnaise is the classic choice. It’s the backbone of the topping, providing a tangy, rich flavor and the all-important moisture-sealing layer. As it bakes, the oil and eggs in the mayo keep the chicken incredibly juicy while browning to a light golden hue. Don’t use low-fat or fat-free mayo—they contain more water and less fat, which can make the topping watery and less effective. If you’re not a mayo fan, you can substitute an equal amount of full-fat Greek yogurt or sour cream. Greek yogurt will give a tangier, slightly lighter result, while sour cream is richer and milder. Both work beautifully, but the flavor profile will shift slightly. For a dairy-free version, a thick, unsweetened plant-based yogurt or even a well-stirred tahini mixed with a little lemon juice and salt can work, though the result will be different.
3. Grated Parmesan Cheese – The Golden, Nutty Crust
One cup of grated Parmesan cheese is the final piece of the puzzle. Use a good-quality Parmesan (Parmigiano-Reggiano is ideal) and grate it yourself from a block for the best melt and flavor. Pre-grated, shelf-stable Parmesan often contains anti-caking agents that can prevent it from melting into a cohesive, crispy layer. Freshly grated Parmesan has a lower moisture content and a nutty, salty punch that transforms the simple mayonnaise base into something spectacular. When baked, the Parmesan melds with the mayo, creating a golden, lacy crust that crackles slightly when you cut into it. It also adds a deep umami note that makes the chicken taste far more complex than its three ingredients suggest. You can swap part of the Parmesan for finely grated Pecorino Romano for an even sharper, saltier edge, or use a blend of Parmesan and breadcrumbs for a thicker, crunchier crust if you’re open to adding a fourth ingredient.
Optional Seasonings – The Flavor Boosters
While the recipe absolutely works with just the three core ingredients, a few pantry seasonings elevate it from simple to superb without counting as additional “ingredients” in the spirit of the recipe. Garlic powder (½ teaspoon) adds an aromatic, savory backbone. Freshly ground black pepper (¼ teaspoon) provides warmth. A pinch of paprika (¼ teaspoon) contributes a subtle smokiness and a beautiful reddish-gold color to the crust. A little salt is usually not necessary because the Parmesan is already salty, but taste the mayo mixture before adding any. You can also stir in a teaspoon of Italian seasoning, a pinch of cayenne for heat, or a squeeze of lemon juice for brightness. These are completely optional and don’t break the “three-ingredient” simplicity; they’re just there to make the dish your own.
Step-by-Step: From Oven to Table
This recipe is so simple you’ll memorize it after one try. Follow these detailed steps for perfect results.
Step 1: Preheat the Oven and Prepare the Pan
Preheat your oven to 400°F (200°C). The high temperature is important for browning the Parmesan crust quickly while keeping the chicken juicy. Line a rimmed baking sheet with parchment paper or aluminum foil for easy cleanup, or lightly grease a baking dish. You can use a baking sheet (which allows air to circulate around the chicken for even browning) or a 9×13-inch dish (which keeps the juices a little more contained).
Step 2: Make the Topping
In a medium bowl, combine the 1 cup of mayonnaise (or Greek yogurt), the 1 cup of freshly grated Parmesan cheese, and any optional seasonings you’re using—garlic powder, black pepper, paprika, or herbs. Stir with a spatula until the mixture is thoroughly combined and smooth. It will be thick and spreadable. Taste it (it’s safe, everything is fully cooked or pasteurized) and adjust the seasoning if needed. Remember the Parmesan is salty, so you likely won’t need additional salt.
Step 3: Coat the Chicken
Pat the chicken breasts completely dry with paper towels. Place them on the prepared baking sheet or dish, smooth side up. Divide the Parmesan-mayo mixture evenly among the chicken breasts, spreading it over the top of each piece to cover the entire surface. The layer should be about ¼ inch thick. It’s okay if a little drips down the sides, but you want the majority on top to form that glorious crust. There’s no need to coat the underside; the topping on top will baste the chicken as it bakes.
Step 4: Bake to Golden Perfection
Slide the pan into the preheated oven and bake for 20 to 25 minutes. The exact time depends on the thickness of your chicken breasts. The chicken is done when the topping is puffed, golden brown, and slightly crisp around the edges, and the internal temperature of the chicken reaches 165°F (74°C) when checked with an instant-read thermometer at the thickest part. If the topping is browning too quickly but the chicken isn’t done yet, tent the pan loosely with aluminum foil. If you like an extra-crispy, deeply browned crust, switch the oven to broil for the last 1–2 minutes, watching constantly—the cheesy topping can go from perfectly golden to burnt very quickly.
Step 5: Rest Briefly and Serve
Remove the chicken from the oven and let it rest on the pan for 3–5 minutes before serving. This brief rest allows the juices to settle and the topping to firm up slightly, making it easier to transfer to plates without the crust sliding off. Serve the chicken whole or sliced, spooning any pan drippings over the top. Garnish with a little fresh chopped parsley or a sprinkle of extra Parmesan if you’re feeling fancy. Enjoy the fact that dinner is done, everyone is happy, and you barely broke a sweat.
Pro Tips for Juicy, Perfectly Browned Chicken
- Start with dry chicken. Moisture is the enemy of a good crust. Pat the breasts extremely well with paper towels. If they’re damp, the mayo mixture can slide off during baking and won’t adhere. A dry surface also helps the chicken brown slightly underneath.
- Use an instant-read thermometer. The best way to avoid dry chicken is to cook to temperature, not time. Breasts are safe at 165°F, but they’ll continue to cook a little after you pull them from the oven, so you can remove them at 160–162°F and let carryover heat bring them to the final temp. The result is perfectly juicy meat every time.
- Don’t spread the topping too thin. A generous layer not only adds flavor but also protects the chicken from the direct oven heat. Aim for a thickness that fully covers the meat. If the layer is too thin, it can dry out and brown too fast without insulating the chicken.
- Position the oven rack in the upper third. Placing the rack slightly above the center helps the Parmesan topping brown and bubble without overcooking the bottom of the chicken. The broiler element (if you use it) will be closer to the food, giving you a beautiful finish quickly.
- Let the chicken rest. A few minutes off the heat allows the juices to redistribute and the topping to set, so it doesn’t all slide off when you cut into it. It’s a small step that makes a big difference in presentation.
Flavor Twists & Simple Upgrades
While the classic Parmesan-mayo version is perfection, you can easily tweak the topping to create entirely different meals. Here are a few favorite variations.
- Herb & Garlic Chicken. Add 1 teaspoon of dried Italian seasoning or a mix of dried basil, oregano, and rosemary to the topping, along with an extra pinch of garlic powder. The herbs perfume the crust and give it a Mediterranean vibe that pairs beautifully with a side of roasted vegetables or a Greek salad.
- Spicy Southwest Chicken. Stir 1 teaspoon of chili powder, ½ teaspoon of cumin, and a pinch of cayenne into the mayo-Parmesan mixture. Serve with salsa, sliced avocado, and a squeeze of lime for a Tex-Mex twist. You can even top the baked chicken with a little shredded pepper Jack cheese in the last few minutes of baking.
- Bacon Cheddar Ranch Chicken. Add 1 tablespoon of dry ranch seasoning mix to the topping and reduce the Parmesan slightly. After baking, sprinkle crumbled cooked bacon and a little shredded cheddar on top, then broil for 1 minute until bubbly. Drizzle with extra ranch or sour cream for a loaded flavor experience.
- Everything Bagel Chicken. Replace the Parmesan with a similar amount of everything bagel seasoning, and mix it into the mayo. The sesame seeds, dried onion, garlic, and salt create a crunchy, flavorful crust that’s completely irresistible. This version is excellent with a side of cucumber salad.
- Lemon Pepper Chicken. Stir 1 tablespoon of lemon pepper seasoning and the zest of one lemon into the mayo. The bright, zesty flavor cuts through the richness and is perfect for a light, springy meal. Serve with steamed asparagus and rice pilaf.
What to Serve with 3-Ingredient Baked Chicken
This chicken is incredibly versatile and pairs well with almost anything. Steamed or roasted vegetables like broccoli, green beans, or asparagus add color and nutrition. A simple rice pilaf or buttered egg noodles soak up any juices and complete the meal. Mashed potatoes are a comforting classic, and the creamy chicken goes perfectly with them. For a low-carb option, serve over cauliflower rice or alongside a crisp green salad with a lemon vinaigrette. A side of crusty bread or garlic toast is always welcome for mopping up the cheesy bits. This chicken also slices beautifully and works on top of a Caesar salad or in sandwiches and wraps the next day.
Storage, Reheating & Meal Prep
Make-Ahead: You can mix the Parmesan-mayo topping up to 3 days in advance and store it in the refrigerator. When ready to cook, simply spread it on the dry chicken and bake. The assembled, unbaked chicken can also be covered and refrigerated for a few hours before baking; just add a few minutes to the bake time if starting cold.
Storing Leftovers: Place cooled chicken in an airtight container and refrigerate for up to 4 days. The topping will soften but the chicken will remain moist. It’s excellent cold, sliced over salads or in sandwiches.
Reheating: To re-crisp the topping, reheat the chicken in a 350°F oven or toaster oven for 8–10 minutes, or in an air fryer at 350°F for 4–5 minutes. The microwave works in a pinch but will make the crust soft. If reheating in the microwave, do so gently to avoid drying out the meat.
Freezing: The unbaked chicken can be frozen. Assemble the chicken with the topping, place on a parchment-lined tray, and freeze until solid. Transfer to a freezer bag and freeze for up to 3 months. Bake from frozen, adding 10–15 minutes to the cooking time. The baked chicken can also be frozen, but the crust will lose its crunch; it’s best to freeze unbaked. Thaw baked chicken overnight in the fridge and reheat gently.
Want the full recipe and simple step-by-step instructions?
Page 2 continues with the full ingredients, cooking tips, and easy directions so you can make this recipe perfectly at home.