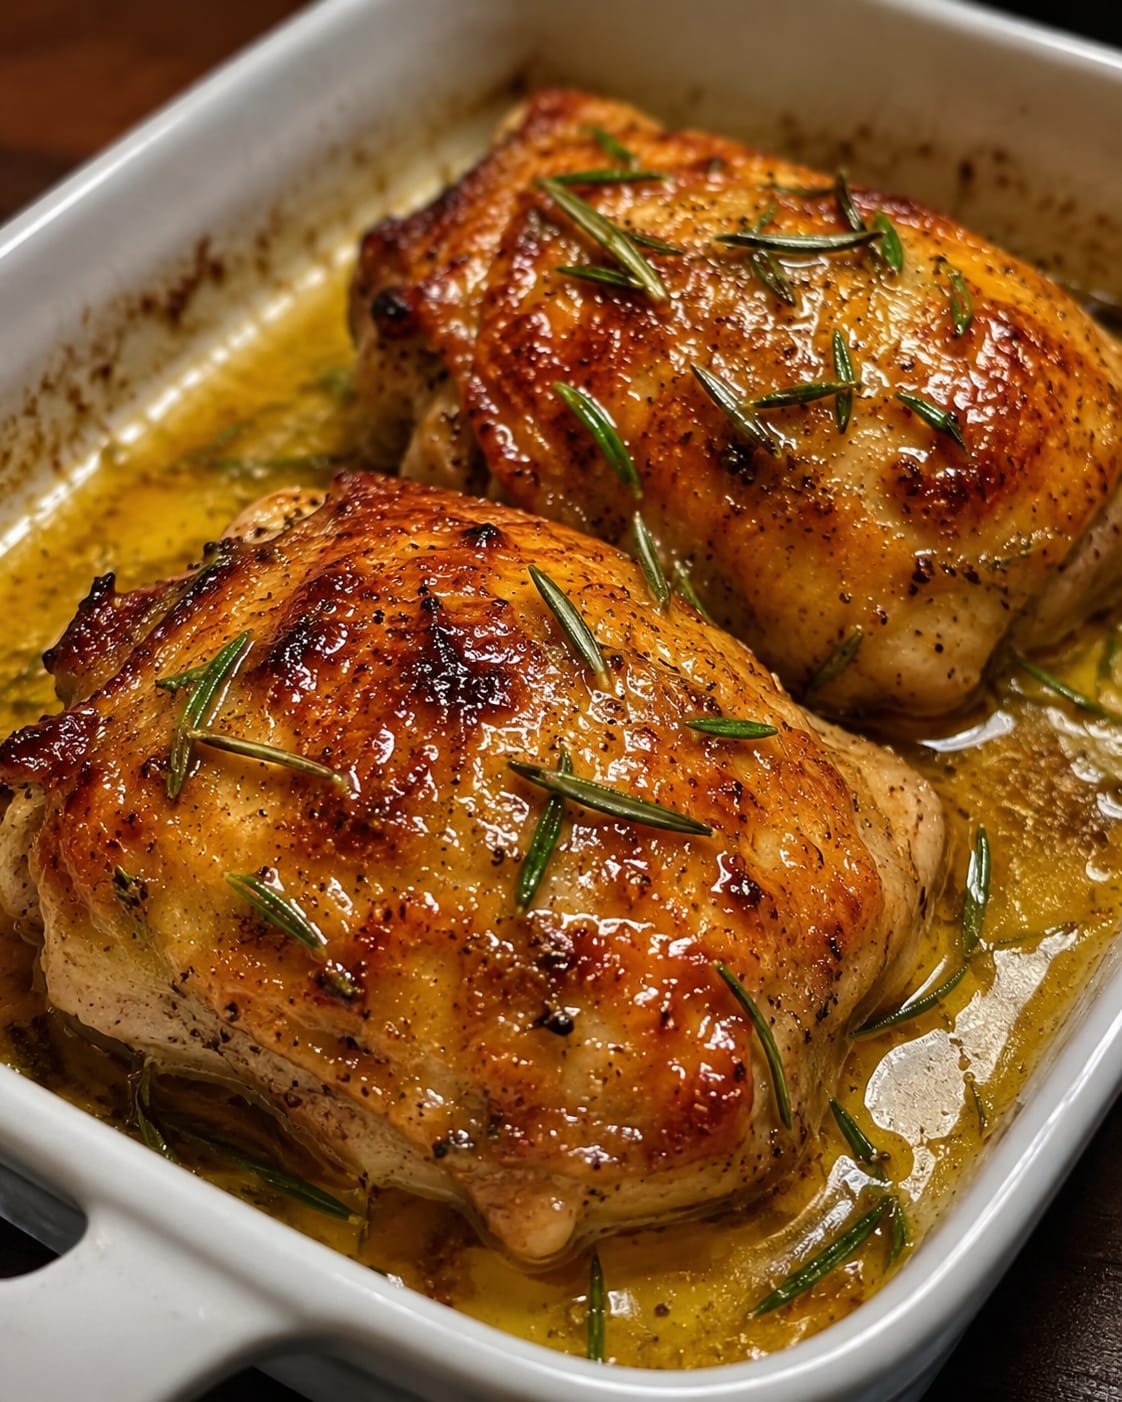
There’s a magic that happens when melted butter, sweet honey, and pungent garlic meet in a hot oven—the kitchen fills with an aroma so intoxicating that everyone drifts toward the stove. This Honey Butter Garlic Chicken is that dish: a masterpiece of balance where juicy, tender chicken is glazed in a sticky, sweet-savory sauce that caramelizes into a burnished golden crust. The edges turn slightly crisp, the garlic mellows into mellow warmth, and the honey thickens into a lacquered glaze that clings to every bite. It’s an easy weeknight dinner that looks and tastes like a special occasion, and it’s guaranteed to become one of your most-requested meals.
What sets this recipe apart is how effortlessly it comes together while delivering such bold, well-rounded flavor. You can use budget-friendly chicken thighs for supremely succulent meat, or lean chicken breasts for a lighter option. The sauce is a simple whisk of pantry staples—butter, olive oil, honey, garlic, lemon juice, and a touch of Dijon mustard for depth—plus a sprinkle of paprika and fresh rosemary. No marinating required, no complicated techniques. Just pour it over the chicken and let the oven do all the work. In about half an hour, you’ll pull out a baking dish of glistening, golden chicken that’s begging to be spooned over fluffy rice or mashed potatoes to soak up every last drop of that glorious sauce.
In this comprehensive guide, I’ll take you through every detail—from selecting the best chicken cut for juicy results to the science of getting that sticky, caramelized exterior. You’ll learn how to customize the flavors with different herbs and spices, the secrets to avoiding dry chicken, and all the best sides to complete the meal. Whether you’re looking for a quick family dinner, a meal-prep hero, or a simple yet stunning dish for guests, this honey butter garlic chicken delivers on every front. Let’s dive into the skillet-to-oven magic.
Why You’ll Love This Honey Butter Garlic Chicken
It’s the perfect sweet-savory combo. Honey and butter create a glossy, rich glaze that clings to the chicken, while garlic provides a robust savory backbone. A squeeze of lemon brightens everything up, and Dijon mustard adds a subtle complexity that makes the sauce taste far more intricate than its simple ingredient list suggests. The result is a dish that hits every note—sweet, salty, tangy, and umami—all in one glorious bite.
Juicy, tender meat with a golden, caramelized crust. The high oven heat and the sugars in the honey work together to create a beautiful caramelization on the outside of the chicken while the inside stays incredibly moist. A quick broil at the end intensifies that sticky, crackly exterior without drying out the meat. It’s the kind of texture you expect from a restaurant-quality entrée, achieved in your own kitchen with almost no effort.
Incredibly easy and fast. You can have this dish in the oven in under 10 minutes. No complicated marinades, no searing on the stovetop (though you could if you wanted an even deeper crust). Everything is whisked together in a single bowl and poured over the chicken. It’s a true dump-and-bake recipe that requires minimal cleanup.
Versatile for any dietary preference. It’s naturally gluten-free, and with a few simple swaps (coconut aminos instead of the Worcestershire-like Dijon, and a dairy-free butter), it becomes dairy-free as well. The honey can be replaced with maple syrup or agave for a slightly different sweetness, though honey’s thick viscosity is part of the magic that makes the glaze so sticky. You can also make it low-carb by using a brown sugar-free sweetener and skipping the honey in favor of a sugar-free honey alternative.
Ingredient Deep Dive: The Sauce That Makes It Sing
Every element in this recipe serves a purpose. Here’s what you need and why.
Chicken Thighs or Breasts – The Protein Base
You can use 4 bone-in, skin-on chicken thighs for the juiciest, most forgiving result. The dark meat stays succulent even with a few extra minutes of oven time, and the skin crisps up beautifully under the broiler. If you prefer white meat, 4 boneless, skinless chicken breasts work too, but you’ll need to watch the internal temperature carefully to avoid drying them out—pull them at 160°F and let carryover cooking bring them to 165°F. Patting the chicken completely dry with paper towels before saucing is non-negotiable; it removes surface moisture that would otherwise steam the meat and prevents the sauce from adhering properly.
Melted Butter & Olive Oil – The Rich Foundation
Three tablespoons of melted unsalted butter bring a luxurious, creamy richness that carries the flavors of the garlic and herbs. Combined with 2 tablespoons of olive oil, the sauce gets a higher smoke point, which helps with browning. The olive oil also contributes a fruity note that complements the honey. If you’re dairy-free, use a high-quality plant-based butter or simply increase the olive oil, though the butter flavor will be missed.
Honey – The Sweet Sticky Glaze
Three tablespoons of honey not only sweeten the dish but also caramelize under the broiler to create that irresistible sticky exterior. Use a mild honey like clover or wildflower to avoid overwhelming the other flavors. The honey also helps balance the pungency of the garlic and the acidity of the lemon. If your honey is crystallized, gently warm it until it’s pourable; it will mix into the sauce more easily.
Fresh Garlic – The Aromatic Punch
Four cloves of fresh garlic, minced, are the backbone of this dish. As the chicken bakes, the garlic mellows and infuses the butter and honey with a savory warmth. Don’t be tempted to use jarred minced garlic—fresh garlic has a much brighter, more potent flavor. For an even more intense garlic presence, you can double the cloves. Just be careful not to let the garlic burn under the broiler; if you’re worried, tent the dish loosely with foil during the broil.
Lemon Juice & Dijon Mustard – The Acid & Depth
A tablespoon of lemon juice cuts through the richness of the butter and honey, brightening the entire sauce and keeping it from feeling heavy. The optional teaspoon of Dijon mustard adds a subtle tang and emulsifies the sauce slightly, helping the butter and honey come together more cohesively. If you don’t have Dijon, a little stone-ground mustard or even a splash of apple cider vinegar can provide that necessary acidic balance.
Paprika & Fresh Herbs – The Color & Aroma
A teaspoon of paprika gives the chicken a warm, reddish-golden hue and a whisper of smokiness. Fresh rosemary or thyme (1 teaspoon chopped) adds an earthy, aromatic note that pairs beautifully with the honey and garlic. You can substitute dried herbs (use ½ teaspoon) if that’s what you have, but fresh herbs really make the dish sing. The extra herbs for garnish at the end provide a final burst of freshness and a beautiful presentation.
Step-by-Step: From Oven to Table
This dish is a true one-pan wonder. Follow these detailed steps for flawless results.
Step 1: Preheat and Prep
Preheat your oven to 400°F (200°C). Place the chicken in a baking dish just large enough to hold the pieces without crowding—if the chicken is too cramped, it will steam instead of roast. Pat each piece thoroughly dry with paper towels. This ensures the sauce adheres well and the skin (if using thighs) can crisp.
Step 2: Whisk the Honey Butter Garlic Sauce
In a medium bowl, combine the melted butter, olive oil, honey, minced garlic, lemon juice, Dijon mustard (if using), paprika, salt, black pepper, and chopped rosemary or thyme. Whisk until the honey is fully dissolved and the mixture is emulsified. It should look glossy and uniform.
Step 3: Coat the Chicken
Pour the sauce over the chicken in the baking dish. Use your hands or tongs to turn the pieces and ensure every surface is coated. Arrange the chicken skin-side up (or smooth side up for breasts) so the top gets the most direct heat for browning.
Step 4: Bake Until Cooked Through
Slide the dish into the preheated oven and bake, uncovered, for 25 to 35 minutes. The exact time depends on the thickness and type of chicken. Chicken thighs typically need 30–35 minutes; breasts need 25–30 minutes. Halfway through the baking time, open the oven and spoon some of the pan sauce over each piece of chicken. This basting step builds up layers of flavor and keeps the surface moist.
Step 5: Broil for a Sticky, Golden Crust
Once the chicken has reached an internal temperature of about 160°F (it will carry over to 165°F as it rests), switch the oven to broil. Broil for 2 to 3 minutes, watching carefully. The sauce will bubble and caramelize, turning a deep golden amber with slightly charred spots. Do not walk away—honey burns quickly under high heat. When the top looks gloriously sticky and lacquered, remove the dish from the oven.
Step 6: Rest, Garnish, and Serve
Let the chicken rest in the dish for 5 minutes before serving. This allows the juices to redistribute throughout the meat and the sauce to thicken slightly. Spoon more of the pan sauce over the top. Garnish with additional fresh rosemary, thyme, or parsley for a pop of green. Serve immediately with your chosen sides.
Pro Tips for Juicy, Golden Perfection
- Use an instant-read thermometer. The best way to guarantee juicy chicken is to cook to temperature, not time. Chicken breasts are safe at 165°F, but pulling them at 160°F and letting carryover cooking finish the job yields exceptionally moist meat. Thighs are more forgiving and can even go a bit higher without drying out.
- Don’t overcrowd the pan. Leave a little space around each piece of chicken so hot air can circulate and the sauce can reduce properly. If the chicken is packed together, it will steam and the skin won’t crisp.
- Baste, baste, baste. Spooning the sauce over the chicken halfway through baking ensures the top stays moist and builds a deep, layered glaze. It’s a small action with big payoff.
- Watch the broiler like a hawk. The final broil is what takes the chicken from good to spectacular, but honey can go from caramelized to charred in seconds. Stand by the oven and check every 30 seconds.
- Add broth for more sauce if desired. If the sauce reduces too much or you want extra for drizzling over rice, deglaze the pan with a splash of chicken broth after removing the chicken and simmer it on the stovetop for a minute to create a quick pan gravy.
Flavor Twists & Customizations
This recipe is a canvas for your creativity. Here are a few delicious riffs.
- Spicy Honey Butter Garlic Chicken: Add ½ teaspoon of red pepper flakes or a squirt of Sriracha to the sauce. The sweet heat is addictive and pairs wonderfully with a cooling cucumber-yogurt salad on the side.
- Lemon Herb Chicken: Increase the lemon juice to 2 tablespoons and add the zest of one lemon. Use a mix of fresh dill, parsley, and chives for a bright, spring-like version.
- Maple Dijon Chicken: Replace the honey with pure maple syrup and double the Dijon mustard. The result is a deeper, more robust sweet-savory profile that’s fantastic with roasted root vegetables.
- Asian-Inspired Soy Honey Chicken: Swap the lemon juice for rice vinegar, add 1 tablespoon of soy sauce, and stir in 1 teaspoon of grated fresh ginger. Garnish with sliced green onions and sesame seeds. Serve with steamed jasmine rice.
- Garlic Lover’s Version: Double the garlic and add 2 cloves of roasted garlic (mashed) to the sauce. The roasted garlic brings a mellow, caramelized sweetness that deepens the flavor dramatically.
What to Serve with Honey Butter Garlic Chicken
The sticky, buttery sauce demands something to soak it up. Fluffy white rice, buttery mashed potatoes, or creamy polenta are perfect canvases. For a low-carb option, cauliflower rice or spaghetti squash work beautifully. Roasted vegetables like broccoli, carrots, or asparagus tossed in olive oil and cooked on a separate sheet pan make the meal complete. A simple green salad with a lemon vinaigrette cuts through the richness and adds freshness. Don’t forget warm dinner rolls or crusty bread to mop up every last drop of that luscious sauce.
Storage, Meal Prep & Reheating
Make-Ahead: You can whisk the sauce together and pat the chicken dry a day in advance. Store them separately in the refrigerator. When ready to cook, simply pour the sauce over the chicken and bake. You can also fully bake the chicken and reheat it later; the sauce keeps the meat from drying out.
Storing Leftovers: Transfer cooled chicken and any remaining sauce to an airtight container. Refrigerate for up to 4 days. The flavor deepens overnight, making this a fantastic meal-prep protein for salads, wraps, or grain bowls.
Reheating: For the best texture, reheat the chicken in a 350°F oven or air fryer until warmed through, about 10 minutes. The microwave works in a pinch but may soften the glaze. Add a splash of water or broth if the sauce has thickened too much.
Freezing: The chicken and sauce freeze well. Place the cooled, cooked chicken in a freezer-safe container and freeze for up to 3 months. Thaw overnight in the refrigerator and reheat gently. Note that the texture of the chicken may be slightly softer upon thawing, but the flavor remains excellent.
Want the full recipe and simple step-by-step instructions?
Page 2 continues with the full ingredients, cooking tips, and easy directions so you can make this recipe perfectly at home.