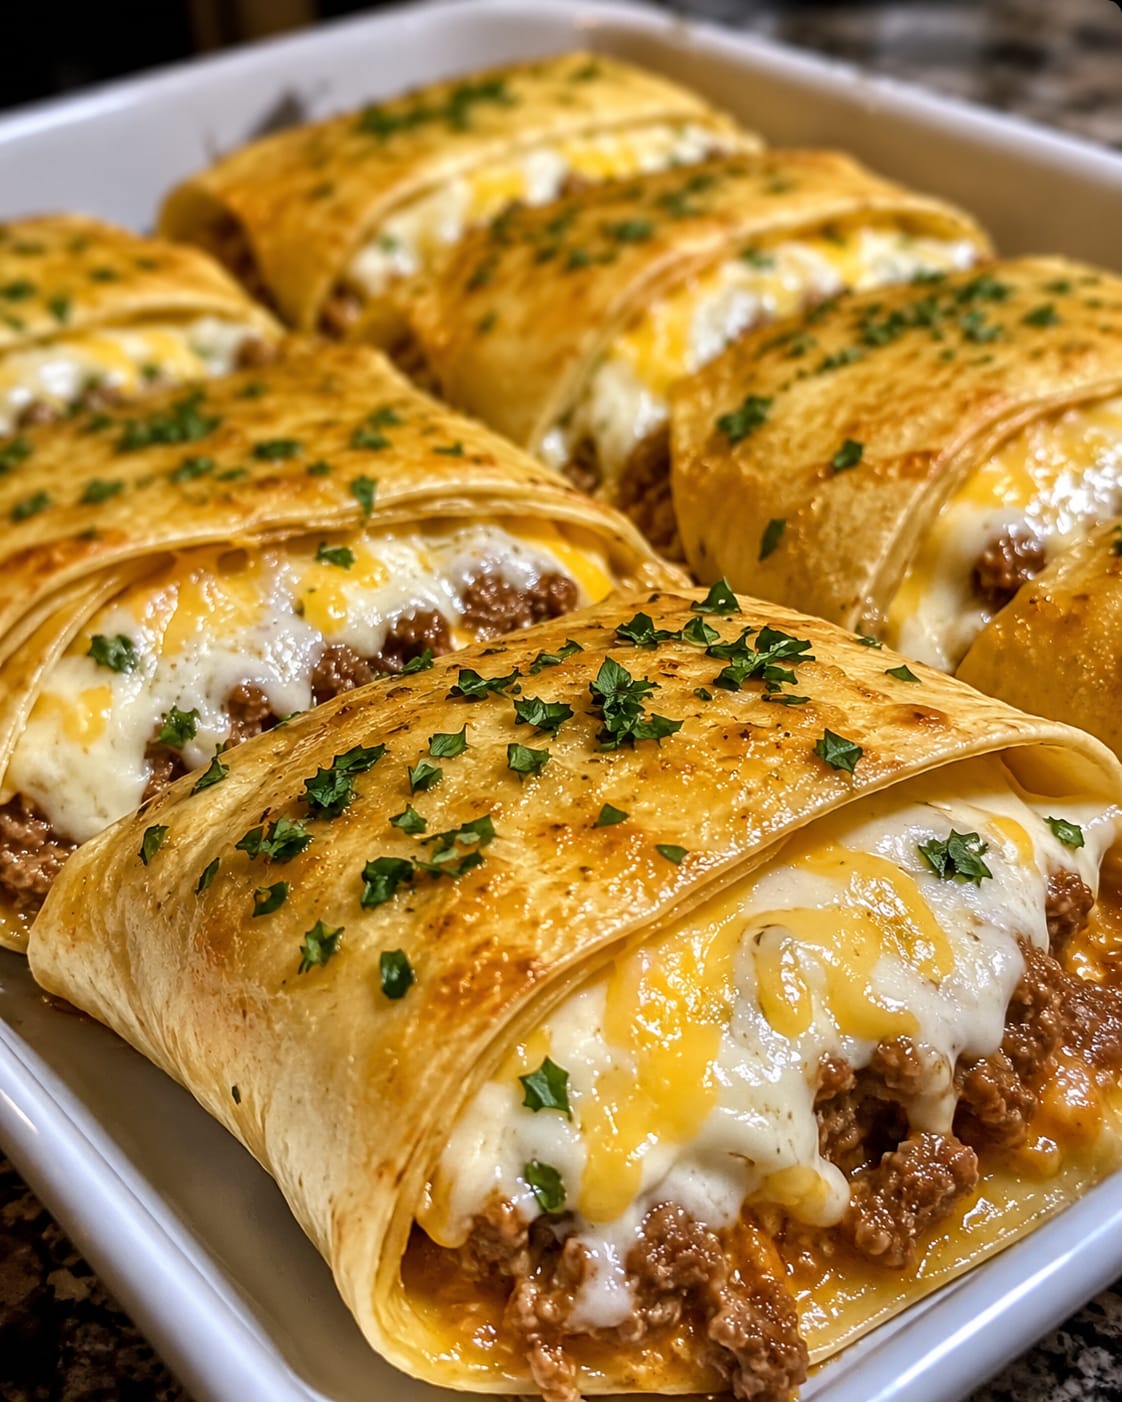
Some recipes are born from a craving for something crunchy, melty, beefy, and completely handheld—no fork needed, no mess, just pure handheld joy. These Loaded Cheesy Pocket Tacos are exactly that: warm, golden tortillas folded into clever little envelopes and stuffed to bursting with seasoned ground beef, oozy melted cheese, and all the classic taco fixings. But the real magic happens at the edges, where the cheese spills out and hits the hot pan, forming a crispy, lacy, fried-cheese crust that shatters with every bite. They’re the kind of dinner that makes everyone run to the table, the appetizer that steals the show at game day, and the quick weeknight meal that turns Tuesday into a celebration.
What makes these “pocket tacos” so brilliant is the fold. Instead of a traditional half-moon quesadilla or an open-faced taco that dribbles filling everywhere, we cut a single slit into each flour tortilla and fold it into quarters, creating a sealed, triangular pocket that holds all the goodness inside while crisping up beautifully in a skillet. The cheese melts into every nook, the beef stays juicy, and when you bite in, you get layers of crunchy tortilla, savory meat, and a molten cheese pull that stretches for days. Load them up with sour cream, fresh pico de gallo, shredded lettuce, and pickled jalapeños, and you have a self-contained flavor bomb that’s perfect for on-the-go dinners, packed lunches, or a fun family taco night with a twist.
In this guide, I’ll walk you through every step of crafting the ultimate cheesy pocket taco—from the ideal tortilla fold to the secret for getting that crispy cheese skirt just right. You’ll learn how to customize them with chicken, beans, or veggies, how to prep them ahead, and how to serve them with all the fixings. Get ready for your new favorite way to taco.
Why You’ll Love These Pocket Tacos
Crispy, cheesy, and completely sealed. No filling spillage, no soggy tortilla bottoms. The folded pocket design keeps all the beef, cheese, and toppings trapped inside while the outside fries to shatteringly crisp perfection in butter or oil. The cheese that leaks out intentionally creates a frico-like crust that is arguably the best part.
Incredibly fun to make and eat. There’s something deeply satisfying about folding a tortilla into a tight packet and then hearing it sizzle and crackle as it turns golden. Kids love helping with the folding, and everyone loves eating with their hands.
Totally customizable. Use ground beef, shredded chicken, seasoned black beans, or even leftover pulled pork. Swap the cheddar for pepper jack, add jalapeños, or keep it mild. The pocket method works with whatever fillings you crave.
Ready in under 30 minutes. Brown the meat, assemble the pockets, and pan-fry—that’s it. No oven preheating, no complicated steps. A hot skillet and a few pantry staples are all you need.
Ingredient Breakdown & The Perfect Fold
Let’s talk about what makes these loaded pockets work and how to choose the best components.
The Tortilla: Your Pocket Canvas
You’ll need medium (8-inch) flour tortillas for the best fold. Flour tortillas are pliable, won’t crack when folded, and get wonderfully crispy when pan-fried. Look for the soft, uncooked-style tortillas (found in the refrigerated section) for even better browning and puff, but standard shelf-stable flour tortillas work perfectly. You’ll need 6 to 8 tortillas.
The Filling: Seasoned Beef & More
1 pound of lean ground beef (80/20 or 85/15) is classic, seasoned with a packet of taco seasoning or a homemade blend of chili powder, cumin, garlic powder, onion powder, paprika, and oregano. The beef should be well-browned and slightly saucy. You can absolutely use ground turkey, chicken, or a plant-based crumble. The key is to cook off any excess moisture so the pockets don’t become soggy.
The cheese: Shredded Mexican blend, sharp cheddar, Monterey Jack, or a mix. You’ll need a generous 1½ to 2 cups—enough to sprinkle inside the pocket and around the edges to create that irresistible crispy cheese skirt. Pre-shredded cheese is convenient; shredding from a block gives a smoother melt.
Loading the “loaded”: This is where you go big. Diced fresh tomatoes, shredded iceberg lettuce, sliced black olives, pickled jalapeños, and a big dollop of sour cream or Mexican crema get tucked inside the pocket. You can add a smear of refried beans for extra substance, or keep it simple with just beef and cheese.
The Fold: Quarter-Pocket Magic
The folding technique is what makes these “pocket tacos.” You take a tortilla and cut a single slit from the center to one edge. This creates a radius. Then you mentally divide the tortilla into four quadrants. Fill three quadrants with different toppings (beef on one, cheese on another, lettuce and tomato on the third), then fold each quadrant over the next, starting from the cut edge, overlapping to form a triangle-shaped pocket. It seals itself, especially when the cheese melts. We’ll walk through this in detail below.
Step-by-Step: How to Make Loaded Cheesy Pocket Tacos
Let’s make these step by step. You’ll be a folding pro in no time.
Step 1: Cook the Beef
Heat a large skillet over medium-high heat. Add 1 pound of ground beef and cook, breaking it up with a spatula, until browned and crumbly, about 6–8 minutes. Drain any excess fat. Add the taco seasoning and a splash of water (as per packet instructions), stir, and let it simmer until the seasoning coats the meat and the liquid reduces. You want a slightly moist but not wet filling. Remove from heat and set aside to cool slightly.
Step 2: Prep the Toppings
While the beef cools, prepare your cold toppings: dice fresh tomatoes or prepare pico de gallo, shred lettuce, slice jalapeños, and gather your sour cream, guacamole, or any sauces you love. Have your shredded cheese in a bowl ready to grab.
Step 3: Master the Tortilla Fold
Lay one flour tortilla flat on a cutting board. Using a sharp knife or kitchen shears, make a single cut from the exact center of the tortilla straight down to the bottom edge, like cutting a radius. Now picture the tortilla divided into four quarters, with the cut acting as the border between the bottom-right and bottom-left quarters.
Fill the quarters this way (clockwise or counterclockwise, it doesn’t matter):
- Quadrant 1 (bottom-left of the cut): Spread a thin layer of sour cream or refried beans.
- Quadrant 2 (top-left): Spoon a generous amount of seasoned beef.
- Quadrant 3 (top-right): Sprinkle a pile of shredded cheese, then add diced tomatoes, lettuce, and jalapeños.
- Quadrant 4 (bottom-right of the cut): Sprinkle another small layer of cheese—this will melt and act as glue.
Now, starting from the cut edge, lift the quadrant closest to the cut (quadrant 1) and fold it up and over quadrant 2. Then fold that double layer over quadrant 3. Finally, fold the entire stack over quadrant 4. You’ll end up with a neat triangular pocket. Press gently to compact. The cheese will melt and seal the edges. Repeat with remaining tortillas.
Step 4: Pan-Fry to Golden, Crispy Perfection
Wipe out the skillet or use a clean nonstick or cast-iron pan. Place it over medium heat and add a small pat of butter or a drizzle of oil. Once hot, carefully place a folded pocket into the pan, seam-side down first to seal it. Cook for 2–3 minutes until deeply golden and crisp. While the first side cooks, sprinkle a tiny pinch of shredded cheese directly onto the exposed top side of the pocket near the edges—this will melt, hit the pan when you flip, and form that glorious crispy cheese skirt.
Flip carefully with a spatula and cook the second side for another 2–3 minutes, pressing down gently. The cheese on the outside will melt, crisp, and turn into a lacy, golden frico. Transfer to a plate and repeat with the remaining pockets.
Step 5: Serve Immediately
These are best eaten hot, straight from the skillet. The cheese is molten, the tortilla shatters, and the cold, fresh toppings inside provide a beautiful contrast to the warm, crispy exterior. Serve with extra sour cream, salsa, guacamole, or a drizzle of hot sauce.
Pro Tips for the Ultimate Crispy Cheese Edge
- Use a nonstick or well-seasoned cast-iron skillet. The cheese skirt can stick if your pan isn’t in good shape. A nonstick surface makes flipping effortless and the cheese release cleanly.
- Don’t overstuff. It’s tempting to heap the fillings high, but a thinner, more even layer makes the folding and sealing much easier, and the pocket holds together beautifully.
- Let the beef cool slightly. Hot, steaming beef can wilt the lettuce and make the tortilla gummy before it hits the pan. Warm beef is fine; just not boiling hot.
- Press gently while frying. A spatula with a little weight on top of the pocket as it cooks ensures even contact with the pan and maximizes the crispy surface area.
- Sprinkle cheese on the outside. Right before flipping, drop a small pinch of shredded cheese onto the uncooked side. When you flip it onto the pan, that cheese melts and fries into an irresistible crispy, golden lattice.
Flavor Twists & Filling Ideas
Chicken Bacon Ranch Pocket Tacos
Swap the ground beef for shredded rotisserie chicken tossed with ranch seasoning. Add crumbled bacon and a blend of mozzarella and cheddar. Use ranch dressing instead of sour cream for the base quadrant.
Spicy Southwest Black Bean & Corn
For a vegetarian version, use seasoned black beans and fire-roasted corn. Pepper jack cheese, pickled jalapeños, and a smear of chipotle mayo bring the heat.
Birria-Style Dippable Pockets
Use shredded birria beef and Oaxaca or mozzarella cheese. Fry the pockets in the birria consommé fat for an incredible depth of flavor, and serve with a small bowl of warm consommé for dipping.
Breakfast Pocket Tacos
Fill with scrambled eggs, crumbled breakfast sausage, and cheddar. Add a hash brown patty or some crispy tater tots inside for the ultimate breakfast handheld.
Philly Cheesesteak Pocket
Sauté thinly sliced beef with bell peppers and onions. Use provolone cheese and a smear of garlic aioli. A completely different but wildly delicious take.
Serving, Sauces & Sides
Dipping sauces: A variety of sauces turns these pocket tacos into an interactive meal. Classic tomato salsa, guacamole, queso dip, sour cream, chipotle crema, or a bright chimichurri all work.
On the side: Mexican street corn salad (esquites), a simple black bean soup, or cilantro-lime rice round out the plate. A crisp jicama slaw or a watermelon-feta salad provides a cool, fresh contrast to the rich, cheesy pockets.
For a crowd: Double or triple the batch, keep finished pockets warm in a low oven, and set up a self-serve “loaded” topping bar so everyone can customize their fillings before you fry them up fresh.
Make-Ahead, Storage & Reheating
Make-Ahead: You can cook and season the beef, prepare the toppings, and even slice the tortillas (store them covered with a damp paper towel) up to 2 days in advance. Assemble and fry just before serving for the crispiest results.
Storing Leftovers: Cooled pockets can be stored in the fridge for up to 3 days. They will lose their crunch and become softer. That’s okay—they’re still delicious, just different.
Reheating for Maximum Crisp: The air fryer or a skillet is your best friend. Reheat in a 350°F air fryer for 3–4 minutes, or refry in a dry nonstick skillet over medium heat until hot and re-crisped. The microwave works in a pinch but will yield a soft, steamy pocket.
Freezing: Assemble and freeze the unbaked pockets on a parchment-lined tray. Once solid, transfer to a freezer bag. Fry directly from frozen, adding a couple of extra minutes per side. The cheese will melt and seal the pocket as it cooks. Do not freeze with fresh lettuce—add lettuce and other delicate toppings after frying.
Want the full recipe and simple step-by-step instructions?
Page 2 continues with the full ingredients, cooking tips, and easy directions so you can make this recipe perfectly at home.