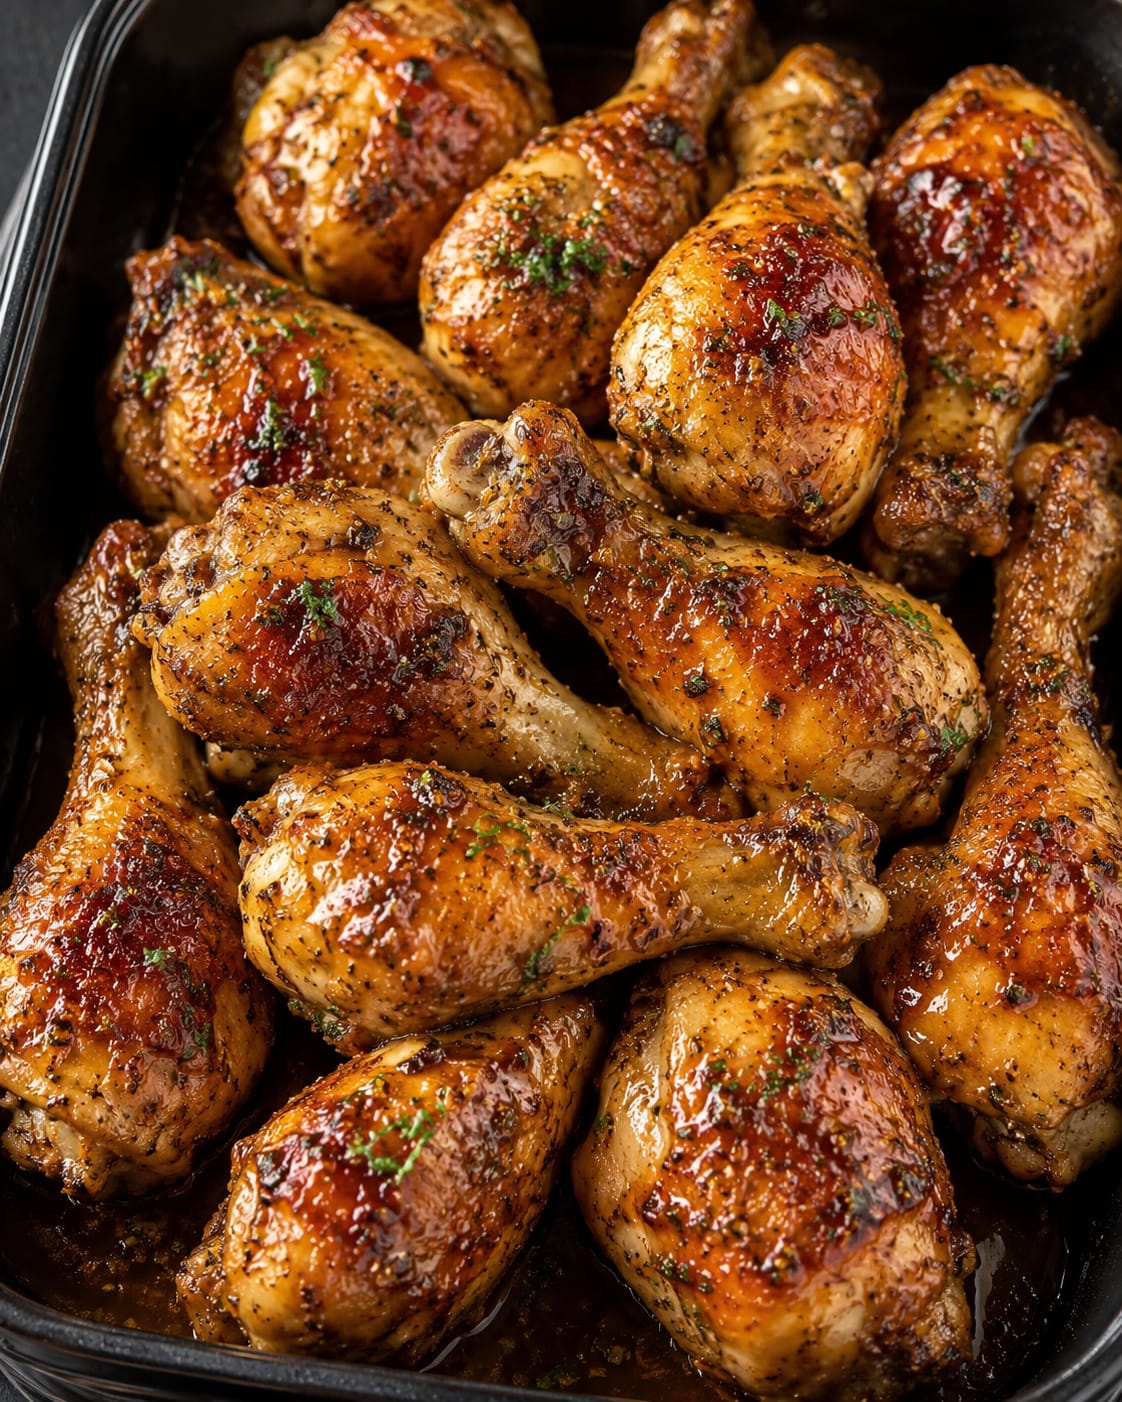
There are certain dishes that require nothing more than a single baking dish, a handful of pantry staples, and an oven to create something that tastes like a million dollars. These Honey Garlic Baked Chicken Drumsticks are exactly that kind of meal. They emerge from the oven glazed in a sticky, sweet, garlicky sauce that clings to every crackle of the golden-brown skin. The meat underneath is so juicy it practically falls off the bone. Every bite delivers that perfect harmony of sweet honey, salty soy sauce, punchy garlic, and a subtle tang that keeps you going back for just one more. Whether you need an easy weeknight dinner that pleases the whole family, a budget-friendly protein for meal prep, or a game day spread that has everyone reaching for seconds, these drumsticks deliver every single time.
Chicken drumsticks are one of the most affordable and forgiving cuts of meat you can buy. They stay moist during baking, they’re nearly impossible to overcook, and their built-in handle makes them fun to eat for kids and adults alike. This recipe takes that humble drumstick and bathes it in a sauce that caramelizes in the oven, creating a lacquered, finger-licking exterior without any deep frying or complicated steps. The foil-covered bake steams the chicken gently, keeping it incredibly juicy, while the uncovered finish and optional broil at the end transforms the skin into a crispy, sticky masterpiece. It’s the kind of cooking that fills your house with an irresistible savory-sweet aroma and makes everyone gather in the kitchen asking when dinner will be ready.
In this comprehensive guide, I’ll walk you through every detail—from choosing the best drumsticks and building that perfectly balanced honey garlic sauce, to the baking techniques that guarantee juicy meat and sticky skin every time. You’ll find tips for customizing the flavor, serving suggestions that round out the plate, and all the storage and reheating tricks. This is the baked chicken recipe that will become your go-to, and once you taste that glaze, you’ll understand exactly why.
Jump to:
- Why You’ll Love These Honey Garlic Drumsticks
- Ingredient Deep Dive: The Sticky Sauce Stars
- Step-by-Step: From Prep to Golden Finish
- Pro Tips for Juicy Meat & Crispy Skin
- Flavor Twists & Sauce Swaps
- What to Serve with Honey Garlic Drumsticks
- Storage, Reheating & Meal Prep
- Frequently Asked Questions
- Full Recipe Card
Why You’ll Love These Honey Garlic Drumsticks
Juicy on the inside, sticky and golden on the outside. The two-phase baking method—covered first, then uncovered—is the secret. The foil traps steam, gently cooking the meat to fork-tender perfection without drying it out. Then the foil comes off, the sauce reduces and caramelizes, and the skin transforms into that glossy, finger-licking lacquer we all crave. A quick broil at the end takes the color from pale gold to deep, burnished amber.
Made from pantry staples you already have. Honey, soy sauce, garlic, ketchup or BBQ sauce, and a few seasonings—there’s nothing obscure here. You can throw this sauce together in under five minutes with ingredients that live in your kitchen. It’s the ultimate low-effort, high-reward dinner that tastes far more complex than its ingredient list suggests.
Budget-friendly and family-approved. Chicken drumsticks are one of the most economical proteins at the grocery store, often costing just a couple of dollars per pound. They’re sold in family packs, perfect for feeding a crowd. And the sweet-savory flavor profile is universally loved—even picky eaters can’t resist the sticky honey glaze.
Versatile enough for weeknights, meal prep, or entertaining. Dress them up with a sprinkle of sesame seeds and sliced green onions on a platter for a party, or pack them alongside rice and veggies for a week’s worth of lunches. They’re excellent hot, warm, or even cold the next day, making them one of the best baked chicken recipes to keep in your back pocket.
Ingredient Deep Dive: The Sticky Sauce Stars
Understanding how each ingredient works ensures a perfectly balanced, finger-licking result.
Chicken Drumsticks – The Perfect Canvas
You’ll need about 12 drumsticks, which usually comes to about 3 to 4 pounds. Look for drumsticks that are similar in size so they cook evenly. Patting them completely dry with paper towels before saucing is a crucial step—dry skin browns and crisps better than wet skin. The skin on drumsticks is thick enough to protect the meat from drying out during the longer uncovered bake, and the bone running through the center adds flavor and helps conduct heat evenly.
Honey – The Sweet, Sticky Soul
Quarter cup of honey brings the sweet, floral notes that balance the saltiness of the soy sauce. As it bakes, the honey caramelizes, creating that gorgeous glossy, sticky exterior. Use a mild honey like clover or wildflower; darker honeys like buckwheat have a stronger flavor that can overpower the garlic. If you’re out of honey, pure maple syrup is an excellent substitute—it’ll give you a slightly different but equally delicious sticky sweetness.
Soy Sauce – The Savory, Umami Depth
Quarter cup of soy sauce adds deep umami, saltiness, and that irresistible savory backbone. I recommend using low-sodium soy sauce so you can control the salt level more precisely. If you’re gluten-free, tamari or coconut aminos work beautifully. Coconut aminos will yield a slightly sweeter, milder sauce.
Ketchup or BBQ Sauce – The Tangy Thickener
Three tablespoons of ketchup (or BBQ sauce if you prefer a smokier note) adds body, tang, and a subtle tomato sweetness that rounds out the sauce. It also helps thicken the glaze as it reduces in the oven. Ketchup keeps things classic and tangy; BBQ sauce introduces a smoky, slightly spiced dimension. Both are fantastic, so use what you love.
Garlic, Lemon Juice, and Seasonings – The Aromatics
Four minced garlic cloves are essential—they infuse the sauce with that pungent, savory warmth that makes honey garlic sauce iconic. A tablespoon of lemon juice (or vinegar) brightens the whole dish, cutting through the sweetness and richness. Paprika adds a subtle smokiness and a beautiful reddish-golden hue. Black pepper and salt season the meat thoroughly. Fresh or dried parsley at the end provides a fresh, green finish that makes the plate look as good as it tastes.
Step-by-Step: From Prep to Golden Finish
Follow these steps for perfectly juicy, sticky drumsticks every time.
Step 1: Preheat and Prepare
Preheat your oven to 400°F (200°C). While it heats, pat the 12 chicken drumsticks completely dry with paper towels. This step cannot be skipped—excess moisture on the skin will steam instead of roast, preventing that gorgeous golden-brown finish. Place the dried drumsticks in a large baking dish or roasting pan that fits them in a single layer without too much crowding.
Step 2: Mix the Honey Garlic Sauce
In a medium bowl, whisk together the 3 tablespoons olive oil, ¼ cup honey, ¼ cup soy sauce, 3 tablespoons ketchup or BBQ sauce, 4 minced garlic cloves, 1 tablespoon lemon juice or vinegar, 1 teaspoon paprika, ½ teaspoon black pepper, and ½ teaspoon salt. Whisk until the honey is fully dissolved and the sauce is smooth and uniform. It will smell incredible already.
Step 3: Coat the Drumsticks Thoroughly
Pour the sauce over the drumsticks in the baking dish. Use your hands or a pair of tongs to toss the chicken in the sauce, ensuring every single drumstick is completely coated on all sides. Arrange them skin-side up in the dish for the best browning.
Step 4: Bake Covered to Lock in Juiciness
Cover the baking dish tightly with aluminum foil. This creates a steamy environment that gently cooks the chicken through without drying it out. Place the dish in the preheated oven and bake covered for 30 minutes.
Step 5: Uncover, Baste, and Caramelize
After 30 minutes, carefully remove the foil. Using a spoon, baste the drumsticks generously with the sauce that has pooled in the bottom of the dish—this adds another layer of flavor that will caramelize into sticky perfection. Return the uncovered dish to the oven and continue baking for another 20 to 25 minutes. During this time, the sauce reduces, the skin crisps, and the color deepens to a beautiful mahogany gold. For even coloring, you can turn the drumsticks over once halfway through this uncovered period, but it’s not strictly necessary if the sauce is plentiful.
Step 6: Broil for That Extra Sticky, Charred Finish (Optional)
If you want an even darker, stickier, slightly charred top—which I highly recommend—switch the oven to broil during the last 2 to 4 minutes of cooking. Watch the drumsticks like a hawk during this step; the high sugar content in the honey can go from perfectly caramelized to burnt very quickly. You’re looking for a deep amber color with some dark spots.
Step 7: Rest, Garnish, and Serve
Remove the dish from the oven and let the drumsticks rest for 5 minutes in the pan. This allows the juices to redistribute and the sauce to thicken slightly. Spoon more of the pan sauce over the drumsticks just before serving. Garnish with dried or fresh chopped parsley. Serve hot, with plenty of napkins—this is a hands-on meal.
Pro Tips for Juicy Meat & Crispy Skin
- Pat the chicken dry. Moisture is the enemy of crispy skin. Take the extra minute to dry each drumstick thoroughly before saucing.
- Use a baking dish that fits the chicken snugly but in a single layer. If the dish is too large, the sauce will spread thin and may burn. If the chicken is too crowded and overlapping, it will steam instead of roast. A 9×13-inch dish usually works well for 12 drumsticks.
- Baste during the uncovered phase. Spooning that pan sauce over the drumsticks once or twice during the final 20–25 minutes builds up thick, sticky layers of glaze.
- Watch the broiler like a hawk. Honey burns quickly under high heat. Stand by the oven and check every 30 seconds. The difference between perfectly charred and burnt is only a minute.
- Reduce the leftover pan sauce. After removing the drumsticks, pour the remaining sauce from the baking dish into a small saucepan. Simmer it on the stovetop for 3–5 minutes until it thickens into a syrupy glaze, then drizzle it over the chicken. This is the extra-sticky finishing move.
Flavor Twists & Sauce Swaps
Once you’ve mastered the classic honey garlic, try these easy riffs.
- Spicy Honey Garlic: Add 1–2 teaspoons of Sriracha, gochujang, or red pepper flakes to the sauce. The sweet heat combination is completely addictive. Garnish with sliced fresh chilies.
- Honey Soy Ginger: Add 1 tablespoon of freshly grated ginger and a splash of sesame oil to the sauce. Finish with toasted sesame seeds and sliced green onions for an Asian-inspired dish that’s gorgeous over steamed rice.
- Smoky BBQ Honey Drumsticks: Use BBQ sauce instead of ketchup and add 1 teaspoon of smoked paprika and a pinch of cayenne. These taste like a summer cookout, straight from your oven.
- Lemon Herb Honey Garlic: Increase the lemon juice, add the zest of that lemon, and stir in fresh chopped rosemary or thyme. The herbal notes brighten the entire dish and make it especially lovely with roasted vegetables.
- Maple Dijon Drumsticks: Swap the honey for pure maple syrup and replace the ketchup with Dijon mustard. The result is a sophisticated, slightly sharper glaze that’s stunning with roasted Brussels sprouts.
What to Serve with Honey Garlic Drumsticks
These drumsticks are the star, but simple sides round out the plate beautifully. Fluffy white rice or buttery mashed potatoes are ideal for soaking up every drop of that sticky pan sauce. Roasted vegetables—broccoli, carrots, asparagus, or green beans—tossed in a little olive oil and roasted on a separate sheet pan while the chicken bakes make for an easy, complete meal. A simple green salad with a lemon vinaigrette cuts through the richness. Warm dinner rolls or cornbread are perfect for mopping up the glaze. For a low-carb option, serve over cauliflower rice or alongside a fresh cucumber-tomato salad.
Storage, Reheating & Meal Prep
Make-Ahead: You can mix the sauce and pat the drumsticks dry up to 2 days ahead. Store them separately in the fridge. When ready to cook, simply coat the chicken and bake. You can also bake the entire dish, cool it, and refrigerate for a quick reheat later.
Storing Leftovers: Place cooled drumsticks in an airtight container and refrigerate for up to 4 days. The flavor often deepens by day two, making them fantastic cold or reheated.
Reheating: For the best texture, reheat drumsticks in a 350°F oven or air fryer for 8–10 minutes until heated through and the skin re-crisps. The microwave works but will soften the skin. If you have leftover pan sauce, drizzle a little over the drumsticks before reheating to keep them moist.
Freezing: These drumsticks freeze very well. Place cooled, cooked drumsticks in a freezer-safe bag or container and freeze for up to 3 months. Thaw overnight in the refrigerator and reheat in the oven. You can also freeze the raw drumsticks in the sauce (marinade) for a future dump-and-bake meal. Thaw completely before baking.
Want the full recipe and simple step-by-step instructions?
Page 2 continues with the full ingredients, cooking tips, and easy directions so you can make this recipe perfectly at home.