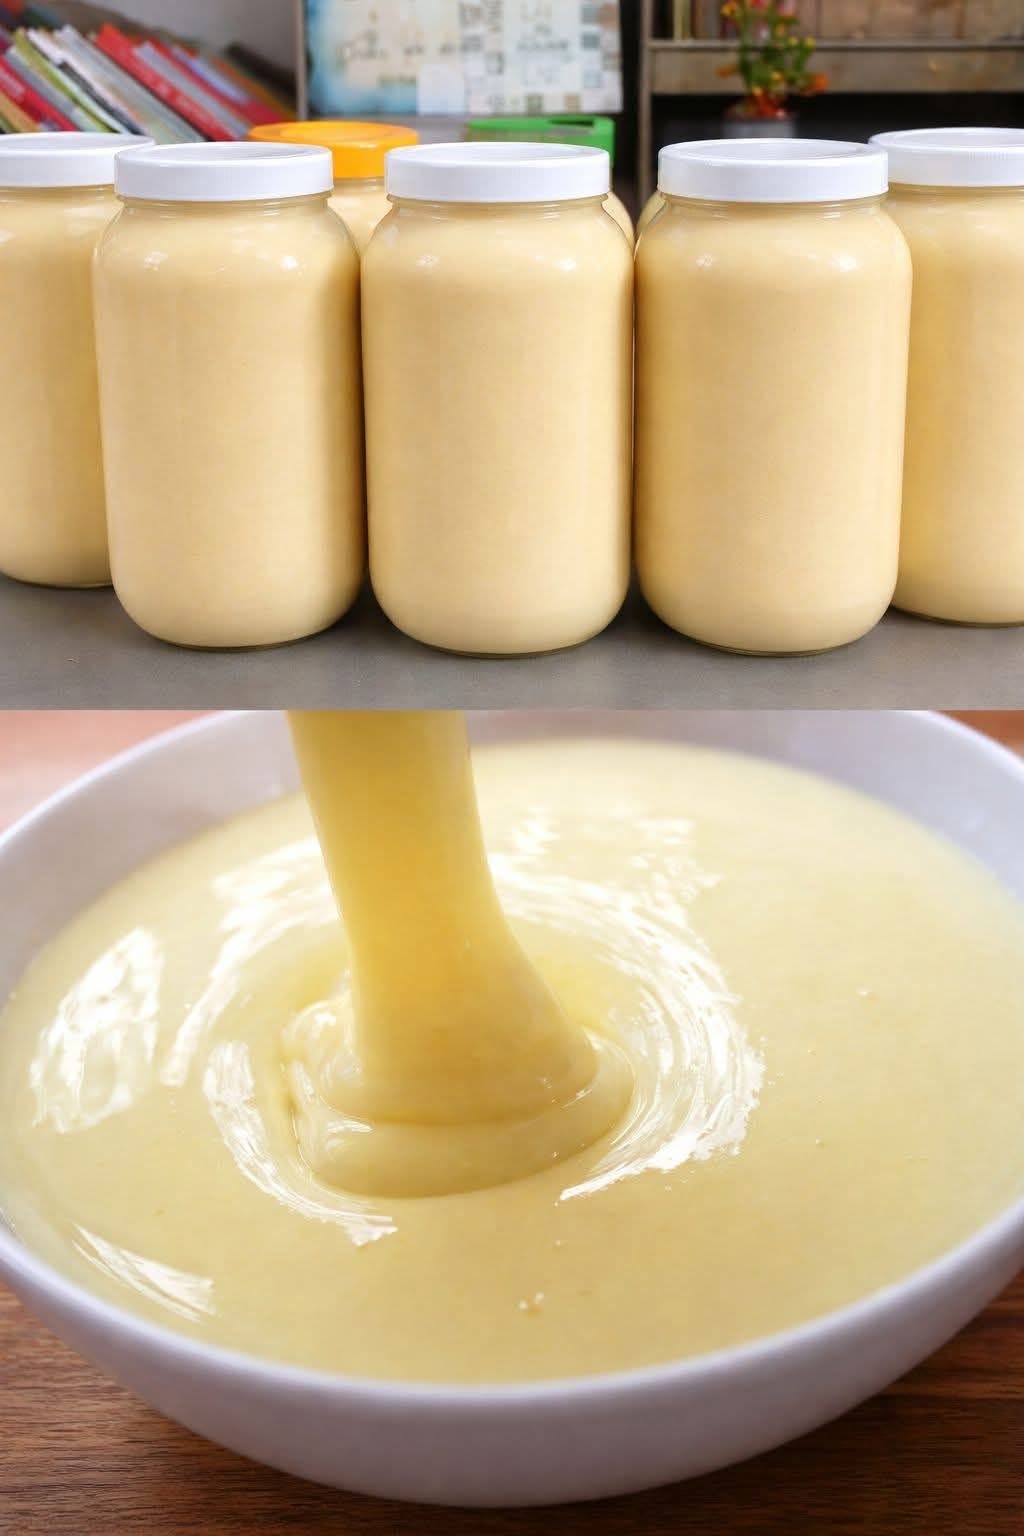
Homemade Sweetened Condensed Milk is thick, creamy, and surprisingly easy to prepare with a few basic ingredients.
This simple recipe creates a smooth milk mixture that can be used in pies, cakes, puddings, homemade ice cream, coffee drinks, and many other desserts. It is a practical option when you do not have a can of condensed milk available or when you prefer to control the sweetness and flavor of your ingredients.
The mixture slowly thickens as milk, sugar, and butter cook together. Once chilled, it becomes rich, glossy, and creamy, similar to store-bought sweetened condensed milk.
What Is Sweetened Condensed Milk?
Sweetened condensed milk is milk that has been cooked to remove part of its water content and combined with sugar.
The reduction process creates a thick, concentrated texture. Sugar provides sweetness and also helps the mixture stay smooth.
It is commonly used in:
- Key lime pie
- No-bake cheesecake
- Fudge
- Caramel desserts
- Tres leches cake
- Coconut desserts
- Homemade ice cream
- Coffee and tea
- Puddings
- Fruit salads
Sweetened condensed milk should not be confused with evaporated milk.
Evaporated milk is concentrated but generally does not contain added sugar. It is thinner and cannot be used as a direct replacement in every dessert recipe.
Why You Will Love This Recipe
This homemade condensed milk recipe requires only a few common ingredients.
It is creamy and smooth.
The sweetness can be adjusted slightly.
You can add vanilla for extra flavor.
It works in many desserts and drinks.
The recipe can also be prepared without special equipment.
A heavy-bottomed saucepan, a whisk, and a clean storage container are usually all you need.
Recipe Information
Prep Time: 5 minutes
Cook Time: 35–50 minutes
Cooling Time: 1 hour
Total Time: Approximately 2 hours
Yield: About 1½ cups
Ingredients
- 4 cups whole milk
- 1½ cups granulated sugar
- 2 tablespoons unsalted butter
- 1 teaspoon vanilla extract, optional
- Small pinch of salt, optional
Best Milk to Use
Whole milk produces the richest and creamiest result because it contains more fat than reduced-fat milk.
Two-percent milk may also work, but the finished condensed milk may be slightly thinner.
Skim milk is not recommended for the best texture.
For an even richer mixture, you can replace up to one cup of the whole milk with heavy cream. This creates a thicker product but also makes it heavier and higher in fat.
Use fresh milk that is still well within its expiration date.
How to Make Homemade Sweetened Condensed Milk
Combine the Milk and Sugar
Pour the whole milk into a large, heavy-bottomed saucepan.
Add the granulated sugar.
Place the pan over medium-low heat.
Whisk gently until the sugar dissolves completely.
Avoid bringing the mixture to a strong boil. High heat may cause the milk to scorch, separate, or develop an unpleasant cooked flavor.
Simmer the Mixture
Once the sugar has dissolved, allow the mixture to reach a gentle simmer.
Small bubbles should appear around the edges of the pan.
Reduce the heat to low.
Continue cooking uncovered for approximately 35–50 minutes.
Stir every few minutes, scraping the bottom and sides of the pan to prevent the milk from sticking.
The exact cooking time depends on the size of the saucepan, the strength of the heat, and the amount of evaporation.
Watch the Texture Carefully
As the milk cooks, it will gradually reduce and become slightly darker.
The mixture should eventually reduce to approximately half its original volume.
It will still look thinner while hot than it will after cooling.
Do not wait until it becomes as thick as refrigerated store-bought condensed milk. If it is cooked for too long, it may become overly sticky or turn into a caramel-like sauce.
A good test is to coat the back of a spoon with the mixture.
Run one finger through the coating.
If the line remains visible for a moment without immediately closing, the mixture is usually ready.
Add the Butter and Vanilla
Remove the saucepan from the heat.
Add the unsalted butter.
Stir until the butter melts completely and the mixture becomes glossy.
Add the vanilla extract and a small pinch of salt if desired.
Vanilla gives the condensed milk a warm dessert flavor, while salt helps balance the sweetness.
Strain the Condensed Milk
For the smoothest texture, pour the mixture through a fine-mesh strainer into a heat-safe bowl or clean glass container.
Straining removes any small pieces of cooked milk that may have formed during simmering.
Let the mixture cool at room temperature for approximately 30 minutes.
Cover it and transfer it to the refrigerator.
The condensed milk will become noticeably thicker as it chills.
Quick Blender Method
A faster version can be prepared using powdered milk.
You will need:
- 1 cup boiling water
- 2 cups granulated sugar
- 4 tablespoons melted butter
- 2 cups dry milk powder
- 1 teaspoon vanilla extract
Place the boiling water, sugar, and melted butter in a heat-safe blender.
Blend carefully until the sugar begins to dissolve.
Add the powdered milk gradually while blending.
Continue blending until the mixture becomes smooth and creamy.
Add the vanilla extract.
Pour the mixture into a clean container and refrigerate it until thickened.
This version is convenient, but the slowly reduced milk method generally provides a deeper dairy flavor.
How Thick Should Homemade Condensed Milk Be?
Freshly cooked condensed milk should pour easily.
It may appear similar to a thick cream while still warm.
After refrigeration, it should become thicker and closer to the texture of commercially prepared sweetened condensed milk.
If the mixture remains too thin after chilling, return it to a clean saucepan and simmer it gently for several additional minutes.
If it becomes too thick, whisk in a small amount of warm milk, one teaspoon at a time, until it reaches the desired consistency.
Common Mistakes to Avoid
Using High Heat
High heat can burn the milk on the bottom of the pan.
It may also cause the milk solids to separate.
Keep the heat low and allow the mixture to reduce slowly.
Leaving the Pan Unattended
Milk can boil over very quickly.
Stay near the stove and stir regularly.
A large saucepan gives the mixture more room and reduces the risk of overflow.
Overcooking the Mixture
Homemade condensed milk continues thickening as it cools.
Removing it only after it looks extremely thick can produce a sticky or chewy texture after refrigeration.
Not Scraping the Bottom
Sugar and milk solids may collect on the bottom of the pan.
Use a heat-safe spatula or whisk to scrape the surface gently during cooking.
Skipping the Straining Step
Straining is optional, but it creates a smoother result.
It is especially helpful when a small amount of milk skin or cooked solids forms during simmering.
Homemade Condensed Milk With Brown Sugar
Brown sugar can be used for a deeper caramel flavor.
Replace the granulated sugar with an equal amount of light brown sugar.
The condensed milk will become darker and develop mild molasses notes.
This variation works especially well in:
- Coffee drinks
- Caramel cake
- Bread pudding
- Banana desserts
- Pumpkin recipes
- Chocolate fudge
Keep in mind that the flavor and appearance will differ from traditional sweetened condensed milk.
Dairy-Free Coconut Condensed Milk
A dairy-free version can be made with full-fat canned coconut milk.
Use:
- 2 cans full-fat coconut milk
- 1 cup granulated sugar
- ½ teaspoon vanilla extract
Combine the coconut milk and sugar in a saucepan.
Cook over low heat, stirring regularly, until the mixture reduces and thickens.
This usually takes 30–45 minutes.
Remove it from the heat and add vanilla.
Allow it to cool before refrigerating.
Coconut condensed milk has a noticeable coconut flavor and works beautifully in tropical desserts, dairy-free fudge, and iced coffee.
How to Use Homemade Condensed Milk
Homemade sweetened condensed milk can be used in many recipes that call for the canned version.
Try it in:
- Lemon pie
- Key lime pie
- Chocolate fudge
- No-churn ice cream
- Coconut macaroons
- Pumpkin pie
- Cheesecake
- Rice pudding
- Coffee creamer
- Flan
- Tres leches cake
- Caramel sauce
- Fruit dip
- Banana pudding
Because homemade condensed milk may vary slightly in thickness, measure it carefully and check the consistency of your dessert mixture.
Homemade Coffee Creamer
Add one or two tablespoons of homemade condensed milk to hot coffee.
Stir until completely dissolved.
For iced coffee, mix the condensed milk into warm espresso before adding ice and cold milk.
You can also flavor it with:
- Cinnamon
- Vanilla
- Caramel extract
- Cocoa powder
- Almond extract
- Pumpkin spice
Start with a small quantity because condensed milk is very sweet.
No-Churn Ice Cream
Homemade condensed milk is a popular base for easy no-churn ice cream.
Beat two cups of cold heavy whipping cream until stiff peaks form.
Fold in approximately one can’s equivalent of chilled condensed milk.
Add vanilla, chocolate chips, fruit puree, cookie pieces, or other desired flavors.
Transfer the mixture to a freezer-safe container.
Freeze for at least six hours.
The condensed milk helps keep the ice cream smooth and prevents it from freezing into a solid block.
Easy Condensed Milk Caramel
Sweetened condensed milk can be transformed into a caramel-style sauce, but it should be heated safely.
Do not boil a sealed glass jar or unopened can.
Instead, pour the condensed milk into a heat-safe baking dish.
Cover the dish tightly with aluminum foil.
Place it inside a larger pan containing hot water.
Bake at 425°F for approximately 60–90 minutes, checking the water level regularly.
Whisk the mixture until smooth after baking.
The final result should be golden, thick, and caramel-like.
How to Store Homemade Condensed Milk
Transfer the cooled condensed milk to a clean airtight container.
Store it in the refrigerator.
For best quality, use it within 7–10 days.
Always use a clean spoon when removing condensed milk from the container.
Discard it if it develops an unusual smell, mold, bubbling, or discoloration.
Because this recipe contains dairy, it should not remain at room temperature for extended periods.
Can Homemade Condensed Milk Be Canned?
Homemade dairy mixtures should not be processed in a boiling-water canner.
There is no reliable home water-bath canning method for making this recipe shelf-stable.
Keep the condensed milk refrigerated or freeze it for longer storage.
Do not assume that sealing hot condensed milk inside a jar makes it safe for room-temperature storage.
Can You Freeze Condensed Milk?
Yes.
Pour the cooled condensed milk into a freezer-safe container.
Leave a little space at the top because the mixture may expand.
Freeze it for up to three months.
Thaw it overnight in the refrigerator.
The texture may separate slightly after thawing.
Whisk it thoroughly before using.
Freezing in small portions can make it easier to thaw only the amount needed for a recipe.
How Much Equals One Can?
A standard can of sweetened condensed milk in the United States usually contains approximately 14 ounces, or about 1¼ cups.
This homemade recipe produces approximately 1½ cups, depending on how long it is reduced.
Measure the amount required by your specific recipe rather than automatically using the entire batch.
Frequently Asked Questions
Why Is My Condensed Milk Grainy?
Graininess may occur when sugar does not dissolve completely or when the mixture cooks too quickly.
Use medium-low heat at the beginning and whisk until the sugar is fully dissolved.
Straining the finished mixture can also improve the texture.
Why Did My Milk Turn Brown?
A slight cream or pale golden color is normal.
A dark brown color may indicate that the mixture cooked too long or the heat was too high.
It may still be usable as a caramel-flavored sauce, but it will not taste exactly like traditional condensed milk.
Can I Reduce the Sugar?
You can reduce it slightly, but sugar contributes to the texture as well as the flavor.
Using too little may produce a thinner result with a shorter refrigerated storage time.
For the most reliable consistency, keep the sugar close to the recommended amount.
Can I Use Lactose-Free Milk?
Yes.
Whole lactose-free milk can be used.
It may taste slightly sweeter because the lactose has already been broken into simpler sugars.
Watch the mixture carefully because it may brown more quickly.
Can I Use Raw Milk?
Pasteurized whole milk is the safer and more predictable option.
Using pasteurized milk also helps improve storage quality.
Why Did the Milk Separate?
Separation may result from very high heat, rapid boiling, or milk that is no longer fresh.
Reduce the heat and whisk gently.
If the mixture separates slightly, blending it briefly after cooling may improve the texture.
Can I Double the Recipe?
Yes, but use a very large, heavy-bottomed saucepan.
A double batch will take longer to reduce.
Do not increase the heat to shorten the cooking time.
Slow simmering produces a smoother result.
Final Note
Homemade Sweetened Condensed Milk is a useful recipe to keep available whenever you need a rich and creamy ingredient for desserts or drinks.
The traditional method requires patience, but the process is simple.
Milk and sugar slowly reduce into a thick, sweet mixture, while butter and vanilla create a smooth and flavorful finish.
Use it in pies, fudge, pudding, homemade ice cream, coffee, or your favorite family desserts.
Keep the finished mixture refrigerated, use clean containers, and avoid attempting to store homemade dairy products at room temperature.
Once you learn how easy it is to prepare condensed milk at home, you may find yourself making it whenever a dessert recipe needs an extra creamy touch.
Want the full recipe and simple step-by-step instructions?
Page 2 continues with the full ingredients, cooking tips, and easy directions so you can make this recipe perfectly at home.